| Last additions |
96 views29 Mar 2010
|
|
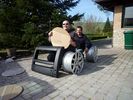
Discovery 5 preview129 viewsQui si vede Panoramix e Piadina sulla nuova D5!!!
Notare i cerchi con gomme super super ribassate (neanche le vedi dalla sottile spalla che hanno!)29 Mar 2010
|
|

373 views28 Mar 2010
|
|

234 views28 Mar 2010
|
|
378 views28 Mar 2010
|
|
90 views28 Mar 2010
|
|

63 views28 Mar 2010
|
|

62 views28 Mar 2010
|
|

59 views28 Mar 2010
|
|

58 views28 Mar 2010
|
|

62 views28 Mar 2010
|
|

57 views28 Mar 2010
|
|
70 views28 Mar 2010
|
|
75 views28 Mar 2010
|
|
79 views28 Mar 2010
|
|

73 views28 Mar 2010
|
|
72 views28 Mar 2010
|
|
72 views28 Mar 2010
|
|
77 views28 Mar 2010
|
|

71 views28 Mar 2010
|
|

Intercooler pipes174 views28 Mar 2010
|
|

53 views28 Mar 2010
|
|
56 views28 Mar 2010
|
|
104 views28 Mar 2010
|
|
95 views28 Mar 2010
|
|
90 views28 Mar 2010
|
|
89 views28 Mar 2010
|
|
86 views28 Mar 2010
|
|
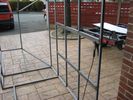
102 views28 Mar 2010
|
|
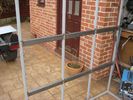
99 views28 Mar 2010
|
|
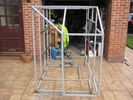
91 views28 Mar 2010
|
|
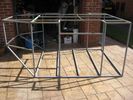
113 views28 Mar 2010
|
|
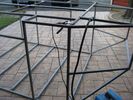
196 views28 Mar 2010
|
|
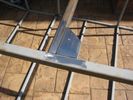
158 views28 Mar 2010
|
|

129 views28 Mar 2010
|
|
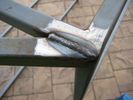
101 views28 Mar 2010
|
|
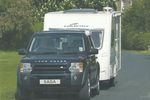
The SAGA flagship82 views28 Mar 2010
|
|

35 views28 Mar 2010
|
|

34 views28 Mar 2010
|
|

37 views28 Mar 2010
|
|

35 views28 Mar 2010
|
|

37 views28 Mar 2010
|
|
29 views28 Mar 2010
|
|
28 views28 Mar 2010
|
|

green laneing31 views28 Mar 2010
|
|
31 views28 Mar 2010
|
|
69 views28 Mar 2010
|
|

64 views28 Mar 2010
|
|

Misterious Part32 views28 Mar 2010
|
|

Avic-F500BT163 viewsIntegrated Pioneer System with original Land rover Logo 27 Mar 2010
|
|

AVIC-F500BT 138 viewsIntegrated Pioneer AVIC-F500BT at the position of the original touchscreen.27 Mar 2010
|
|

AVIC F500BT-USB129 viewsUSB-Connector in glove box. 27 Mar 2010
|
|

In action - October 2008121 views27 Mar 2010
|
|

134 views27 Mar 2010
|
|
107 views27 Mar 2010
|
|
108 views27 Mar 2010
|
|
98 views27 Mar 2010
|
|
87 views27 Mar 2010
|
|
79 views27 Mar 2010
|
|
83 views27 Mar 2010
|
|
94 views27 Mar 2010
|
|
82 views27 Mar 2010
|
|

79 views27 Mar 2010
|
|
87 views27 Mar 2010
|
|

64 views27 Mar 2010
|
|
79 views27 Mar 2010
|
|
84 views27 Mar 2010
|
|

72 views27 Mar 2010
|
|
63 views27 Mar 2010
|
|
58 views27 Mar 2010
|
|
47 views27 Mar 2010
|
|
59 views27 Mar 2010
|
|
45 views27 Mar 2010
|
|
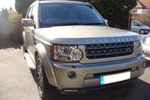
The new member of the family comes home170 views27 Mar 2010
|
|

New Disco 4 arrives Home208 views27 Mar 2010
|
|
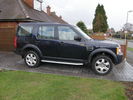
Side Steps & Mudflaps Fitted51 views27 Mar 2010
|
|

D3 at Knowsley Safari Park70 views26 Mar 2010
|
|
98 views26 Mar 2010
|
|
117 views26 Mar 2010
|
|
104 views26 Mar 2010
|
|
110 views26 Mar 2010
|
|
101 views26 Mar 2010
|
|
103 views26 Mar 2010
|
|

198 views26 Mar 2010
|
|

140 views26 Mar 2010
|
|
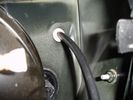
...in place!78 views26 Mar 2010
|
|
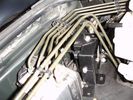
Alarm fitted in suggested location for the circuit breaker - will either velcro-fasten to the alarm or find alternative location83 views26 Mar 2010
|
|
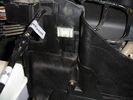
Twist the white plastic in either direction 45 degrees and pull - this is where the SC80 will go77 views26 Mar 2010
|
|
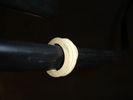
...almost there...67 views26 Mar 2010
|
|

...alternative grommet threaded through (but not cut)...62 views26 Mar 2010
|
|
Grommet on bulkhead easily located...77 views26 Mar 2010
|
|

Pad wear sensor removal77 views26 Mar 2010
|
|

Front right ARB bushing69 views26 Mar 2010
|
|

Front right ARB bushing65 views26 Mar 2010
|
|
Lower front arm bushing68 views26 Mar 2010
|
|
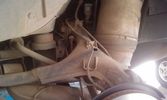
Rear left wheelarch70 views26 Mar 2010
|
|

Rear left wheelarch61 views26 Mar 2010
|
|
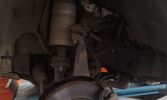
Front left wheelarch71 views26 Mar 2010
|
|

56 views26 Mar 2010
|
|
Lower front arm bushing71 views26 Mar 2010
|
|

Kit contents51 views26 Mar 2010
|
|

Kit contents62 views26 Mar 2010
|
|

Kit contents53 views26 Mar 2010
|
|

Kit contents55 views26 Mar 2010
|
|

Kit contents61 views26 Mar 2010
|
|

Kit contents55 views26 Mar 2010
|
|

Kit contents55 views26 Mar 2010
|
|

...male-female converter used for testing (will get a proper female cable once checked)...94 views26 Mar 2010
|
|
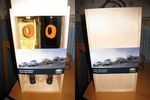
D4 Assurance Gift82 views25 Mar 2010
|
|
51 views25 Mar 2010
|
|
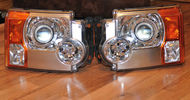
D3 Xenon97 views25 Mar 2010
|
|

D3 Xenon77 views25 Mar 2010
|
|
D3 Xenon73 views25 Mar 2010
|
|

D3 Xenon83 views25 Mar 2010
|
|

54 views25 Mar 2010
|
|
39 views25 Mar 2010
|
|
57 views25 Mar 2010
|
|
58 views25 Mar 2010
|
|

51 views25 Mar 2010
|
|
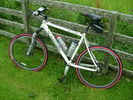
My other off roader72 views25 Mar 2010
|
|
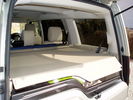
Light-Coloured Boot Area222 views25 Mar 2010
|
|

78 views25 Mar 2010
|
|

40 views25 Mar 2010
|
|
48 views25 Mar 2010
|
|
45 views25 Mar 2010
|
|
31 views25 Mar 2010
|
|
107 views25 Mar 2010
|
|
101 views25 Mar 2010
|
|
247 views24 Mar 2010
|
|
232 views24 Mar 2010
|
|
140 views24 Mar 2010
|
|
110 views24 Mar 2010
|
|
117 views24 Mar 2010
|
|
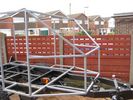
108 views24 Mar 2010
|
|

67 views24 Mar 2010
|
|

68 views24 Mar 2010
|
|

67 views24 Mar 2010
|
|
![Filename=IMG_3019 [1600x1200].JPG
Filesize=68KB
Dimensions=640x960
Date added=24.Mar 2010 IMG_3019 [1600x1200].JPG](albums/userpics/11748/thumb_IMG_3019%20%5B1600x1200%5D.JPG)
Caption Comp98 views24 Mar 2010
|
|
![Filename=IMG_3110 [1600x1200].JPG
Filesize=355KB
Dimensions=1438x959
Date added=24.Mar 2010 IMG_3110 [1600x1200].JPG](albums/userpics/11748/thumb_IMG_3110%20%5B1600x1200%5D.JPG)
Spotted D3 on D3129 views24 Mar 2010
|
|

80 views24 Mar 2010
|
|

85 views23 Mar 2010
|
|
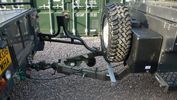
133 views23 Mar 2010
|
|
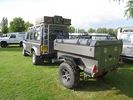
145 views23 Mar 2010
|
|
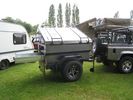
138 views23 Mar 2010
|
|
87 views23 Mar 2010
|
|
89 views23 Mar 2010
|
|
95 views23 Mar 2010
|
|
92 views23 Mar 2010
|
|
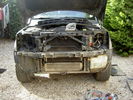
94 views23 Mar 2010
|
|
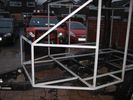
229 views23 Mar 2010
|
|
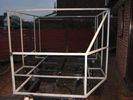
179 views23 Mar 2010
|
|
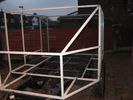
144 views23 Mar 2010
|
|
129 views23 Mar 2010
|
|
83 views23 Mar 2010
|
|

63 views23 Mar 2010
|
|

58 views23 Mar 2010
|
|

51 views23 Mar 2010
|
|
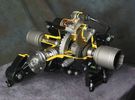
Rear Differential cutaway with E-Locker 1199 viewsThis jpg is from the link below.
There are another ten or so cutaways plus a whole file group showing a 2005 LR3 sectioned for the 2005 Chicago Auto show. Each jpg has an enlarge function to the bottom right of a main picture.
On one jpg you can see right into the stepper motor.
http://www.cutawaycreations.com/cutaways.php?project=land-rover-electronic-rear-differential#/IMAGES/car4/images/image1.jpg
Both the front and rear differentials are manufactured by Dana Spicer in the UK. Dana calls them a Clamshell design. 23 Mar 2010
|
|

Fin cell phone aerial drawing190 viewsThe factory aerial for the factory NAV / GPS on my 2005 HSE is within the high mounted stop light lens at the top of the upper hatch door. I do not have the factory installed phone kit, and as such, do not have the fin installed; instead there is just a plastic blanking insert to fill the cell phone aerial wiring hole in the metal portion of the roof; hence this requirement for an "external" cell antenna. For those that do have the fin on their glass roof, the fin is screwed on to a glued on plastic gasket, (sort of), and not bolted thru as per the metal roof 3's.23 Mar 2010
|
|

Battery Maintainer pigtail sticking out of Grill723 viewsThis is all you see when everything is put back together - just the pigtail and Weather Pack blanking plug. Most often, I have it all tucked back behind the grill.
In winter, there may be a second cord hanging out as well - the 120 VAC power cord for the engine block heater, a tea kettle like element inserted in the engine block. NAS petrol V8's do not have the Fuel Burning Heater, (FBH), installed, but instead in cold area markets have the block heater element assembly available as a dealer installed option. There is an argument to say that the heating element is factory installed in all cold climate V8 gasoline engines, however the appropriate power cord is not. If true, this means that all one needs to purchase is the area specific power cord and plugging in / attachment to the engine block located block heater.
As such, you will often see a conventional 120VAC three prong power plug hanging loose out of the grill of most vehicles here in the wintertime. In summer, most drivers tuck the plug back behind the grill as it is no beauty mark.23 Mar 2010
|
|
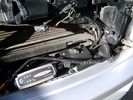
Battery Maintainer switching box plug and CTEK Multi US 3300 charger. 703 viewsThe CTEK Multi US 3300 maintainer is just sitting there for the picture. In addition to topping up both batteries, the CTEK can provide power such that if the batteries were completely dead, there would be power to the door locks and hence, one could most likely still gain access via the remote once the starting battery charged up a bit.
The Land Rover recommended method is via the hidden key hole which is mechanical, however that presumes the mechanism is not frozen from lack of use. As such, the manual lock should be exercised at least once a year to ensure that it still functions.
The blanking plug sitting on top of the plastic box is of the GM Weather Pack series. That is what I like to use for vehicle wiring that is subject to moisture, (or not).23 Mar 2010
|
|
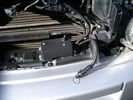
Battery Maintainer switch box and connector 716 viewsThe Hammond box contains a DPDT toggle switch with centre off. The Positive and Negative from each battery feeds to the switch. Depending on the setting of the toggle, (full left, full right,or centre off),the respective batteries connect into the pigtail that can stick out thru the grill when one wishes to connect the charger.
This allows one to charge each battery independently via a suitable battery maintainer. I use a CTEK unit that feeds a maximum of 3.3 amps at 14.4 or 14.7 VDC, depending upon setting. The wiring therefore allows for a slow recharge of either of the batteries separately if either one requires such.23 Mar 2010
|
|

74 views23 Mar 2010
|
|

Codifica VIN67 views23 Mar 2010
|
|
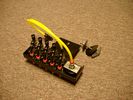
FASKIT rear showing gauge.918 views23 Mar 2010
|
|
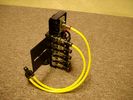
FASKIT on end view 859 viewsEnd and rear view of the FASKIT. Yellow lines are as shipped for hooking to the air supply; one line to valve/filler and other is to gauge. I will modify the arrangement to delete one of the yellow lines such that gauge line plugs into where the second yellow line is right now,(will be only one yellow tube), and then the air source line will plug into the port controlled by the valve, (hidden in this view but visible in other view). When white valve is in the ON position, gauge will read air source pressure, and be available to supply air to any of the selected four air springs. When valve is closed, the gauge will show individual air pressure in each of the air springs when a jumper is run between the gauge Schrader valve and the appropriate air spring Schrader valve. 23 Mar 2010
|
|

Air System Schematic with parts identified.1364 viewsAir system block diagram with components numbered and identified.23 Mar 2010
|
|
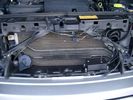
Plastic cover and Box back on in Front of Radiator 636 viewsThe wiring loom is below the cover - nothing is crushed or distorted and all fits back together OK. The black plastic box with the DPDT, (centre OFF), toggle switch is to tie the battery maintainer to each of the two batteries per the Traxide Dual battery install. I can also get power to the power door locks if all fails.23 Mar 2010
|
|
Wire (tubing) loom on right to down into bumper 463 viewsThis shows the 19mm loom in the trough between the bumper and the rad as it drops down into the right fog light area.23 Mar 2010
|
|
Wiring (tubing) loom at left headlight showing FASKIT panel 582 viewsThis shows the wiring (tubing) loom and FASKIT panel mounted to left wing. The loom moves a a couple of inches (50mm) towards the bottle once the headlight is put back in as there is not enough free space for the loom as located. The FASKIT panel is just visible at the top left corner of the picture. 23 Mar 2010
|
|
19mm wiring loom in trough behind bumper and in front of rad790 viewsThe 19mm wiring loom is large enough that a maximum of six 6mm air lines can be fished thru as required. The loom runs from the FASKIT panel located in the engine compartment behind the left front headlight, down and across in front of the rad and then down to the front axle valve block located behind and below the right fog light.23 Mar 2010
|
|
Wiring, (tubing), loom exiting temporarily from the front right fog light.567 viewsThe front axle air valve block is located just behind and below the fog light. Access to the valve block is by removing the right front fender liner, (or the bumper). The FASKIT lines are attached to the left and right front air spring lines at this location; also compressor air is taken from this location as well. Cutting the lines at as few different locations makes it easier to find leaks at a later date. As above, five 6mm air lines run from the FASKIT panel to the front axle air valve assembly and run within the loom. Two pair of the lines are for control of the air springs, and the fifth line taps the air supply at the valve block assembly off the compressor. This will be the air source line rather than tapping in directly to the high pressure air tank. 23 Mar 2010
|
|
19 mm wire, (tubing), loom rising from below at left headlight654 viewsFrom the FASKIT panel, five air lines fit in the 3/4" (19mm) wiring loom and feed to the front air valve block located behind and under the right front fog light.23 Mar 2010
|
|
76 views22 Mar 2010
|
|
73 views22 Mar 2010
|
|
70 views22 Mar 2010
|
|

shut it29 views22 Mar 2010
|
|
136 views22 Mar 2010
|
|
122 views22 Mar 2010
|
|
107 views22 Mar 2010
|
|
118 views22 Mar 2010
|
|

79 views22 Mar 2010
|
|

102 views22 Mar 2010
|
|

84 views22 Mar 2010
|
|
100 views22 Mar 2010
|
|
124 views22 Mar 2010
|
|
50 views22 Mar 2010
|
|
53 views22 Mar 2010
|
|

Special works RR Classic Vogue SE51 views22 Mar 2010
|
|
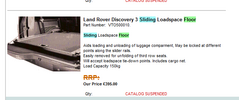
D3 sliding loadspace floor95 viewsD3 sliding loadspace floor22 Mar 2010
|
|

68 views22 Mar 2010
|
|

283 views21 Mar 2010
|
|

216 views21 Mar 2010
|
|
217 views21 Mar 2010
|
|
214 views21 Mar 2010
|
|
172 views21 Mar 2010
|
|

187 views21 Mar 2010
|
|
179 views21 Mar 2010
|
|
171 views21 Mar 2010
|
|

181 views21 Mar 2010
|
|
167 views21 Mar 2010
|
|
167 views21 Mar 2010
|
|
155 views21 Mar 2010
|
|
207 views21 Mar 2010
|
|
142 views21 Mar 2010
|
|

77 views21 Mar 2010
|
|
magic panda in formentera142 views21 Mar 2010
|
|
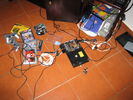
broken&fixed ps2162 views21 Mar 2010
|
|
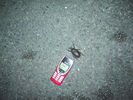
aussie big bug144 views21 Mar 2010
|
|

tokyo car139 views21 Mar 2010
|
|
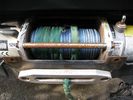
1200lb Winch with Plasma Rope145 views21 Mar 2010
|
|
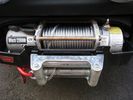
1200lb Winch with Steel Rope144 views21 Mar 2010
|
|
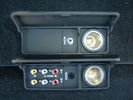
AVIO Panel118 views21 Mar 2010
|
|
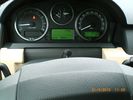
I placed the mic for the hand free at the steering colum - easy install and seems to work fine139 views21 Mar 2010
|
|
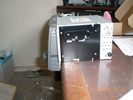
This shows the standard radio body angle161 views21 Mar 2010
|
|
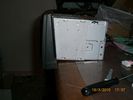
This show that the angel of the radio body is diffrent from the original, hence shall some plasic be removed - I used a dremmel and removed 7 mm of the horizontal bar inside 160 views21 Mar 2010
|
|
Job done - after adding nice start screen :-)237 viewsPinoeer AVIC-F910BT installation21 Mar 2010
|
|

FluidPan.pdf179 views21 Mar 2010
|
|

Transfer Case Draining and Filling.pdf178 views21 Mar 2010
|
|

Transmission Fluid Drain and Refill.pdf207 views21 Mar 2010
|
|

58 views21 Mar 2010
|
|

62 views21 Mar 2010
|
|
52 views21 Mar 2010
|
|
96 views21 Mar 2010
|
|

98 views21 Mar 2010
|
|

93 views21 Mar 2010
|
|
88 views21 Mar 2010
|
|
113 views21 Mar 2010
|
|
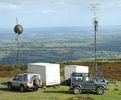
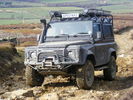
A view from the top104 viewsLooking down on my Disco and friends Defender. Photo taken from the top of Brown Clee Hill.20 Mar 2010
|
|
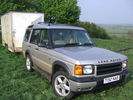
Disco 2 and Trailer75 views20 Mar 2010
|
|
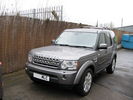
My New Disco4 Parked at the back of the dealers.179 views20 Mar 2010
|
|
HID Spots 2341 views20 Mar 2010
|
|
HID Spots 1320 views20 Mar 2010
|
|
HID Spots 0386 views20 Mar 2010
|
|
HID Spots 5335 views20 Mar 2010
|
|
HID Spots 4337 views20 Mar 2010
|
|
HID Spots 3317 views20 Mar 2010
|
|
HID Spots 8360 views20 Mar 2010
|
|
HID Spots 7338 views20 Mar 2010
|
|
HID Spots 6332 views20 Mar 2010
|
|
HID Spots 11394 views20 Mar 2010
|
|
HID Spots 10361 views20 Mar 2010
|
|

HID Spots 9367 views20 Mar 2010
|
|

136 views20 Mar 2010
|
|
124 views20 Mar 2010
|
|
121 views20 Mar 2010
|
|

90 views20 Mar 2010
|
|
84 views20 Mar 2010
|
|

84 views20 Mar 2010
|
|
77 views20 Mar 2010
|
|
78 views20 Mar 2010
|
|
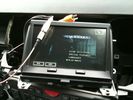
SMB RCA lead test95 views19 Mar 2010
|
|
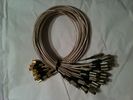
SMB RCA leads80 views19 Mar 2010
|
|
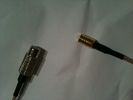
SMB RCA lead ends77 views19 Mar 2010
|
|

40 views19 Mar 2010
|
|

who farted?171 views19 Mar 2010
|
|

101 views19 Mar 2010
|
|
SV192 views19 Mar 2010
|
|
105 views19 Mar 2010
|
|
113 views19 Mar 2010
|
|
107 views19 Mar 2010
|
|
75 views19 Mar 2010
|
|
107 views19 Mar 2010
|
|
125 views19 Mar 2010
|
|
98 views19 Mar 2010
|
|

Disco3 Site Image Disco4\'ised159 views19 Mar 2010
|
|
128 views19 Mar 2010
|
|
124 views19 Mar 2010
|
|
120 views19 Mar 2010
|
|

Front Door Trim Panel164 views19 Mar 2010
|
|
New toy EX857 views18 Mar 2010
|
|

Long Vehicle66 views18 Mar 2010
|
|
Tong 200962 views18 Mar 2010
|
|
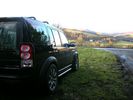
Calendar 2011432 views18 Mar 2010
|
|
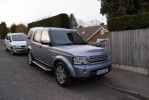
201 views18 Mar 2010
|
|
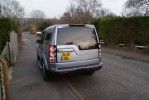
162 views18 Mar 2010
|
|
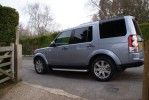
161 views18 Mar 2010
|
|

151 views18 Mar 2010
|
|
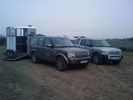
100 views18 Mar 2010
|
|
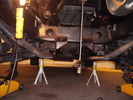
before shot!129 views18 Mar 2010
|
|
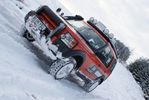
Calendar 2011 Flinty99\'s Northumberland Winter Wonderland by GSLRO530 views18 Mar 2010
|
|

89 views18 Mar 2010
|
|
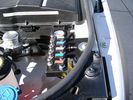
View from front left side looking towards rear aux battery compartment under cover 643 viewsAs there is no Fuel Burning Heater in the NAS V8 petrol vehicles, there is space available to install the FASKIT panel here. The piping is such that each air spring can be isolated from the air system and then filled one at a time manually via the Schrader valve. There are five Schrader valves and five shutoff valves. The fifth valve nearest the gauge controls air from the compressor, and can provide fill up air via a jumper fill line assuming the compressor is still operational.17 Mar 2010
|
|
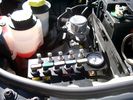
View of mounted panel from front left side872 viewsNote that all valve handles are shown in the OFF position, (the trouble position). In this case, the air that is in the air springs, (if any), is trapped in there - that is the valve blocks cannot vent whatever air is already in the air springs as the air lines between the springs and respective valve blocks are closed off by the FASKIT valves. In operation, there may be only trouble with one air spring, (perhaps a wheel height sensor), and as such, only one valve would need to be closed. If there was complete air compressor failure, then all valves would be closed and then as required, each spring could be manually filled from an outside clean dry oil free air source. 17 Mar 2010
|
|
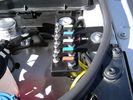
View of mounted panel from front left corner732 viewsI drilled a hole for the supplied 6 mm tie down toggle bolt in a flat portion of the wing on which the panel sits. I inserted a 50 mm flat rubber washer between the wing metal surface and the underside of the black painted panel plate; also a 40 mm flat rubber washer between the supplied fender washer and the metal plate - just seemed like a good idea so surfaces mate well even if wing metal not completely flat. 17 Mar 2010
|
|
225 views17 Mar 2010
|
|

Cutting Plan74 views17 Mar 2010
|
|

Downsized174 views17 Mar 2010
|
|

37 views17 Mar 2010
|
|

93 views17 Mar 2010
|
|
62 views17 Mar 2010
|
|

137 views17 Mar 2010
|
|
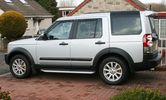
132 views17 Mar 2010
|
|
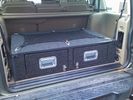
Finished92 views17 Mar 2010
|
|
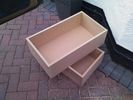
Step 164 views17 Mar 2010
|
|
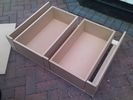
Step 265 views17 Mar 2010
|
|
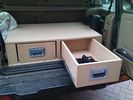
Step 382 views17 Mar 2010
|
|

53 views16 Mar 2010
|
|

71 views16 Mar 2010
|
|
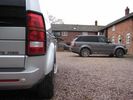
66 views16 Mar 2010
|
|
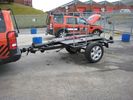
164 views16 Mar 2010
|
|
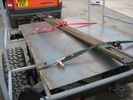
110 views16 Mar 2010
|
|
141 views16 Mar 2010
|
|
78 views15 Mar 2010
|
|
67 views15 Mar 2010
|
|
81 views15 Mar 2010
|
|
new van83 views15 Mar 2010
|
|
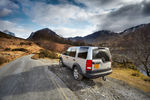
CALENDAR 2011452 viewsButtermere15 Mar 2010
|
|
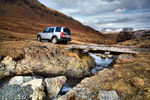
CALENDAR 2011465 viewsOn tour in the Lake District15 Mar 2010
|
|

109 views15 Mar 2010
|
|
136 views15 Mar 2010
|
|
68 views15 Mar 2010
|
|

92 views15 Mar 2010
|
|
65 views15 Mar 2010
|
|
79 views15 Mar 2010
|
|
61 views15 Mar 2010
|
|

84 views15 Mar 2010
|
|
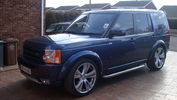
75 views15 Mar 2010
|
|
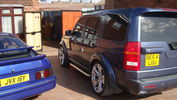
68 views15 Mar 2010
|
|

139 views15 Mar 2010
|
|
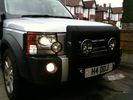
157 views14 Mar 2010
|
|
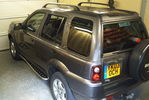
70 views14 Mar 2010
|
|
2 weeks90 views14 Mar 2010
|
|

LR tail light conversion 282 views14 Mar 2010
|
|

LR4 tail light conversion 166 views14 Mar 2010
|
|

LR4 tail light conversion 365 views14 Mar 2010
|
|
72 views13 Mar 2010
|
|

98 views13 Mar 2010
|
|
110 views13 Mar 2010
|
|
116 views13 Mar 2010
|
|
101 views13 Mar 2010
|
|
97 views13 Mar 2010
|
|
107 views13 Mar 2010
|
|
52 views13 Mar 2010
|
|
47 views13 Mar 2010
|
|

gancio traino ant con piastra paracolpi134 views13 Mar 2010
|
|

163 views13 Mar 2010
|
|

157 views13 Mar 2010
|
|

174 views13 Mar 2010
|
|

159 views13 Mar 2010
|
|

171 views13 Mar 2010
|
|

146 views13 Mar 2010
|
|

173 views13 Mar 2010
|
|

163 views13 Mar 2010
|
|

189 views13 Mar 2010
|
|

171 views13 Mar 2010
|
|

163 views13 Mar 2010
|
|

164 views13 Mar 2010
|
|

172 views13 Mar 2010
|
|

178 views13 Mar 2010
|
|

157 views13 Mar 2010
|
|

180 views13 Mar 2010
|
|

152 views13 Mar 2010
|
|

160 views13 Mar 2010
|
|

Calendar Entry 2011466 viewsMrH going through Wheelwash at Whitecliff Quarry March 201013 Mar 2010
|
|

37 views13 Mar 2010
|
|

35 views13 Mar 2010
|
|
102 views13 Mar 2010
|
|

67 views13 Mar 2010
|
|

Rufus65 views13 Mar 2010
|
|

Jack59 views13 Mar 2010
|
|

137 views13 Mar 2010
|
|
155 views13 Mar 2010
|
|
138 views13 Mar 2010
|
|
55 views12 Mar 2010
|
|
55 views12 Mar 2010
|
|
126 views12 Mar 2010
|
|
147 views12 Mar 2010
|
|
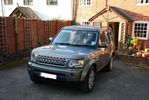
189 views12 Mar 2010
|
|
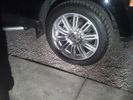
81 views12 Mar 2010
|
|
43 views12 Mar 2010
|
|
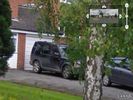
StreetView63 views12 Mar 2010
|
|
242 views12 Mar 2010
|
|

181 views12 Mar 2010
|
|
201 views12 Mar 2010
|
|
224 views12 Mar 2010
|
|
225 views12 Mar 2010
|
|
218 views12 Mar 2010
|
|
188 views12 Mar 2010
|
|

157 views12 Mar 2010
|
|

204 views12 Mar 2010
|
|
103 views12 Mar 2010
|
|

123 views12 Mar 2010
|
|
91 views12 Mar 2010
|
|
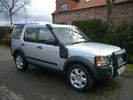
82 views12 Mar 2010
|
|

147 views12 Mar 2010
|
|
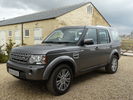
162 views12 Mar 2010
|
|
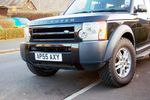
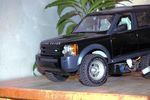
The real thing75 views12 Mar 2010
|
|
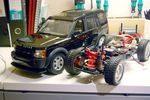
1:10 Scale D3 next to RC chassis63 views12 Mar 2010
|
|
New Chassis placed underneath51 views12 Mar 2010
|
|
104 views12 Mar 2010
|
|

Molly and Oscar43 views12 Mar 2010
|
|

23 views11 Mar 2010
|
|

206 views11 Mar 2010
|
|

163 views11 Mar 2010
|
|

26 views11 Mar 2010
|
|

20 views11 Mar 2010
|
|
116 views11 Mar 2010
|
|
121 views11 Mar 2010
|
|

Brendan Kilkenny82 views11 Mar 2010
|
|
| 233654 files on 585 page(s) |
 |
 |
 |
 |
 |
 |
 |
510 |  |
 |
 |
 |
 |
|