| Search results - "Top" |
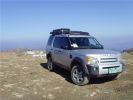
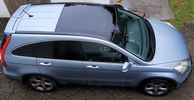
on the top94 views
|
|
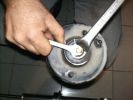
369 views
|
|
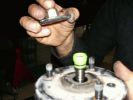
366 views
|
|
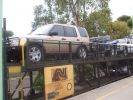
01 Start of Xmas 07 trip across the Australian Nullabor242 viewsThis is the preferred method of travelling 2500km of Nullabor desert when time is short (the Indian Pacific train). Next stop is Adelaide.
|
|

Clearance to top arm - approx 10mm. Standard Links / Standard Height.200 views
|
|
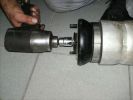
366 views
|
|
Gaydon 2010 from the top of the bank58 views
|
|
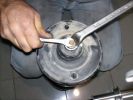
377 views
|
|
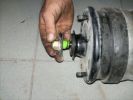
368 views
|
|

Tagliare per eliminare parte del coperchio - Cut to remove part of the cover14 viewsE' meglio prima levare il circuito stampato e poi la lama della chiave, per evitare di danneggiarlo. Tagliare sopra il tasto superiore per rimuovere solo la parte con i tasti.
Is better to remove the printed board first then the key, to prevent damage. Cut over the top button to remove only the part with the buttons.
|
|

Estrarre il circuito stampato con la batteria - Exctact the printed board with the battery18 viewsRimossa la parte superiore del contenitore, estrarre il circuito stampato sollevandolo leggermente dalla parte della batteria.
Removed the top of the box, pull out the printed circuit board slightly lifting from the battery side.
|
|
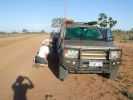
08 D3 stranded with a seized smoking wheel314 viewsAbout 1 hr after replacing the blown tyre, strange noises emanated from the stability control system and speed dropped off. Then I looked in the rear view mirror, and noted a cloud of dust along with a whiff of black smoke. This led to a very quick stop (no traffic on this route for over a week, so no worries about having to signal exiting the road). Took a look and WOW. The right rear wheel was glowing a dull red colour, and burning rubber smoke was wafting from the red glow over the fuel lines.
|
|
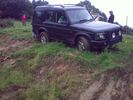
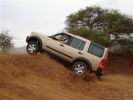
Almost a roll, but not quite...55 viewsI\'d \'launched\' myself at a 6ft hill and got to the top- but at an angle- the offside rear gripped and pulled us around to the right- perilously close to the edge... time for spare undies I think...
|
|
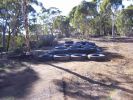
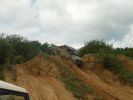
The tyre hill182 viewsWe had to drive over this without stopping. Made it, no problem :)
|
|
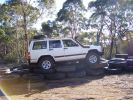
Tyre hill 2257 viewsNot so lucky - Jeep got stuck on top of the mound
|
|
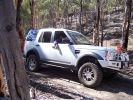
off-camber hill351 viewsAnd no, I wasn\'t hanging my arm out to balance the car - I was stopped at this point waiting for the Jeep in front to try and finish. It was a pretty steep off-camber slope!
|
|
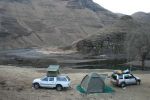
Camping at the top end of Katse Dam143 views
|
|
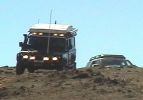
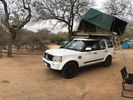
110 at Carinya Escapes ,Flinders ranges295 viewsDefender 110 Extreme,Long Range fuel tank,under floor water tanks, HF radio,GKN Overdrive,Swingaway Spare Carrier,70 litre Freezer,30 litre Fridge,Roof top Camper,Cruise Control,
|
|
Barc pitstop9 views
|
|

Virgin Snow129 viewsWent for a play in some new snow so I could practice and get my driving style right on close to zero friction surfces. Hard to tell from this photo, but car is parked on a 1:6 slope heading uphill, with hard packed ice under the fresh snow covering. I stopped here to practice my hill starts on ice...I was there for some time :)
|
|
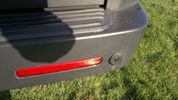
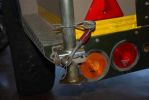
53 viewsSlight dink in parking sensor, caused by under sied trailor. Stops parking sensors from working and didnt see it. Bloody thing!! Parking snsor still working perfectly normal.
|
|
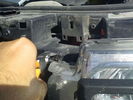
light stops X 2148 views
|
|
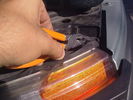
light stops X 2153 views
|
|

Ready to winch a friends disco 4 194 viewsback of the picture you can just see another freinds (luvbus) disco 3 acting as balast to stop the disco 4 pulling me down hill
|
|
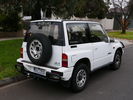
Thread upload24 viewsImage uploaded in thread 157551
|
|
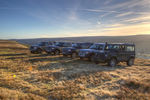
On the top of Fremington Edge above Reeth in North yorkshire42 views
|
|
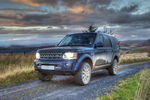
D4 HSE on top of Ogre Hill in Northumberland183 viewsD4 HSE on top of Ogre Hill in Northumberland with the Scottish hills in the background
|
|
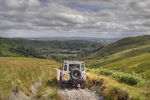
The view from the top of Breasthigh Road31 views
|
|
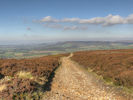
Rudland Rigg48 viewsThe view from the top of Rudland Rigg looking out towards Roseberry Topping and the coast.
|
|
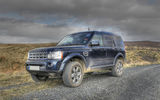
D4 HSE on top of Ogre Hill on the Scottish Border207 views
|
|

Thread upload9 viewsImage uploaded in new thread
|
|
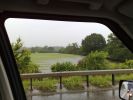
Area of the new housing expansion south of Swindon.144 viewsFlood plains will be flood plains - insurance anyone? Oh sorry forgot; all top 8 insurance companies refused to insure a house in this area, so the developers are going ahead building anyway...
|
|
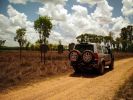
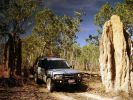
D3 in Litchfield National Park, on another part of the Reynolds Track51 viewsAnother shot of the flood plains and the magnetic trmite mounds.
|
|
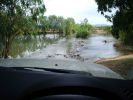
D3 in the Mary River Flood plains47 viewsIn this part of the world, on the flood plains out to Kakadu, you never get out to wade a creek first as the theory says you should. If the water isn\'t clear, like it was on this causeway, and it is this wide, you either wait for someone else who is braver than you to cross first, or you turn around and go home. These rivers are full of estuarine (salt-water) crocodiles, and they are starting to reach 7 metres in size in some still rare instances. However, seeing as a 2.5m crocodile can kill a grown man,
|
|
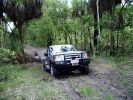
D3 in the Mary River Flood plains50 viewsFamily was down South with the In-laws, so I went for a drive on Boxing Day - which is the monsoon time, or \'The Wet\'. Was doing a test run with the off-raod trailer in preparation for the trip I was planning to the Kimberley six months later. Couldn\'t quite make it out of the creek, so a self-recovery was in order. Good thing it all worked, as I didn\'t see another car in over four hours. They were too smart to drive down the track I was on!
|
|

On top at last351 viewsPhoto at the sumit of Arigna mountains, as part of one of the stages in the 2009 4x4challenge in aid of Temple St childrens hospital. Tough gettin there especially as we towed a Deafner90 up behind us that had bursted an expansion bottle. But the D3 powered on up regardless.
|
|
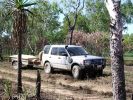
D3 in Kakadu National Park, on the track into the Alligator Billabong47 viewsThis whle area is down on the flood-plain, so in the Wet it is all under a few inches of water. In the dry it has a hard but brittle surface, which is then chewed up in many places by the feral animals with hard hoofs such as buffalo, pigs and horses. This then turns the track into a big dust bowl which is primarily bull-dust - a soft fine powder like talcum powder, which can be many feet deep, and gets into everything. The cover on the trailer is actually black.
|
|
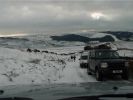
Letting a D3 pass in the Goyt Valley62 viewsStopped to let a D3 and his van-in-distress pass on the main slope down to the reservoirs in the Goyt Valley
|
|
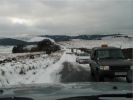
Waiting for a D1 to pass in the Goyt Valley65 viewsStopped to let a D1 and his vectra-in-distress pass on the main slope down to the reservoirs in the Goyt Valley
|
|
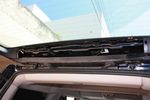
30 viewsTop trim removed
|
|
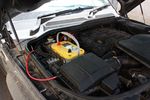
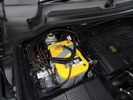
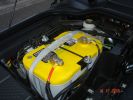
124 viewsOptima Yellow Top in battery box. This is the version with side terminals so there will be some modifications to be done to fit
|
|

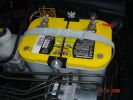
91 viewsBattery clamp needs to be modified due to the mouldings on the battery top to the side terminals. All that is needed is to cut off the bit as seen.
|
|
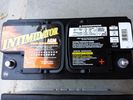
Deka 9A49 AGM Intimidator320 viewsThe Deka 9A49 AGM Intimidator makes an excellent primary battery alternative to the factory or Interstate. Made in US of premium quality. This is an excellent match with the Traxide system w/another Deka or Yellow Top optima.
This will behave properly in your D3/4 LR3 with slightly less wear and tear on your alternator.
|
|
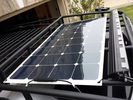
solar roof install439 viewsMore or less wrapped up my solar installation today. I added a Grape Solar Flex 100W panel, it's adequate to keep the vehicle topped off with the Fridge running, and Ham, but it could lose some ground if transmitting depending on how much, 2 would be awesome. One is enough, but barely. I am quite impressed with the Grape Solar flex panel version 2.0.
https://www.facebook.com/DifferentialPartsUS
|
|
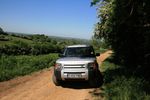
Nice lane by Belvoir stopped to let GGs past so photo op taken57 views
|
|

Topless33 views
|
|
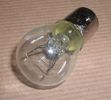
Land Rover Stop Tail Light dual filament bulb nominal 12 volt 21 / 5 watt filaments1416 viewsThis is the Land Rover part number 264590 dual filament bulb, (P21/5), that inserts into the upper two tail lamp receptacles. In the upper one, both filaments function, in the lower one, only the 5 watt tail light filament functions.
I regard it as not a good practice to routinely switch bulbs when the tail light filament, (5 watt), burns out on the lower bulb. The broken filament can jiggle over onto the brake light filament, (21 watt), and short the circuit to ground or something else not predicable.
There are also arguments to say that quality control is better on the Land Rover marketed bulbs than say far east sourced bulbs. Filament construction, and hence resistance can vary and mislead the current sensing circuits monitoring the signal light systems. Also when the bulbs are properly installed, all filaments should be standing vertically and not at any slope.
These are the sort of obscure circumstances that can lead to false trouble messages on the display, dropping to the stops, and subsequent concerns - all over a tail/signal light bulb.
For example, the filament life of both the tail light and the brake light filaments in the P21/5 bulb is significantly less than the USA common 1157 dual filament bulb, (1000/250 vs 5000/1200 hours); brightness in the P21/5 is a bit more, (3cp/35cp vs 3cp/32cp where cp is candle power), but current consumption is oddly less, (0.44a/1.86a vs 0.59a/2.10a where a is amps). It is the quest for efficiency vs maintenance trade off.
|
|
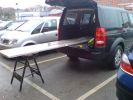
292 viewsNeeded 1.8m of worktop but had to buy 3m length. Took B&D workmate with me and cut it down to size in the car park! Notice how the workmate is exactly level with D3 in normal height!
|
|
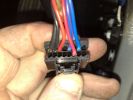
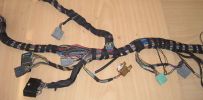
32 Dash Loom39 views
|
|
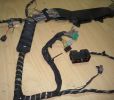
34 Dash Loom35 views
|
|
Lunch Stop49 views
|
|
honistor at the top149 views
|
|

Air Conditioner Specifications 4.4L V81550 viewsThis 2 page pdf is just the specifications for the AC system. The refrigerant type is R134A.
Note that when topping the system up, it can be a good idea to include some of that ultra violet light dye that will glow to show leaks and loose fitting.
|
|
asscent to the top of Arigna mountain65 views
|
|
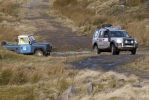
58 viewsColdweathers, classic 90 blew up its expansion bottle, he was glad of the ride to the top but funnily enuf didnt want a tow to the bottom, some say it may have been due to the fact that his 90 looked like it had been taken jet sking on the back of a D3
|
|

52 views
|
|
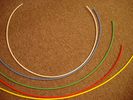
6mm Heat Shrink colours 362 viewsI decided to colour code the tubing so I used 6mm electrical heat shrink.
As there is no apparent colour coding re the 3, I tried to emulate the P38 coding; #1 LR red, #2 RR blue, #3 LF yellow, and #4 RF green. This was not doable as both left side air springs have green coloured tubing coming off the top of the front and rear air springs. I therefore arbitrarily chose the Left Rear to be red; Left Front green; Right Front yellow; Right Rear blue; and for the air compressor supply line, White coloured heat shrink. Since two new lines tie into each air spring line, I made the line between the air spring and the FASKIT, a single solid colour, and the line from the FASKIT to the valve block, White, plus the related appropriate solid colour.
|
|
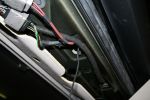
09238 viewsRan the GPS antena up through the rubber gromet in the top center of the boot door jam.
|
|

Land Rover Aerial Fin images for both Glass and Metal Roof Disco3 / LR3855 viewsAs well as the two different fins, this pdf also shows the plastic blanking plate for glass roof vehicles where no fin is installed.
The glass roof fin is secured by two security screws from the top into a plastic frangible glue on gasket. The hope is that when struck, the fin will shear off and not crack the glass roof. Re the metal roof design, the fin is secured from underneath via two nuts.
The pdf also shows the various electrical bits related to the antennas. In the UK, the fin would house not only a cell phone antenna but the TV and satellite radio antenna electronics as well; in the States, the Sirius sat radio antenna and a G type cell phone antenna if the phone kit was installed would reside within the fin. The SAT NAV GPS antenna is located within the High Mount Brake Light plastic mounted to the upper rear hatch.
|
|

Fin cell phone aerial drawing190 viewsThe factory aerial for the factory NAV / GPS on my 2005 HSE is within the high mounted stop light lens at the top of the upper hatch door. I do not have the factory installed phone kit, and as such, do not have the fin installed; instead there is just a plastic blanking insert to fill the cell phone aerial wiring hole in the metal portion of the roof; hence this requirement for an "external" cell antenna. For those that do have the fin on their glass roof, the fin is screwed on to a glued on plastic gasket, (sort of), and not bolted thru as per the metal roof 3's.
|
|
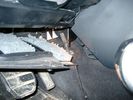
Air Conditioner Drain Hose on Drivers Side (LHD)2265 viewsThe corrugated rubber bit above and to the right of the gas pedal is the drain hose that goes down thru the carpet and floor sheet metal.
While it is bit hard to figure out from the jpg above, there is a rubber "strap" attached to the top of the corrugated hose that one uses to pull on to drag the hose up back around the black plastic heater "pan" drain. The same drain hose arrangement is on the other side as well.
One could I suppose run a plastic snap tie around the vertical pull strap if one was concerned about the hose slipping off again. See also the other jpg sketch which is from the Land Rover manual.
|
|

Alternator female plug looking down into top368 viewsThis shows the plug connected to the alternator wiring harness looking down into the top of the plug.
The cavity marked 1 is the AS or BATT SENSE and the wire colour most likely has Brown/Green on it.
The cavity marked 2 is the RC or ALT CON and the wire colour most likely has Red/White on it.
The cavity marked 3 is the L1 or ALT MON and the wire colour likely has Green/White on it.
I say "most likely" as the wire colours are not always the same on all vehicles.
Also the terminal 1 conductor destination is more likely C0570-175 rather than per the jpg.
The #3 pin is located closest to the big B+ terminal.
|
|

Thread upload13 viewsImage uploaded in thread 64916
|
|

Thread upload15 viewsImage uploaded in thread 64916
|
|
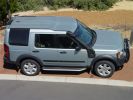
Aus Disco Top View. 144 views
|
|

Thread upload5 viewsImage uploaded in thread 142922
|
|
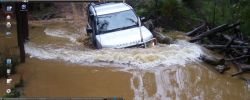
desktop pics181 views
|
|

Thread upload5 viewsImage uploaded in thread 159579
|
|

Bamford Top55 viewsStart of the decent into the lane at the top of Bamford
|
|
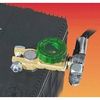
Battery Disconnect Wirthco 20308 Knob Top Post 889 viewsThis is a battery post style disconnect, usually for the negative terminal. There is a hole drilled in the round end off the battery so that flat terminal can be attached as well as the normal battery post terminal. I did not use this hookup arrangement, however I show it for information only.
|
|
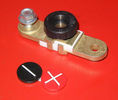
Battery Disconnect side post with + & - caps, top view617 viewsThis disconnect is designed for side post batteries. It can be used on either the + or - terminals. It can also be installed at the "other" end of the battery cable as well. In my install of the Aux battery, I installed this on the negative ground cable where the cable attaches to the body sheet metal. I have never used it but it seemed like a good idea at the time. The main battery hookup is pure stock.
For the hot side of the Aux battery, an Anderson PowerPole was used inline for the cable between the Aux and connecting to the spare bolt hole at the + post of the Main battery cable.
|
|
481 views
|
|
437 views
|
|

147 views
|
|

Mower blade with new countersink bolts - original dome head at top63 views
|
|

Thread upload17 viewsImage uploaded in new thread
|
|
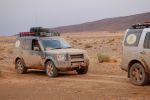
A short stop before entering Finland. October 201029 views
|
|
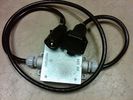
Box Closed with 7 Blade NAS connectors580 viewsBox closed up and ready for use. The box and cable connectors are reasonably weather tight and hence can be submerged for a bit while doing a creek crossing but as with the 3, do not use the creek bed as a parking stall. Similarly, the connector recessed into the bumper will probably remain somewhat dry as long as you keep moving but if you get stopped, well that is another story.
As such, I put a vial of desiccant in the metal box prior to closing it up to reduce corrosion due to moisture build up.
|
|
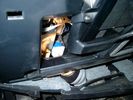
Brake Switch Visible thru Opening4943 viewsThe blue and white bit is the switch; the sort of gold appearing box,(it is really black), you will not see in your 3 as it is a Smooth Talker brand amplifier for my Blackberry phone antenna. This install is detailed in the SmoothTalker phone antenna section of my gallery.
One way to remove and install the switch is to lower the "horizontal" panel above the brake pedal as shown where the flashlight head is located. To actually remove the switch, you slide your hand thru the gap and rotate the switch clockwise 1/4 turn while watching thru the rectangular opening. Installation of the new switch is the reverse of above - 1/4 turn counterclockwise.
Before you remove the switch, note its orientation - horizontal with electrical wires to the left. That is the way it should look after replacement as well.
The second time I replaced the switch, I did it all thru the rectangular opening and did not remove the horizontal panel - that is experience helping out.
The knee kick you have to remove regardless. It is sort of hinged at the bottom so you just pull at the top and sort of rotate the knee panel and then pull upwards for two plastic "fingers" to clear the slots they reside in.
|
|
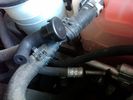
Breather line with factory cap cut off.2281 viewsIf you expand the jpg by clicking on it, in the bottom right corner if you look closely, one can see the black plastic factory vent tubing with the OEM cap cut off.
Note the tubing is cut at a 45 degree angle facing to the rear. Also shown in the top right is the cut off portion sitting on the coolant water hose and on the top left also sitting on the coolant hose, the new to be installed Gore manufactured replacement breather cap.
|
|
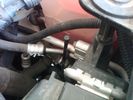
Vertical Breather Hose before cutting off OEM cap.1746 viewsThis shows the plastic vertical breather tubing and OEM cap prior to being cut off. The tubing is located on the driver side at the front near the radiator. One cuts about 3/4" to 1" off from the top. The TSB says 20mm.
I tried blowing thru the cut off piece and was not very successful. The cap seemed plugged. I am beginning to think that there was a very good reason for Land Rovers's Technical Service Bulletin, (TSB).
|
|

Thread upload8 viewsImage uploaded in new thread
|
|
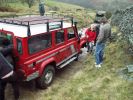
Top of Roych - a tyre change required!198 views
|
|
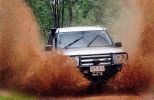
D3 on the Gold-fields Loop South of Darwin, and North of Pine Creek. 67 viewsThis is the middle of January, so is right in the middle of the Wet. Red mud. EPB hates it.
|
|
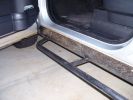
Sill protectors 2737 viewsThe side protection bar comes out a good 170mm. Prevents side panel damage and car-park knocks! Still deciding whether to fit the chequerplate tops, as originally designed.
|
|

Snow reflections338 viewsA quick stop to reflect about the snow in January 2010.
|
|

Thread upload19 viewsImage uploaded in thread 113557
|
|
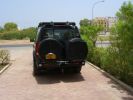
Rear end294 viewsLocally made wheel covers. LH is zipped from bottom to top to fit over registration plate with zip fasteners top and bottom. Rear IPF Reversing /camp lights on rack linked to reverse light circuit.
|
|
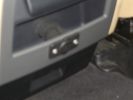
Auxiliary power sockets - TracTronics, Australia382 viewsA complete kit including two outlets, wiring etc connected to auxiliary Optima Blue top battery using their very effective SC40 split charge relay. One outlet between rear and front seats, and 2nd alongside loadspace 12v outlet, enables fridge to run when engine is not running, without affecting start capacity or vehicle functions.
|
|
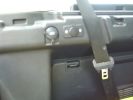
TracTronics loadspace power socket 381 viewsThe 2nd power socket fitted alongside the original in the loadspace runs off the auxiliary Optima Bluetop battery to run a fridge when engine is not running. No more starting worries!
|
|
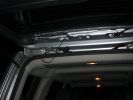
Cable Routing through top of tailgate49 views
|
|
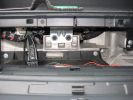
Top glove box removed 292 views
|
|
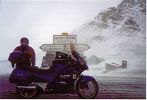
10,000ft up in the Alps!!! Honda Pan European Sept'01390 viewsThis was the first time I had ever fallen off a bike. Snow didn't help! Nothing hurt or damaged so we stopped to take a picture...
|
|
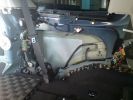
Thomas compressor159 viewsCompressor mounted ontop of the rear wheel arch behind the plastics.
|
|

Thread upload4 viewsImage uploaded in thread 199871
|
|
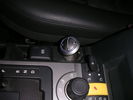
Controller 1146 viewsLocation of HK controller on top of EPB cover.
|
|

Cooling system hoses - 4.4L petrol V81099 viewsThese are the cooling system hoses on the 4.4L petrol V8. The little odd shaped bleeder hose, (LR006158), shown in the top right hand corner can give problems. There is a plastic tee with a threaded air bleeder outlet located in the middle of the hose. The plastic tee can or will fail due to I guess heat distress.
A BIC pen can serve as a field fix, however for your parts kit, a nominal 3/8" ID hose size brass hose barb inline connector plus a couple of hose clamps is suggested. Better yet is a threaded hose barb brass coupling or a tee and bleeder valve to allow bleeding of the line. Land Rover now makes the plastic bleeder valve that breaks available as a separate part, # LR027661, where 0 is a zero. As such, one can now purchase that part only for addition to your field fix parts kit.
|
|

Thread upload14 viewsImage uploaded in thread 136052
|
|

istruzioni cambio luce stop202 views
|
|
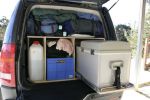
3 jerry's of water, cooking gear in crates in middle, clothes + food on top shelf127 views
|
|

View from the mountain top of north Corsica42 views
|
|
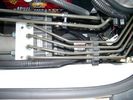
CounterAct Power supply mounted under brake lines.191 viewsThis top view shows where I located the power supply. It is attached with 3M sticky to the black plastic surface that is located under the brake lines.
When the system is operating properly, the red LED pulses about twice per second.
Some users claim they can hear a very slight hum or whine coming from the unit. My unit seems silent.
|
|
AlexE and CarlS coming over the top120 views
|
|
AlexE and CarlS coming over the top127 views
|
|
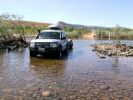
D3 in the Kimberley - on the Gibb River Road, crossing the Pentecost River49 viewsNot too far in on the Western end of the Gibb River Road is the Pentecost River, with the ranges in the back ground - an iconic shot of the Gibb River Road.
|
|
Thread upload5 viewsImage uploaded in thread 140743
|
|
Thread upload2 viewsImage uploaded in new thread
|
|
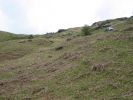
Tyre Change45 viewsWhat a place to change a tyre! - See top left !
|
|
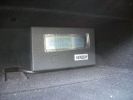
Genesis digital battery system - monitor in top glovebox320 views
|
|
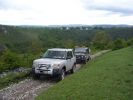
Top of Putwell Hill, one of the best view points in the Peak District258 views
|
|
18 views
|
|
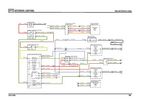
Thread upload21 viewsImage uploaded in thread 123695
|
|
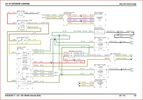
Thread upload17 viewsImage uploaded in thread 162372
|
|
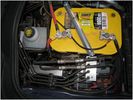
Optima Yellow top Battery in a D4266 views
|
|
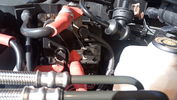
+12V supply137 views+12V taken from the regulator used to power the start/stop battery from MY14 onwards
|
|
Thread upload18 viewsImage uploaded in new thread
|
|
109 views
|
|
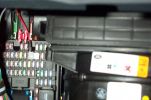
Tapa-circuit384 viewsTapa-circuit fitted to fuse box behind glove box. Red cable to top is the fused output cable leading to the PDA charger
|
|

DDin Xtron kit first fit - slight adjustments needed top and bottom.102 views
|
|

Deka Battery Dimension Data614 viewsThe battery size that I installed for my auxiliary was a BCI 40R battery as it was for me the easiest to fit and was also a cranking battery. The case profile was such that no tie down fins were located on either bottom end, (sides yes), and length wise, it was only about 11" (290 mm) long. As such, I did not have to grind the nibs at the front bottom of the plastic surround.
I did however raise the bottom of the battery above the angled nibs as I set the battery on a 1" (25mm) high plastic spacer. The total height, (battery plus spacer), was about 8" (200mm) so the battery top still fit under the Land Rover factory cover.
For the Aux battery, when I replaced the 40R, I installed an Interstate BCI 47 which is similar in size to a DIN H5. I was therefore able to eliminate the vertical spacer as the Group 47/H5 is the same height as the DIN H7/H8 stock LR spec starting battery. As such, the standard battery tie down bolts can be used without modification. The Group 47 battery is 9 11/16" long x 6 7/8" wide x 7 1/2" (190mm) high.
|
|

Cooling System - Description and Operation 4.0L and 4.4L petrol engines 5 pages1017 viewsThis is a 5 page pdf that provides some insight into how the coolant flows thru all the hoses. Of interest is the paragraph,(page 3/5), that attempts to explain how and why the thermostat is designed to open at different engine operating temperatures - in brief, the reason for the spaghetti tangle of small hoses on the top of the engine.
There is also reference to an engine oil cooler that I gather cools something I think related to a supercharger, if fitted.
|
|
113 views
|
|

93 views
|
|
Wood kit from Apsis USA499 views
|
|
179 views
|
|
201 views
|
|

213 views
|
|

Thread upload12 viewsImage uploaded in thread 137807
|
|

computer desktop11 views
|
|

211 views
|
|

140 views
|
|

Getting to the top of the Screamer101 views
|
|
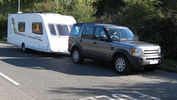
Discovery 3 XS & Swift Challenger 53070 viewsBrief stop at Clackets Lane M25
|
|
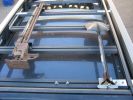
Awning205 viewsThere are many bolt slots in the expo rack, bottom ribs,
side rails on the inside and on top of rear rail.
|
|

256 viewspulled off the factory plastic and found 2 6inch cracks in the drivers side top in front of head light
|
|
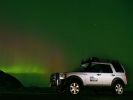
Nice desktop pic...219 views
|
|
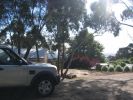
Disco3 overlooking our city of Adelaide, Australia212 viewsThe TDV6 will make it a dream to climb the 450m above sea level to our ridge top home from the city each day.
|
|

Thread upload0 viewsImage uploaded in thread 206858
|
|

Over the top performance350 viewsDropping down over a 50ft loose gravel drop, aprox 80 degree slope, in Quarry day, ireland event#8
|
|
Thread upload18 viewsImage uploaded in thread 151303
|
|
Thread upload6 viewsImage uploaded in new thread
|
|
Thread upload6 viewsImage uploaded in new thread
|
|

Thread upload16 viewsImage uploaded in thread 147705
|
|

FBH Webasto Thermo Top V Workshop Manual94 views
|
|

Disco_3_FBH_Workshop_Manual_Thermo_Top_V.pdf83 views
|
|

Thread upload8 viewsImage uploaded in thread 197548
|
|

FBH Workshop Manual75 views
|
|

Webasto Thermo Top V Workshop Manual59 views
|
|

Thread upload34 viewsImage uploaded in thread 125313
|
|

Thread upload2 viewsImage uploaded in thread 187407
|
|
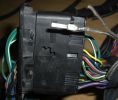
New Speaker Cables.108 viewsThis is the door connector, Main loom to Right, Door side to the left. to the top of the connectors you can see green and Green white wires which are the speaker ones. The door wiring is premium and has two pairs, the main loom was a 1 pair high line, so i am adding the pair you see (one already pinned up) to upgrade the loom to premium.
|
|
Top of Posion Spider192 views
|
|

Top of Posion Spider202 views
|
|
Dual Battery and ECU Chip175 viewsDual Barrery System by Traxide and Optima Yellow Top battey, Plus ECU Chip being fitted
|
|
Top of Wheeler Lake171 views
|
|
Top of Wheeler Lake171 views
|
|
Top of Twin Cone174 views
|
|

Stop light90 views
|
|
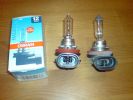
The H9 bulb without reflector on top.269 views
|
|
Top view with plane tree reflection838 views
|
|
Over the top394 views
|
|
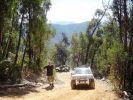
Short stop on Merricumbene FT - while a tyre was changed77 views
|
|
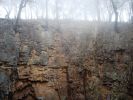
The top of the Big Hole76 views
|
|
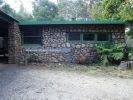
Mt Werong Camping Area - a good spot to stop for lunch! 56 views
|
|
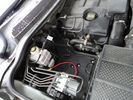
72 viewsAux battery tray - I found out you can remove the side as well as the top cover of the compartment.
|
|
Oi!! stop following me!!199 views
|
|
Optima Yellow Top13 viewsAGM auxiliary battery in second battery compartment
|
|
D3 going tops128 views
|
|
OptimaYellow Top Deep Cycle and Battery Tray194 views
|
|
OptimaYellow Top Deep Cycle and Battery Tray171 views
|
|
top of kilaloe271 views
|
|
top of kilaloe70 views
|
|

Camera location in the middle top of the rear window395 views
|
|
101 viewsRear shot, showing diff and fuel tank breather pipes running up to filler neck at top LHS
|
|
![Filename=DSC05669 [Desktop Resolution].JPG
Filesize=193KB
Dimensions=1200x900
Date added=07.Feb 2009 DSC05669 [Desktop Resolution].JPG](albums/userpics/11603/thumb_DSC05669%20%5BDesktop%20Resolution%5D.JPG)
155 views
|
|
![Filename=DSC05670 [Desktop Resolution].JPG
Filesize=145KB
Dimensions=1200x900
Date added=07.Feb 2009 DSC05670 [Desktop Resolution].JPG](albums/userpics/11603/thumb_DSC05670%20%5BDesktop%20Resolution%5D.JPG)
145 views
|
|
![Filename=DSC05672 [Desktop Resolution].JPG
Filesize=147KB
Dimensions=1200x900
Date added=07.Feb 2009 DSC05672 [Desktop Resolution].JPG](albums/userpics/11603/thumb_DSC05672%20%5BDesktop%20Resolution%5D.JPG)
161 views
|
|
![Filename=DSC05673 [Desktop Resolution].JPG
Filesize=123KB
Dimensions=1200x900
Date added=07.Feb 2009 DSC05673 [Desktop Resolution].JPG](albums/userpics/11603/thumb_DSC05673%20%5BDesktop%20Resolution%5D.JPG)
134 views
|
|
![Filename=DSC05674 [Desktop Resolution].JPG
Filesize=147KB
Dimensions=1200x900
Date added=07.Feb 2009 DSC05674 [Desktop Resolution].JPG](albums/userpics/11603/thumb_DSC05674%20%5BDesktop%20Resolution%5D.JPG)
135 views
|
|
![Filename=DSC05777 [Desktop Resolution].JPG
Filesize=258KB
Dimensions=1200x900
Date added=07.Feb 2009 DSC05777 [Desktop Resolution].JPG](albums/userpics/11603/thumb_DSC05777%20%5BDesktop%20Resolution%5D.JPG)
67 views
|
|
![Filename=DSC05778 [Desktop Resolution].JPG
Filesize=268KB
Dimensions=1200x900
Date added=07.Feb 2009 DSC05778 [Desktop Resolution].JPG](albums/userpics/11603/thumb_DSC05778%20%5BDesktop%20Resolution%5D.JPG)
73 views
|
|
![Filename=DSC05779 [Desktop Resolution].JPG
Filesize=141KB
Dimensions=1200x900
Date added=07.Feb 2009 DSC05779 [Desktop Resolution].JPG](albums/userpics/11603/thumb_DSC05779%20%5BDesktop%20Resolution%5D.JPG)
68 views
|
|
![Filename=DSC05788 [Desktop Resolution].JPG
Filesize=198KB
Dimensions=1200x900
Date added=07.Feb 2009 DSC05788 [Desktop Resolution].JPG](albums/userpics/11603/thumb_DSC05788%20%5BDesktop%20Resolution%5D.JPG)
69 views
|
|
![Filename=DSC05789 [Desktop Resolution].JPG
Filesize=217KB
Dimensions=1200x900
Date added=07.Feb 2009 DSC05789 [Desktop Resolution].JPG](albums/userpics/11603/thumb_DSC05789%20%5BDesktop%20Resolution%5D.JPG)
81 views
|
|
![Filename=DSC05790 [Desktop Resolution].JPG
Filesize=158KB
Dimensions=1200x900
Date added=07.Feb 2009 DSC05790 [Desktop Resolution].JPG](albums/userpics/11603/thumb_DSC05790%20%5BDesktop%20Resolution%5D.JPG)
62 views
|
|
![Filename=DSC05813 [Desktop Resolution].JPG
Filesize=228KB
Dimensions=1200x900
Date added=28.Feb 2009 DSC05813 [Desktop Resolution].JPG](albums/userpics/11603/thumb_DSC05813%20%5BDesktop%20Resolution%5D.JPG)
76 views
|
|
![Filename=DSC05831 [Desktop Resolution].JPG
Filesize=168KB
Dimensions=1200x900
Date added=28.Feb 2009 DSC05831 [Desktop Resolution].JPG](albums/userpics/11603/thumb_DSC05831%20%5BDesktop%20Resolution%5D.JPG)
95 views
|
|
![Filename=DSC05845 [Desktop Resolution].JPG
Filesize=136KB
Dimensions=675x900
Date added=28.Feb 2009 DSC05845 [Desktop Resolution].JPG](albums/userpics/11603/thumb_DSC05845%20%5BDesktop%20Resolution%5D.JPG)
81 views
|
|
![Filename=DSC05912 [Desktop Resolution].JPG
Filesize=207KB
Dimensions=1200x900
Date added=28.Feb 2009 DSC05912 [Desktop Resolution].JPG](albums/userpics/11603/thumb_DSC05912%20%5BDesktop%20Resolution%5D.JPG)
95 views
|
|
![Filename=DSC05993 [Desktop Resolution].JPG
Filesize=155KB
Dimensions=1200x900
Date added=19.Mar 2009 DSC05993 [Desktop Resolution].JPG](albums/userpics/11603/thumb_DSC05993%20%5BDesktop%20Resolution%5D.JPG)
60 views
|
|
![Filename=DSC05993 [Desktop Resolution]~0.JPG
Filesize=155KB
Dimensions=1200x900
Date added=19.Mar 2009 DSC05993 [Desktop Resolution]~0.JPG](albums/userpics/11603/thumb_DSC05993%20%5BDesktop%20Resolution%5D~0.JPG)
63 views
|
|
![Filename=DSC05996 [Desktop Resolution].JPG
Filesize=263KB
Dimensions=1200x900
Date added=19.Mar 2009 DSC05996 [Desktop Resolution].JPG](albums/userpics/11603/thumb_DSC05996%20%5BDesktop%20Resolution%5D.JPG)
56 views
|
|
![Filename=DSC05996 [Desktop Resolution]~0.JPG
Filesize=263KB
Dimensions=1200x900
Date added=19.Mar 2009 DSC05996 [Desktop Resolution]~0.JPG](albums/userpics/11603/thumb_DSC05996%20%5BDesktop%20Resolution%5D~0.JPG)
61 views
|
|
![Filename=DSC05997 [Desktop Resolution].JPG
Filesize=182KB
Dimensions=1200x900
Date added=19.Mar 2009 DSC05997 [Desktop Resolution].JPG](albums/userpics/11603/thumb_DSC05997%20%5BDesktop%20Resolution%5D.JPG)
55 views
|
|
![Filename=DSC05997 [Desktop Resolution]~0.JPG
Filesize=182KB
Dimensions=1200x900
Date added=19.Mar 2009 DSC05997 [Desktop Resolution]~0.JPG](albums/userpics/11603/thumb_DSC05997%20%5BDesktop%20Resolution%5D~0.JPG)
67 views
|
|
![Filename=DSC05998 [Desktop Resolution].JPG
Filesize=175KB
Dimensions=1200x900
Date added=19.Mar 2009 DSC05998 [Desktop Resolution].JPG](albums/userpics/11603/thumb_DSC05998%20%5BDesktop%20Resolution%5D.JPG)
64 views
|
|
![Filename=DSC05998 [Desktop Resolution]~0.JPG
Filesize=175KB
Dimensions=1200x900
Date added=19.Mar 2009 DSC05998 [Desktop Resolution]~0.JPG](albums/userpics/11603/thumb_DSC05998%20%5BDesktop%20Resolution%5D~0.JPG)
75 views
|
|
![Filename=DSC06000 [Desktop Resolution].JPG
Filesize=154KB
Dimensions=1200x900
Date added=19.Mar 2009 DSC06000 [Desktop Resolution].JPG](albums/userpics/11603/thumb_DSC06000%20%5BDesktop%20Resolution%5D.JPG)
59 views
|
|
![Filename=DSC06000 [Desktop Resolution]~0.JPG
Filesize=154KB
Dimensions=1200x900
Date added=19.Mar 2009 DSC06000 [Desktop Resolution]~0.JPG](albums/userpics/11603/thumb_DSC06000%20%5BDesktop%20Resolution%5D~0.JPG)
67 views
|
|
![Filename=DSC06005 [Desktop Resolution].JPG
Filesize=201KB
Dimensions=1200x900
Date added=19.Mar 2009 DSC06005 [Desktop Resolution].JPG](albums/userpics/11603/thumb_DSC06005%20%5BDesktop%20Resolution%5D.JPG)
93 views
|
|
![Filename=DSC06006 [Desktop Resolution].JPG
Filesize=210KB
Dimensions=1200x900
Date added=19.Mar 2009 DSC06006 [Desktop Resolution].JPG](albums/userpics/11603/thumb_DSC06006%20%5BDesktop%20Resolution%5D.JPG)
106 views
|
|
![Filename=DSC06015 [Desktop Resolution].JPG
Filesize=166KB
Dimensions=1200x900
Date added=19.Mar 2009 DSC06015 [Desktop Resolution].JPG](albums/userpics/11603/thumb_DSC06015%20%5BDesktop%20Resolution%5D.JPG)
73 views
|
|
![Filename=DSC06016 [Desktop Resolution].JPG
Filesize=183KB
Dimensions=1200x900
Date added=19.Mar 2009 DSC06016 [Desktop Resolution].JPG](albums/userpics/11603/thumb_DSC06016%20%5BDesktop%20Resolution%5D.JPG)
74 views
|
|
![Filename=DSC06018 [Desktop Resolution].JPG
Filesize=300KB
Dimensions=1200x900
Date added=19.Mar 2009 DSC06018 [Desktop Resolution].JPG](albums/userpics/11603/thumb_DSC06018%20%5BDesktop%20Resolution%5D.JPG)
65 views
|
|
![Filename=DSC06019 [Desktop Resolution].JPG
Filesize=171KB
Dimensions=675x900
Date added=19.Mar 2009 DSC06019 [Desktop Resolution].JPG](albums/userpics/11603/thumb_DSC06019%20%5BDesktop%20Resolution%5D.JPG)
72 views
|
|
![Filename=DSC06020 [Desktop Resolution].JPG
Filesize=205KB
Dimensions=1200x900
Date added=19.Mar 2009 DSC06020 [Desktop Resolution].JPG](albums/userpics/11603/thumb_DSC06020%20%5BDesktop%20Resolution%5D.JPG)
72 views
|
|
![Filename=DSC06026 [Desktop Resolution].JPG
Filesize=267KB
Dimensions=1200x900
Date added=19.Mar 2009 DSC06026 [Desktop Resolution].JPG](albums/userpics/11603/thumb_DSC06026%20%5BDesktop%20Resolution%5D.JPG)
65 views
|
|
![Filename=DSC06027 [Desktop Resolution].JPG
Filesize=185KB
Dimensions=1200x900
Date added=19.Mar 2009 DSC06027 [Desktop Resolution].JPG](albums/userpics/11603/thumb_DSC06027%20%5BDesktop%20Resolution%5D.JPG)
71 views
|
|
![Filename=DSC06028 [Desktop Resolution].JPG
Filesize=74KB
Dimensions=1200x900
Date added=19.Mar 2009 DSC06028 [Desktop Resolution].JPG](albums/userpics/11603/thumb_DSC06028%20%5BDesktop%20Resolution%5D.JPG)
66 views
|
|
![Filename=DSC06029 [Desktop Resolution].JPG
Filesize=177KB
Dimensions=1200x900
Date added=19.Mar 2009 DSC06029 [Desktop Resolution].JPG](albums/userpics/11603/thumb_DSC06029%20%5BDesktop%20Resolution%5D.JPG)
66 views
|
|
![Filename=DSC06030 [Desktop Resolution].JPG
Filesize=115KB
Dimensions=1200x900
Date added=19.Mar 2009 DSC06030 [Desktop Resolution].JPG](albums/userpics/11603/thumb_DSC06030%20%5BDesktop%20Resolution%5D.JPG)
77 views
|
|
![Filename=DSC06031 [Desktop Resolution].JPG
Filesize=151KB
Dimensions=1200x900
Date added=25.Apr 2009 DSC06031 [Desktop Resolution].JPG](albums/userpics/11603/thumb_DSC06031%20%5BDesktop%20Resolution%5D.JPG)
47 views
|
|
![Filename=DSC06032 [Desktop Resolution].JPG
Filesize=194KB
Dimensions=1200x900
Date added=25.Apr 2009 DSC06032 [Desktop Resolution].JPG](albums/userpics/11603/thumb_DSC06032%20%5BDesktop%20Resolution%5D.JPG)
55 views
|
|
![Filename=DSC06033 [Desktop Resolution].JPG
Filesize=278KB
Dimensions=1200x900
Date added=25.Apr 2009 DSC06033 [Desktop Resolution].JPG](albums/userpics/11603/thumb_DSC06033%20%5BDesktop%20Resolution%5D.JPG)
51 views
|
|
![Filename=DSC06034 [Desktop Resolution].JPG
Filesize=209KB
Dimensions=1200x900
Date added=25.Apr 2009 DSC06034 [Desktop Resolution].JPG](albums/userpics/11603/thumb_DSC06034%20%5BDesktop%20Resolution%5D.JPG)
49 views
|
|
![Filename=DSC06035 [Desktop Resolution].JPG
Filesize=187KB
Dimensions=1200x900
Date added=25.Apr 2009 DSC06035 [Desktop Resolution].JPG](albums/userpics/11603/thumb_DSC06035%20%5BDesktop%20Resolution%5D.JPG)
47 views
|
|
![Filename=DSC06036 [Desktop Resolution].JPG
Filesize=264KB
Dimensions=1200x900
Date added=25.Apr 2009 DSC06036 [Desktop Resolution].JPG](albums/userpics/11603/thumb_DSC06036%20%5BDesktop%20Resolution%5D.JPG)
56 views
|
|
![Filename=DSC06037 [Desktop Resolution].JPG
Filesize=208KB
Dimensions=1200x900
Date added=25.Apr 2009 DSC06037 [Desktop Resolution].JPG](albums/userpics/11603/thumb_DSC06037%20%5BDesktop%20Resolution%5D.JPG)
55 views
|
|
![Filename=DSC06038 [Desktop Resolution].JPG
Filesize=130KB
Dimensions=1200x900
Date added=25.Apr 2009 DSC06038 [Desktop Resolution].JPG](albums/userpics/11603/thumb_DSC06038%20%5BDesktop%20Resolution%5D.JPG)
57 views
|
|
![Filename=DSC06039 [Desktop Resolution].JPG
Filesize=142KB
Dimensions=1200x900
Date added=25.Apr 2009 DSC06039 [Desktop Resolution].JPG](albums/userpics/11603/thumb_DSC06039%20%5BDesktop%20Resolution%5D.JPG)
55 views
|
|
![Filename=DSC06040 [Desktop Resolution].JPG
Filesize=182KB
Dimensions=1200x900
Date added=25.Apr 2009 DSC06040 [Desktop Resolution].JPG](albums/userpics/11603/thumb_DSC06040%20%5BDesktop%20Resolution%5D.JPG)
54 views
|
|
![Filename=DSC06041 [Desktop Resolution].JPG
Filesize=141KB
Dimensions=1200x900
Date added=25.Apr 2009 DSC06041 [Desktop Resolution].JPG](albums/userpics/11603/thumb_DSC06041%20%5BDesktop%20Resolution%5D.JPG)
61 views
|
|
![Filename=DSC06042 [Desktop Resolution].JPG
Filesize=122KB
Dimensions=1200x900
Date added=25.Apr 2009 DSC06042 [Desktop Resolution].JPG](albums/userpics/11603/thumb_DSC06042%20%5BDesktop%20Resolution%5D.JPG)
58 views
|
|
![Filename=DSC06043 [Desktop Resolution].JPG
Filesize=187KB
Dimensions=1200x900
Date added=25.Apr 2009 DSC06043 [Desktop Resolution].JPG](albums/userpics/11603/thumb_DSC06043%20%5BDesktop%20Resolution%5D.JPG)
66 views
|
|
![Filename=DSC06044 [Desktop Resolution].JPG
Filesize=275KB
Dimensions=1200x900
Date added=25.Apr 2009 DSC06044 [Desktop Resolution].JPG](albums/userpics/11603/thumb_DSC06044%20%5BDesktop%20Resolution%5D.JPG)
73 views
|
|
![Filename=DSC06045 [Desktop Resolution].JPG
Filesize=170KB
Dimensions=1200x900
Date added=25.Apr 2009 DSC06045 [Desktop Resolution].JPG](albums/userpics/11603/thumb_DSC06045%20%5BDesktop%20Resolution%5D.JPG)
72 views
|
|
![Filename=DSC06046 [Desktop Resolution].JPG
Filesize=234KB
Dimensions=1200x900
Date added=25.Apr 2009 DSC06046 [Desktop Resolution].JPG](albums/userpics/11603/thumb_DSC06046%20%5BDesktop%20Resolution%5D.JPG)
88 views
|
|
![Filename=DSC06047 [Desktop Resolution].JPG
Filesize=191KB
Dimensions=1200x900
Date added=25.Apr 2009 DSC06047 [Desktop Resolution].JPG](albums/userpics/11603/thumb_DSC06047%20%5BDesktop%20Resolution%5D.JPG)
76 views
|
|
![Filename=DSC06048 [Desktop Resolution].JPG
Filesize=137KB
Dimensions=1200x900
Date added=25.Apr 2009 DSC06048 [Desktop Resolution].JPG](albums/userpics/11603/thumb_DSC06048%20%5BDesktop%20Resolution%5D.JPG)
74 views
|
|
![Filename=DSC06049 [Desktop Resolution].JPG
Filesize=169KB
Dimensions=1200x900
Date added=25.Apr 2009 DSC06049 [Desktop Resolution].JPG](albums/userpics/11603/thumb_DSC06049%20%5BDesktop%20Resolution%5D.JPG)
80 views
|
|
![Filename=DSC06051 [Desktop Resolution].JPG
Filesize=234KB
Dimensions=1200x900
Date added=25.Apr 2009 DSC06051 [Desktop Resolution].JPG](albums/userpics/11603/thumb_DSC06051%20%5BDesktop%20Resolution%5D.JPG)
76 views
|
|
![Filename=DSC06052 [Desktop Resolution].JPG
Filesize=273KB
Dimensions=900x1200
Date added=25.Apr 2009 DSC06052 [Desktop Resolution].JPG](albums/userpics/11603/thumb_DSC06052%20%5BDesktop%20Resolution%5D.JPG)
77 views
|
|
![Filename=DSC06053 [Desktop Resolution].JPG
Filesize=154KB
Dimensions=900x1200
Date added=25.Apr 2009 DSC06053 [Desktop Resolution].JPG](albums/userpics/11603/thumb_DSC06053%20%5BDesktop%20Resolution%5D.JPG)
71 views
|
|
![Filename=DSC06054 [Desktop Resolution].JPG
Filesize=211KB
Dimensions=1200x900
Date added=25.Apr 2009 DSC06054 [Desktop Resolution].JPG](albums/userpics/11603/thumb_DSC06054%20%5BDesktop%20Resolution%5D.JPG)
83 views
|
|
![Filename=DSC06055 [Desktop Resolution].JPG
Filesize=197KB
Dimensions=1200x900
Date added=25.Apr 2009 DSC06055 [Desktop Resolution].JPG](albums/userpics/11603/thumb_DSC06055%20%5BDesktop%20Resolution%5D.JPG)
90 views
|
|
![Filename=DSC06057 [Desktop Resolution].JPG
Filesize=201KB
Dimensions=1200x900
Date added=25.Apr 2009 DSC06057 [Desktop Resolution].JPG](albums/userpics/11603/thumb_DSC06057%20%5BDesktop%20Resolution%5D.JPG)
74 views
|
|
![Filename=DSC06060 [Desktop Resolution].JPG
Filesize=134KB
Dimensions=1200x900
Date added=25.Apr 2009 DSC06060 [Desktop Resolution].JPG](albums/userpics/11603/thumb_DSC06060%20%5BDesktop%20Resolution%5D.JPG)
54 views
|
|
![Filename=DSC06061 [Desktop Resolution].JPG
Filesize=109KB
Dimensions=1200x900
Date added=25.Apr 2009 DSC06061 [Desktop Resolution].JPG](albums/userpics/11603/thumb_DSC06061%20%5BDesktop%20Resolution%5D.JPG)
60 views
|
|
![Filename=DSC06062 [Desktop Resolution].JPG
Filesize=183KB
Dimensions=1200x900
Date added=25.Apr 2009 DSC06062 [Desktop Resolution].JPG](albums/userpics/11603/thumb_DSC06062%20%5BDesktop%20Resolution%5D.JPG)
52 views
|
|
![Filename=DSC06063 [Desktop Resolution].JPG
Filesize=157KB
Dimensions=1200x900
Date added=25.Apr 2009 DSC06063 [Desktop Resolution].JPG](albums/userpics/11603/thumb_DSC06063%20%5BDesktop%20Resolution%5D.JPG)
57 views
|
|
![Filename=DSC06064 [Desktop Resolution].JPG
Filesize=179KB
Dimensions=1200x900
Date added=25.Apr 2009 DSC06064 [Desktop Resolution].JPG](albums/userpics/11603/thumb_DSC06064%20%5BDesktop%20Resolution%5D.JPG)
56 views
|
|
![Filename=DSC06065 [Desktop Resolution].JPG
Filesize=159KB
Dimensions=1200x900
Date added=25.Apr 2009 DSC06065 [Desktop Resolution].JPG](albums/userpics/11603/thumb_DSC06065%20%5BDesktop%20Resolution%5D.JPG)
56 views
|
|
![Filename=DSC06066 [Desktop Resolution].JPG
Filesize=187KB
Dimensions=1200x900
Date added=25.Apr 2009 DSC06066 [Desktop Resolution].JPG](albums/userpics/11603/thumb_DSC06066%20%5BDesktop%20Resolution%5D.JPG)
56 views
|
|
![Filename=DSC06067 [Desktop Resolution].JPG
Filesize=154KB
Dimensions=1200x900
Date added=25.Apr 2009 DSC06067 [Desktop Resolution].JPG](albums/userpics/11603/thumb_DSC06067%20%5BDesktop%20Resolution%5D.JPG)
58 views
|
|
![Filename=DSC06068 [Desktop Resolution].JPG
Filesize=185KB
Dimensions=1200x900
Date added=25.Apr 2009 DSC06068 [Desktop Resolution].JPG](albums/userpics/11603/thumb_DSC06068%20%5BDesktop%20Resolution%5D.JPG)
62 views
|
|
![Filename=DSC06069 [Desktop Resolution].JPG
Filesize=150KB
Dimensions=1200x900
Date added=25.Apr 2009 DSC06069 [Desktop Resolution].JPG](albums/userpics/11603/thumb_DSC06069%20%5BDesktop%20Resolution%5D.JPG)
85 views
|
|
![Filename=DSC06071 [Desktop Resolution].JPG
Filesize=177KB
Dimensions=1200x900
Date added=25.Apr 2009 DSC06071 [Desktop Resolution].JPG](albums/userpics/11603/thumb_DSC06071%20%5BDesktop%20Resolution%5D.JPG)
71 views
|
|
![Filename=DSC06072 [Desktop Resolution].JPG
Filesize=106KB
Dimensions=1200x900
Date added=25.Apr 2009 DSC06072 [Desktop Resolution].JPG](albums/userpics/11603/thumb_DSC06072%20%5BDesktop%20Resolution%5D.JPG)
55 views
|
|
![Filename=DSC06073 [Desktop Resolution].JPG
Filesize=118KB
Dimensions=1200x900
Date added=25.Apr 2009 DSC06073 [Desktop Resolution].JPG](albums/userpics/11603/thumb_DSC06073%20%5BDesktop%20Resolution%5D.JPG)
56 views
|
|
![Filename=DSC06074 [Desktop Resolution].JPG
Filesize=129KB
Dimensions=1200x900
Date added=25.Apr 2009 DSC06074 [Desktop Resolution].JPG](albums/userpics/11603/thumb_DSC06074%20%5BDesktop%20Resolution%5D.JPG)
50 views
|
|
![Filename=DSC06075 [Desktop Resolution].JPG
Filesize=146KB
Dimensions=1200x900
Date added=25.Apr 2009 DSC06075 [Desktop Resolution].JPG](albums/userpics/11603/thumb_DSC06075%20%5BDesktop%20Resolution%5D.JPG)
60 views
|
|
![Filename=DSC06076 [Desktop Resolution].JPG
Filesize=194KB
Dimensions=1200x900
Date added=25.Apr 2009 DSC06076 [Desktop Resolution].JPG](albums/userpics/11603/thumb_DSC06076%20%5BDesktop%20Resolution%5D.JPG)
64 views
|
|

Top of pass to Semonkong104 views
|
|
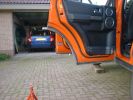
door stops108 views
|
|
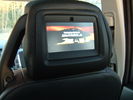
Top Gun112 views
|
|
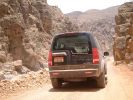
Down from the top following the track along the bottom of the wadi138 views
|
|
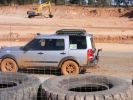
285 viewsSo guess which idiot left their tow hitch on? No wonder we stopped!
|
|
237 viewsMike is finally stopped almost at the end of pit 3!
|
|
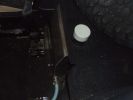
Internal 40 Litre water tank - top view of left side of tank105 viewsShows my spare tyre, but also bright white protective cap of top fill point and vent. Blue hose is water dispensing point. Note seat bracket bolt secures tank to D3. Similar bolt point on other side. Only these two bolts secure the tank and it is very secure.
|
|
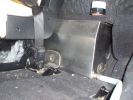
Left hand side of internal 40 Litre water tank161 viewsView from floor looking towards tank. Top white cover is 50mm plastic pipe cap. It protects the tank vent valve. Dispensing hose is at lower corner of tank
|
|
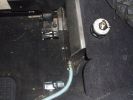
Top view Left side of water tank128 viewsThis view shows the protective cap off, displaying tank vent point.
|
|

Top view of "Uncle Ray" discrete winch tray, after painting.104 viewsNote that towards the upper right there is a notch in the tray. This is needed for the specific winch's electric solenoid. The winch is a Mile Marker 12,000 lb hydraulic unit.
|
|
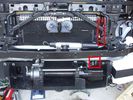
Installed winch with hydraulic hoses175 viewsThe hydraulic hoses are stiff, so I had to run them up the side of the radiator (can just see inside red boxes) to near the top of the radiator, then back down inside the engine compartment, then underneath the engine (behind the radiator) to the D4's power steering rack, where the hoses become metal. This hose routing may not be possible if the fuel-burning heater is in place (we don't have those in Aust and the space allowed room for my hands to bend and run the hoses without kinking).
|
|
Looking out from the top of the slate mine188 views
|
|
CALENDAR 2008 ENTRY977 viewsView from top of Honnister Slate Mine. Disco3.co.uk Lake District trip 10 Feb 2007
|
|

Top of Honnister Mine - Icy descent.229 views
|
|

Over The Top load liner175 views
|
|

Over The Top load liner175 views
|
|

Over The Top Load Space Liner190 views
|
|

Over The Top front seat covers167 views
|
|
FL2 at top of slate mine154 views
|
|
Brief stopover on Loch Awe54 views
|
|
Stopover at Grisdale Forest55 views
|
|
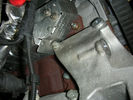
Top Bolt Alternator Bracket235 views
|
|
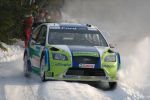
Gronholm flat out SS9 Rally Sweden 2006137 views
|
|
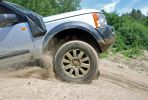
423 viewsCALENDAR ENTRY
Traction Control fighting for life at the top of \'The Hill\' in Tong - but it succeeded!
|
|
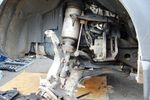
Top Swivel Joint100 views
|
|
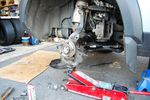
reconnecting top swivel joint133 views
|
|
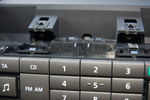
Top of Radio116 views
|
|
fitted stronger rear strut holders. not a great mod. the holes i drillled for the "R" clips are the best mod, as they stop the legs from sliding up under pressure. requires bracing inside to stop chassis bending100 views
|
|

Top of roof mount antenna327 views
|
|
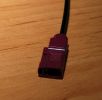
Photo off coax connector on roof top ariel, can you identify it? The name and type is needed.273 views
|
|
120 viewsThe plate installed on top of the bracket
|
|
![Filename=DSC_5074 [Desktop Resolution].JPG
Filesize=196KB
Dimensions=1203x800
Date added=03.Apr 2009 DSC_5074 [Desktop Resolution].JPG](albums/userpics/14017/thumb_DSC_5074%20%5BDesktop%20Resolution%5D.JPG)
52 views
|
|
![Filename=DSC_5077 [Desktop Resolution].JPG
Filesize=212KB
Dimensions=1203x800
Date added=03.Apr 2009 DSC_5077 [Desktop Resolution].JPG](albums/userpics/14017/thumb_DSC_5077%20%5BDesktop%20Resolution%5D.JPG)
62 views
|
|
![Filename=DSC_5149 [Desktop Resolution].JPG
Filesize=125KB
Dimensions=1203x800
Date added=03.Apr 2009 DSC_5149 [Desktop Resolution].JPG](albums/userpics/14017/thumb_DSC_5149%20%5BDesktop%20Resolution%5D.JPG)
71 views
|
|
![Filename=DSC_5204 [Desktop Resolution].JPG
Filesize=181KB
Dimensions=532x800
Date added=03.Apr 2009 DSC_5204 [Desktop Resolution].JPG](albums/userpics/14017/thumb_DSC_5204%20%5BDesktop%20Resolution%5D.JPG)
61 views
|
|
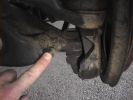
Lock Stop. Grease to stop the graunch.892 views
|
|
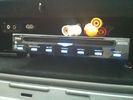
DVD Player63 viewsVeba DVD Player fitted into top glove box, AUX in for connection of Ipod, Games COnsoles etc. Remote control with sensor mounted by rear view mirror.
|
|
Thread upload7 viewsImage uploaded in thread 186253
|
|
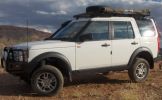
Widow maker - Alice Springs114 viewsHyper extended - Climbed the widow maker and the suspension found its way to this position by the top without any intervention.
|
|
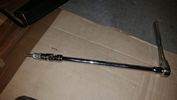
Thread upload17 viewsThis is how you reach that TOP BOLT holding your air compressor bracket on. 10" extension, swivel, and 10mm socket taped so it won't fall off while your feeding it through the air compressor maze.
|
|
faultmate EAS rear bump stop97 views
|
|

Thread upload2 viewsImage uploaded in new thread
|
|
Thread upload39 viewsImage uploaded in thread 69791
|
|
Finished Passenger Kick panel area127 viewsMissing connetor (left most grey) & wiring in, (plastic bracket was broke will use the one in the car) Airbag wires & connector to connector previously cut replaced (on top of grey one to right).
And you can even see the 2 new speaker wires going into the Pass door connector at the very bottom.
|
|
Extra wies at Amp area101 viewsAdditional speaker wires loomed in at Amp connectors can be seen being routed at the top.
|
|
The best Windows Vista desktop - slight modified - ahem!192 views
|
|
Sarnie stop214 views
|
|
31 views
|
|
31 viewsuna volta ho fatto fuoristrada...
|
|
dischi forati e baffati16 views
|
|
Thread upload23 viewsImage uploaded in thread 105613
|
|

Top of the world... almost54 views
|
|

Series LR at Oil Sands Plant in Northern Canada circa 1968744 viewsThis is an end of shift picture taken about 1968 at the Great Canadian Oil Sands (GCOS) plant while under construction in the Ft McMurray area of Northern Canada.
I was surprised to see the yellow coloured Series single cab hardtop pickup parked in about the centre of the picture. I would say it is one of the few on site as most vehicles were Chevrolet's, (as are the other three trucks elsewhere in the view). The yellow painted vehicles including the Land Rover are most likely Bechtel owned - not leased - yes, that long ago now.
|
|

Fix stiff gear selector or jumping out of drive into neutral32 viewsThis is a document culled from a topic about a simple fix to teh gearbox selector lever that fixes a problem with jumping out of drive into neutral.
I made the document to give to my local independent and thought it might be useful for others.
Thanks to disco_mikey, EdF and Robbie from the original post whose information and photos made this possible (I take no credit for anything here apart from errors).
|
|

Fix stiff gear selector or jumping out of drive into neutral17 viewsUpdated 19 Dec 2012
This is a document culled from a topic about a simple fix to the gearbox selector lever that fixes a problem with jumping out of drive into neutral.
I made the document to give to my local independent and thought it might be useful for others.
Thanks to disco_mikey, EdF and Robbie from the original post whose information and photos made this possible (I take no credit for anything here apart from errors).
Updated after I did this fix on my own car.
|
|

Click this, I can't stop watching it, it's epic!!52 views
|
|

Thread upload0 viewsImage uploaded in thread 198490
|
|
D3 in Kakadu National Park, on the track into Graveside Gorge51 viewsKakadu National Park is in a World Heritage area, with the entrance about 3 hours out of Darwin. It took another hour to get to the un-marked track into Graveside Gorge, which then took three hours to travel the 41km in. Not a tough track, but a series of big wash-outs with very deep and soft sand in the creek beds made driving fun. The most amazing thing, was that we had the whole place to ourselves. No marked tracks, so bushwalking involved blazing a trail using GPS and topo maps to find the way.
|
|
Thread upload12 viewsImage uploaded in thread 154866
|
|

16 views
|
|

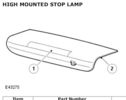
high level brake light removal540 views
|
|

High Mounted Stoplamp Removal.pdf443 views
|
|

Thread upload0 viewsImage uploaded in thread 195748
|
|
Thread upload0 viewsImage uploaded in thread 195748
|
|
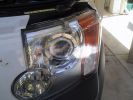
Headlight Protector Top Fixing380 views
|
|
Les Falaises Cahors France153 viewsOur first hotel stop. View of car and coffin from our room.
|
|
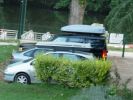
On the top road between Windermerfe and Ulswater lakes168 views
|
|
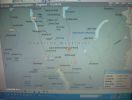
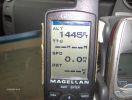
Bit foggy outside, so got out the Laptop to get a place fix139 views
|
|
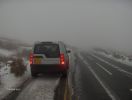
Pit stop ..145 views
|
|
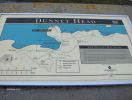
......... So, then I found out that in fact Dunnet Head is the top most point of the UK. Had to go ..146 views
|
|
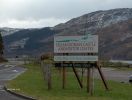
Pit Stop163 views
|
|
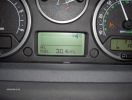
At the 1303 mile mark, Av MPG was 30.4 !!!!!!!!!!!!! With all teh start / stop, and general moochign about, this was quite good !305 views
|
|
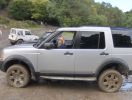
Photo stop59 views
|
|
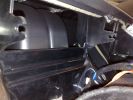
OE 2 cut dash showing top72 views
|
|

Parts diagram for 2007 D3 TDV6 HSE glass top aerial fin42 views
|
|

Side Protection Bars - top44 views
|
|

Topside of the circuit board144 viewsLooks better from the top :D
|
|
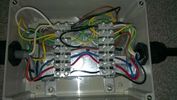
Topside124 viewsWiring from the top, one additional earth added to the internal box after the picture was taken.
|
|

President Johnson II in its current position17 viewsThis CB was installed some years ago and still is at the same location.
However, I'm planning to move it to the head unit area.
As such, I'm looking around to replace my low end head unit with a single DIN radio and the CB on top of it.
|
|
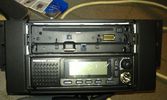
73 viewsThe Pioneer DEH X9500BT on top with the CB President Johnson II beneath.
I had to cut the bottom part of the CB 2 DIN conversion kit in order to have the supplied cover with the facia in place as it should.
I eventually didn't use the supplied facia of the radio as it's bottom part was covered by the CB's kit.
|
|
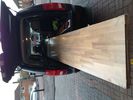
4m worktop34 views
|
|
Impact Skid after hitting wayward Hilux207 viewsDisco3 was stopped when a skidding Hilux collided with it. Collision caused Disco3 to slide backwards
|
|
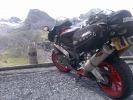
Top of stelvio pass96 viewsI know not in my disco. . but one hell of a road to travel on two or four wheels
|
|
Playing with laptop, GPS, Mobile Broadband and Mappoint/GoogleEarth75 views
|
|

nice view from the top but its getting there that counts25 views
|
|

2.5.3 Top Menu and Cog15 views
|
|
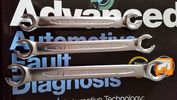
Toptul flare wrench 18 views
|
|

Toptul flare wrench 28 views
|
|
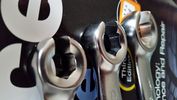
Toptul8 views
|
|
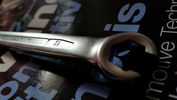
Toptul flare wrench 48 views
|
|
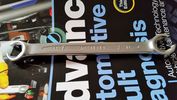
Toptul flare wrench 59 views
|
|

Series door tops4 views
|
|
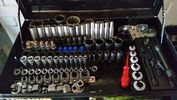
Topbox19 views
|
|

Topbox28 views
|
|
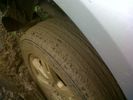
Oops16 viewsThat's why it stopped moving forwards and started moving down!
|
|

Top of strut22 views
|
|
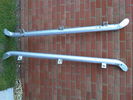
Tops of bar, sorry about the muck on them. 125 views
|
|
Assemblato senza top41 views
|
|

Series 3 300tdi11 viewsMy Series 3 patiently waiting for the D3 to stop breaking so I can rewire the thing properly!
|
|
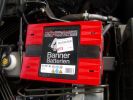
Aux Battery1054 viewsShows the aux 65Ah battery in place, top left of the picture is the 100amp circuit breaker feeding items sutch as , inverter, sub bass amplifiers, computer.
|
|
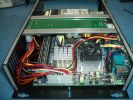
1310 viewsA view of the PC opened, the board at the top is the power supply with the start stop timing built in.
|
|
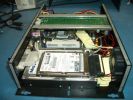
1225 viewsA view of the inside of the car PC, the laptop drive is the system drive and the large 400Gig drive is for storage.
|
|
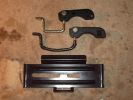
Roof box fixings377 viewsTop original with new one in middle!
Had to make the hole to the left of the plate longer to fit new brackets, it was the same size!
|
|
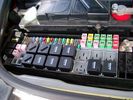
Picture of the engine compartment fuse panel5758 viewsEngine compartment fuse panel located near the battery. This is where F3E, (5 amp), F26E, (20 amp), Fuseable link 10E, (60 amp) and Relay 7E, the now upgraded 70 amp air compressor motor relay, part number YWB500220, (E is for Engine compartment fuse box), are all located. Fuse F35P, (5 amp), is inside the Passenger compartment behind the lower glove box door.
To keep the suspension from going down to the stops when driving, (or parked), it appears that it is only really necessary to remove F26E to depower the exhaust valve and generally keep all the valve block solenoid valves in a closed position trapping whatever air is within the air springs. F3E gets its power thru F26E, so when F26E is removed, the F3E circuit is automatically de-powered. F35P is more interesting in that battery power goes thru the ignition switch and F35P and then into the air suspension control unit. Apparently however, if F26E is removed, removing the F35P is not needed even when the engine is running.
With all fuses still in, if you have a problem, in practice, ideally, the compressor still works and will raise the 3 to an appropriate height. If so, one can then shut the engine off and allow the computers to go to sleep and then you remove the fuse(s). In actual practice, it seems that one need only pull the F26E fuse and can do so with the engine running. All the same, one might consider that the 3 is first a mobile computer, and secondly a 4x4. Computers prefer to go to sleep before the plug is pulled on them, however given that F26E circuit is always alive, then the computer never sleeps. With the fuse(s) pulled, and if you are still up, you can now be a 4x4 instead of a low rider. The whole purpose of the fuse pulling exercise is to depower the one and only system exhaust valve that is physically located within the compressor unit, (to keep it from opening), and secondarily to keep closed the four air spring solenoids within the block valves. This also shuts the air compressor down and stops the air compressor from making air even if the compressor is still good. That is why you initially need the fuse(s) in to allow the compressor to make air if it can.
|
|

Switch is blue colour thing thru the rectangular opening.3152 viewsThe blue coloured plastic bit thru the rectangular opening is the brake light switch. The fist time, I found it easier remove the switch by dropping the horizontal plastic panel, (two screws), and then slipping my hand in and rotating the switch clockwise 1/4 turn. The second time, I was able to remove the switch thru the rectangular opening and did not need to remove the horizontal lower panel. Obviously, I had to remove the sloping knee pad panel, (note sort of hinged at the bottom so pull back from the top.)
Regardless, do not touch the brake pedal - just let it sit where it wants to. One has to first remove the angled knee pad panel that sits under the steering wheel. It can be pulled from the top corner at the door side. Pulling releases a pair of those U shaped metal clips that LR loves so dearly. You have to pull quite hard. The bottom is held by a couple of plastic fingers in a couple of slots so you pull at the top till the two clips release and then rotate the panel and pull upwards a bit.
To remove the switch, you rotate it clockwise and pull outwards. Rotating the switch clockwise automatically retracts the plunger back into the switch body away from the brake pedal arm.
Similarly when you install the new switch, the required 1/4 turn anti clockwise rotation action releases the plunger so it lays up against the brake pedal arm and at the same time, secures the switch in place.
To remove the electrical wires, the switch will drop below the horizontal pad and hang from the wires so unclipping the electrical connector plug is fairly easy to do.
|
|
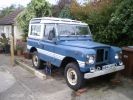
New door tops now fitted. Just needs new fuel tank, replacement footwells and a spot weld or two on the chassis!! 58 views
|
|
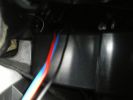
110 viewsview of wires inside dash (from where plug was removed). I ran them through the pre-existing slit in the top of the glove box to wiring loom connector.
|
|
101 viewsexisting slot in top side of glove box used.
|
|
Rest stop after our first hill descent - line of cars stretched way back up the hill that disappears up to right of photo.198 views
|
|
Rest stop after our first hill descent.190 viewsMode: TR Rock Crawl with HDC turned off as I found that the ABS kicked in too much. As we were in convoy I maintained a safe distance from car in front and just "feathered the brakes" as suggested by an instructor.
|
|
Lunch stop near Wheel Turner Mine 143 viewsGammon Ranges north of Umberatana
|
|

top left hand side fitted66 viewsto show how its angled to fit in with the mouldings
|
|
Top of Bomber lanr Barmouth estuary.155 views
|
|
Before30 viewsBefore I got the body moldings. In the foreground is the first reason for getting a top notch ride.
|
|
Sottoporta treeslide60 views
|
|
top side of chapel in le frith at 4pm today84 viewsthis is what my discovery is built for to tow a 3.5ton generator and carry 900KG of cable to keep the power on for the people of hope village in the peak district
|
|
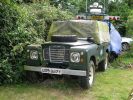
Series III stopping me cutting hedge...71 views
|
|
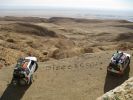
2009 Calendar Entry617 viewsView over Chott El Jerid, Tunisia Feb 2008 from the top of Rommels Pass, Redeyef
|
|

Oh... Nature320 viewsSome times one needs to stop and take a look!
|
|
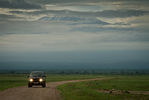
Sunday, December 4th, 2011 at 7a.m. in Amboseli National Park, Kenya (East Africa)227 viewsThe top of Mt. Kilimanjaro showed it self for 15 minutes in the morning and my buddy snapped this picture of me and my Disco 3 from a Defender while on a morning game drive
|
|
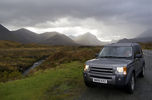
Isle of Skye229 viewsHaving just seen the view in my rear view mirror i thought i'd stop and get a photo of the Disco. This was about 15 minutes north of Portree on the Isle of Skye. A stunning place to visit. With the clouds in the distance just letting the sun peek through them i thought it was worth uploading. Hope you like it.
|
|
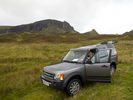
Isle of Skye217 viewsStopping for some lunch just at the foot of Quiraing on the Isle of Skye.
|
|
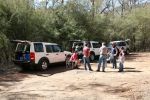
Lunch stop - Big Rivver251 views
|
|
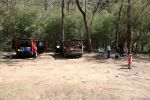
Lunch stop - Big River222 views
|
|
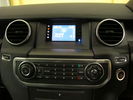
D4 Lowest Grade Radio - Wide Angle75 viewsThe CD player is at the bottom of the picture, the control buttons in the middle, and at the top is the screen with colour-lit icons on the left to indicate source, and bluetooth icon on the right to indicate connectivity. There are also two hardware buttons for hour/minute clock setting.
|
|
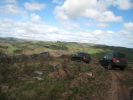
Boughrood279 viewsAt the top
|
|
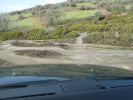
view from the top of the smaller but tricky drop.184 views
|
|
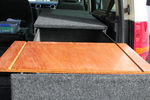
50 viewsUnderside of table top. Grooves created by a router to stop every thing sliding off. Marine Ply. My birthday present!
|
|
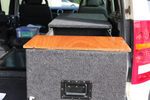
50 viewsTable top for the drawer, normally sits long ways in the top of the drawer
|
|
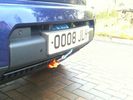
Redg plate mounting127 viewsThe original redg plate mounting was modified. An L-shaped piece of plastic now sticks out rearward from the top of the mounting and this hooks over the back of the top edge of the bumper cover. Then 2 spring clips hold the bottom edge of the mounting in place. Proximity sensor and surround camera seen unaffected.
|
|
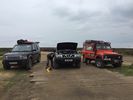
Top of Rutland rigg12 views
|
|
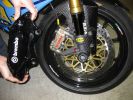
Smaller ones cost more118 viewsIt\'s hard to think that one of the small gold Brembos costs more than the complete set on my D3!!!
Stopping power of both is awesome!!
|
|
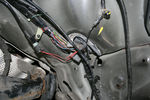
Left inner wheel arch, top128 views
|
|

Ken Blocks Stunt Motor (as seen on top gear)40 views
|
|

Starvation lake,BC, Canada22 viewsView from top trail
|
|
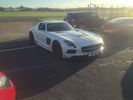
17 viewsMercedes,just after filming for Top Gear
|
|

D3 Rear Tailgate switch headliner connector8 viewsThe black connector in the headliner of a D3, showing the brown wire being pushed back and not making contact, and stopping the rear button from working
|
|

Thread upload6 viewsImage uploaded in thread 177056
|
|

Thread upload2 viewsImage uploaded in thread 193462
|
|
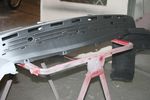
Rear Bumper High Build Primer & Showing Tread Plate Removed & Fixing Points Top84 views
|
|
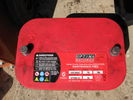
optima redtop58 views
|
|

CALENDAR ENTRY247 viewsCRIMEA - between Bahchisaray and Sevastopol - 2011-07-05 19:43:43 220 m N44 38.481 E33 41.940 Winch was a must to get out of there :)
|
|
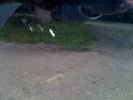
Small scratch on off side rear door towards the top42 views
|
|
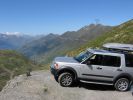
Col de la Tourmalet France 200952 viewsHolidays in France high up in the Pyrenees we decided to drive up to the top of the Pic du Midi at an altitude of 2877m instead of taking the £60-00 cable car. Just don\'t look down. What a Day!
|
|
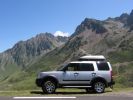
222 viewsHolidays in France high up in the Pyrenees we decided to drive up to the top of the Pic du Midi at an altitude of 2877m instead of taking the £60-00 cable car. Just don\'t look down. What a Day!
|
|
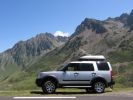
59 viewsHolidays in France high up in the Pyrenees we decided to drive up to the top of the Pic du Midi at an altitude of 2877m instead of taking the £60-00 cable car. Just don\'t look down. What a Day!
|
|
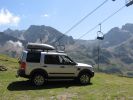
Why take the lift when you have a Landrover49 viewsHolidays in France high up in the Pyrenees we decided to drive up to the top of the Pic du Midi at an altitude of 2877m instead of taking the £60-00 cable car. Just don't look down. What a Day!
|
|
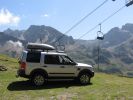
Why take the lift when you have a Landrover233 viewsHolidays in France high up in the Pyrenees we decided to drive up to the top of the Pic du Midi at an altitude of 2877m instead of taking the £60-00 cable car. Just don\'t look down. What a Day!
|
|
| 695 files on 2 page(s) |
 |
1 |  |
|