| Search results - "Was" |

RRSport Auto TDV6 0-100-0 times and G Forces156 viewsAir Temp 18, Dry conditions.
Best Acceleration G was .785 and decelleration G was 1.55
|
|
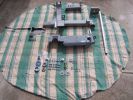
The full complement of bits and pieces, major parts back from the powder coaters, all bolts nuts washers replaced with stainless steel241 views
|
|

0000 LR Bluetooth dealer Kit install instructions1591 viewsThis 17 page pdf is mostly a series of pictures showing how to install the original Land Rover dealer installed Bluetooth kit for circa 2005 / 2006 three's. Also included are three wiring diagrams sheets related to the pairing code 0000 Bluetooth install.
This pdf is useful if you are now removing the 0000 kit to install the optical 2121 MOST D4 module, an easier install than the 0000 kit ever was.
|
|
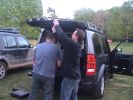
Ken and Slimer tried to steal parts whilst no one was looking!190 views
|
|

51 viewsD44 front winch bumper. Ali washer bottle. D44 rear h/d bumper. centre diff lock. 235x85x16 pirelli muds. OME +2" springs & shocks. front diff guard. side tree bars. wired for roof CB. Aux fuse block. safari snorkel. extended wading tubes. the list goes on...
|
|

Fog Light & Washer Jet Install91 views
|
|
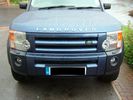
Fog Light & Washer Jet Install92 views
|
|
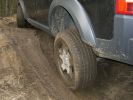
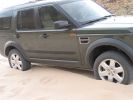
202 viewsDidn´t loose contact, but grip was zero.
|
|
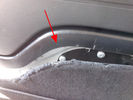
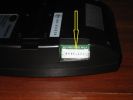
Rimozione pannello dalla sponda - Tailgate panel removing43 viewsPer togliere il pannello moquettato dalla sponda ho fatto leva con un cacciavite abbastanza grosso nel punto indicato, è stato veloce e non ho rovinato niente.
To remove the carpeted panel away from the tailgate I used a big enought screwdriver at the point indicated, it was fast and I have not ruined anything.
|
|

Mitsubishi Montero Headlight Washer41 views
|
|
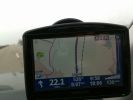
How fast?230 viewsI was driving along the Autobahn, glanced down at the speedo which was showing 140 mph, the Tomtom was telling the truth at 132 mph, but by the time I had switched the phone to camera I had dropped 2 mph, didnt try and do it again as there was no need.
|
|
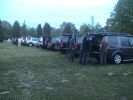
Everyone heard that DG was at the bar161 views
|
|
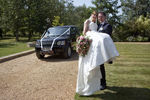
Got Married!241 viewsOccasionally the car does get a clean/polish, this was a special occasion :-)
|
|
02 On banks of Darling River, Back of Bourke157 views"Back of Bourke" is the typical definition of the start of the Australian Outback. This was after crossing the Darling River "back of Bourke" on 8 Jan 08. We were the first vehicle to start driving after floods had closed (first time in 8 yrs there was any water in the river).
|
|

This is why the bus was canceled!39 views
|
|

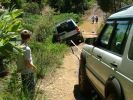
That WAS steep!137 views
|
|

Silverstone Classic Media Day176 viewsAttended the media day for the Silverstone Classic, took 3 cars to display & tell 300 journalists what we do at the show.
David Coultard was one of the drivers who were taking the journalists around the track.
|
|
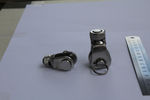
114 viewsboth adapter the larger one needed a bit chopped off the botom and the washers to fit
|
|
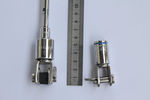
127 viewsleft hand adater adopted, decided right hand adapter was ok but right hand one fits and is stronger
|
|
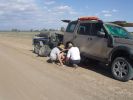
03 First bit of tyre/wheel trouble244 viewsIn the outback a tyre suddenly blew. "No worries" we thought, as we had 3 spares (+ two more if we abandoned the trailer), 150l of water, 3 days of food, and an EPIRB if things got really bad. At the time I didn\'t fully appreciate the fact that my index got a blister from the burning heat of one of the wheel nuts. It was 45 deg C at the time, so everything was hot.
|
|
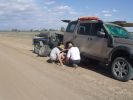
03 The first bit of tyre/wheel problem251 viewsSomewhere in the Australian outback on a 45 deg C day in Jan 08, a D3 had a bit of a flat tyre problem. "No worries, mate" st we had 3 spares (plus 2 more if we abandon the trailer), 150l of water, 4 days of food, and an EPIRB if things really go crook. The first clue that this was not a "normal" flat was when I handled a wheel nut and ended up with a blister from a burning hot nut (the ambient wasn\'t THAT hot).
|
|
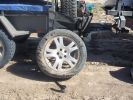
04 Damaged Tyre300 viewsYes, there\'s no doubt that this was a flat tyre. The ultra hot wheel nuts, look of the flat (note in a later photo that the back of the tyre appeared okay) and increased fuel consumption should have been a clue, but it was 45 deg C, and we had been doing about 105 km/hr on a dirt road for hours, so we just assumed it was a flat = WRONGO!
|
|
Thankfully it\'s nearly a week old. they wanted to dig underneath my drive to install gas. Nov 5th, Bang,78 viewsNo, and i was worried about the rangerover!
|
|
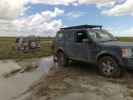
really sticky mud171 viewsCan\'t really see it in the pic, but off the road the mud was treacherous
|
|
05 No doubt the tyre is flat274 viewsThis is the view of the flat tyre. Again, didn\'t think it anything more than a "normal" explosive blowout, as the tyre was about 90% worn, we were heavily loaded, it was 45 deg C, and driving 105 km/ho on a rough dirt road in the outback.
|
|
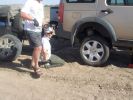
06 Spare tyre on and still suffering from hot wheel nuts296 viewsManaged to get ultra hot wheel nuts back on the spare (using the original 19" D3 wheel, vs the 19" RRS wider wheel which blew - shown in left of photo). Pity we didn\'t note that the disk brake was EXTREMELY hot at this time.
|
|

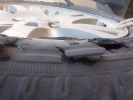
07 Back side of failed tyre340 viewsThis is the back of the blown tyre. It looks like any other worn tyre which has run a bit while flat. Note that we were running on wider 19" RRS wheels (have 4 19" MTRs + 1 old A/T on the original 5 wheels). Also have a rear-mount spare tyre holder which is really convenient with the wider rim and the fact that the tyre was still hot (it had some melted rubber on the other side!!)
|
|
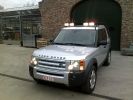
Spot lights 181 viewsFinally there was light
|
|
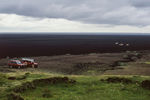
A green haven in a vast expanse of lava21 viewsThis was a great place fore some mid day leg stretcher and lunch
|
|
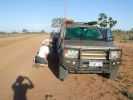
08 D3 stranded with a seized smoking wheel314 viewsAbout 1 hr after replacing the blown tyre, strange noises emanated from the stability control system and speed dropped off. Then I looked in the rear view mirror, and noted a cloud of dust along with a whiff of black smoke. This led to a very quick stop (no traffic on this route for over a week, so no worries about having to signal exiting the road). Took a look and WOW. The right rear wheel was glowing a dull red colour, and burning rubber smoke was wafting from the red glow over the fuel lines.
|
|
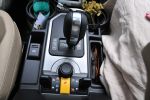
Transmission as it was.89 views
|
|

Receiver for toy rack39 viewsSensor bar was made of same heavy tube that the carrier was made from allowing a small 1 1/4" receiver to be placed on it for a multitude of toy racks of my choice. Rack adjust in and out of receiver.
|
|
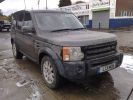
car wash281 views
|
|

10 Cracked smoking parking brake drum338 viewsNote the crack in the face of the brake. This showed mangled parking brake springs and other bits. Also a bit of melted rubber was drooling out of the crack. Started to remove the brake caliper and enjoying the flies in 45 deg C heat. Ah, the wonderful Aussie climate in January.
|
|
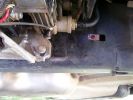
Repositioned compressor bracket737 viewsThe bracket was snapped in two, so I had it re-welded and slotted out the mounting holes so that it could be positioned 10mm higher (no longer protrudes under the chassis rail)
|
|
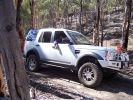
off-camber hill351 viewsAnd no, I wasn\'t hanging my arm out to balance the car - I was stopped at this point waiting for the Jeep in front to try and finish. It was a pretty steep off-camber slope!
|
|
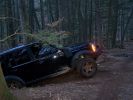
George Washington National Forest 2008154 views
|
|
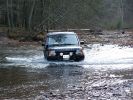
George Washington National Forest 2008139 views
|
|
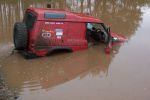
bit of water70 viewsdidnt think it was so deep. I got my feet a little wet. Car is still running and it also survived this and is still in use now. Bet a Disco 3/4 wouldn't work after this.
|
|
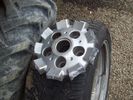
What was left24 viewsThe bitty which was left attached to the hub when the wheel failed whilst driving
|
|
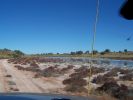
Savoury Creek, crossed it further down where there was minimal water204 views
|
|
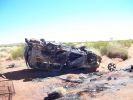
We think it was a Toyota Prado263 views
|
|
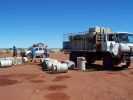
Fuel truck was in on day we were there259 views
|
|

This picture was taken with garage doors closed.42 views
|
|
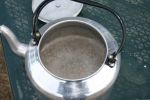
Yup, it was cold!! Water in kettle froze during the night..123 views
|
|
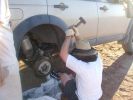
11 Lesson in removing a jammed brake assembly in the Outback378 viewsSpent the next 4 hours doing this to my D3. Gave the photos to Land Rover dealer and they did not think this constituted abuse of the vehicle. I thought that was charitable, but if we hadn\'t done this, the tow back to civilisation would have been even longer.
|
|
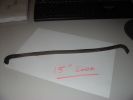
181 viewscame loose when washing car with power washer - its 15" long and hollow
|
|

12 Half way through removing a jammed disk brake in the Outback296 viewsThis was just before breaking the sledge hammer. Note we luckily carried a spare hammer. Ended up using (or breaking) every tool we had on this little repair job. Bed sheets are a good way of gathering the bits to show for the inevitable warranty claim.
|
|
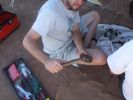
13 How to care for tools303 viewsWhat happened to the sledge hammer after 2 hours of beating my seized and cracked disk/park brake assembly to bits. Now down to 1 hammer remaining. At least by this time it was getting cooler (down to 40 deg C)
|
|

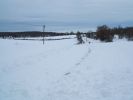
Virgin Snow129 viewsWent for a play in some new snow so I could practice and get my driving style right on close to zero friction surfces. Hard to tell from this photo, but car is parked on a 1:6 slope heading uphill, with hard packed ice under the fresh snow covering. I stopped here to practice my hill starts on ice...I was there for some time :)
|
|
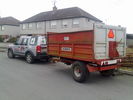
honestly officer....if it was overloaded, it would be sitting on the rear axel ??? heh heh79 viewsfunny how some cops will accept what their eyes tell must be the truth, a trailer load of logs home ....easy peasy, hahahahaha
|
|

15 First sign of bits of parking brake failure335 viewsNote the complete lack of pad from the parking brake. Not only was there no composite brake material left, but the drum was somewhat twisted and connecting bits all smashed. Also a small drip of melted rubber from wheel bearing parts....
|
|
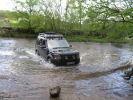
Border Rover in Boughrood,what can i say,It was an Amazing Weekend.51 views
|
|
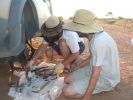
16 All the remains of a D3\'s parking brake372 viewsAfter 4 hours of hammering, finally removed the disk/park brake drum, and nearly all the parking brake bits fell to the ground. Cut rhe remaining brake cable loose as it was wrapped around the hub and a bit melted. Also having 2 jacks + 2 jack stands will support 4 hrs of hammering on the side of my D3.
|
|
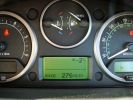
fuel range????????295 viewsfilled tank up and climbed the 21 hairpins into Alpe d\'Huez 1860m - as you can see the projected fuel range (due to the climb) suffered. The reality was different as it used virtually no fuel on the descent.
|
|
18 Brake "repairs" finished at sunset295 viewsWe just finished the repair at sunset and were driving slowly with 3 brakes. Oddly the D3 didn\'t behave any differently at 50 km/hr than it did normally. We had 4 instances of hitting the (3) skids for kangaroos before arriving in Wilcannia 3 hrs later. The brake light warning was making very distinctive noises and flashing randomly, though.
|
|
Suspension dragster mode442 viewsAfter I succesfully changed my wintertyres to summertyres, I found out that the front suspension was on access level and rear at off-road. Situation cleared after I switched engine on.
|
|

What the weekend was all about41 views
|
|
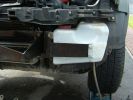
Washer Bottle Bracket874 views
|
|
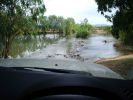
D3 in the Mary River Flood plains47 viewsIn this part of the world, on the flood plains out to Kakadu, you never get out to wade a creek first as the theory says you should. If the water isn\'t clear, like it was on this causeway, and it is this wide, you either wait for someone else who is braver than you to cross first, or you turn around and go home. These rivers are full of estuarine (salt-water) crocodiles, and they are starting to reach 7 metres in size in some still rare instances. However, seeing as a 2.5m crocodile can kill a grown man,
|
|
D3 in the Mary River Flood plains50 viewsFamily was down South with the In-laws, so I went for a drive on Boxing Day - which is the monsoon time, or \'The Wet\'. Was doing a test run with the off-raod trailer in preparation for the trip I was planning to the Kimberley six months later. Couldn\'t quite make it out of the creek, so a self-recovery was in order. Good thing it all worked, as I didn\'t see another car in over four hours. They were too smart to drive down the track I was on!
|
|
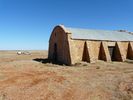
This was Australia's largest Shearing Shed - Cordillo Downs SA26 views
|
|
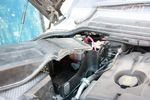
120 viewsModified aux battery box cover with shape of battery to battery cable. I also removed the tab which was fouling my traxide brain mounting bolts.
|
|
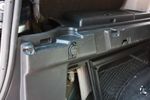
91 views12V socket done. This is permanently powered by the Aux battery. Another one was done on the other side, though that one required drilling the hole with a 29mm hole saw as there wasn't an unused hole on that side.
|
|
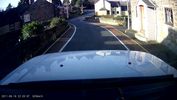
BlackVue DR40032 viewsA still from the first clip (before the date was set), good picture quality.
|
|

17 viewsjust washed her
|
|
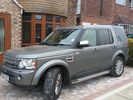
My Disco 4 HSE32 viewsUnwashed...blame outdoor LHR T1 2 week parking!!
|
|
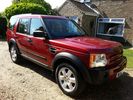
My D3200 viewsJust washed and polished.
|
|
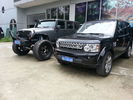
big jeep28 viewswent to collect my optima battery...this was in getting a new wing fitted
37" wheels are quite big...
|
|
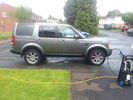
D3 First Wash42 views
|
|
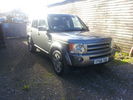
At work shining in the sunsheeeine181 viewsWashed it last night and applied Permanon Car Supershine Nano coating
|
|
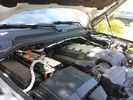
Traxide USI-160 Install501 viewsOverview picture of Traxide USI-160 upgrade install. This was an upgrade from the SC80 which performed flawlessly. The USI-160 had two relays and can deliver more amperage. As a result, the wiring was upgraded to 4/0 Welding Cable (warn) and heat shielding was added. The unit performs flawlessly to support 2 HAM Radios, Fridge, etc. Like me https://www.facebook.com/DifferentialPartsUS
|
|
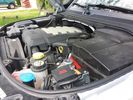
Winch Power upgrade312 viewsUsing 2 warn kits, and removing one of the wires to use on another project. The purpose was to replace the power and ground wire. I used Warn kits, which are 4/0 Welding cable. The original red #4 warped from getting a little too worn. The 2nd
Battery #1 Deka 9A94 AGM Intimidator, Battery #2 Deka 9A47 AGM Intimidator WARN 36080 28" Quick Connect Cable X 2, WARN 26405 Quick Connect Cable 7' X 2, WARN 15901 Black Cable X 1 -- winch control 72" X 1 https://www.facebook.com/DifferentialPartsUS
|
|

screen wash supplies12 viewsnever enough screen wash when family run 3 in winter
|
|

Thread upload0 viewsImage uploaded in thread 192575
|
|
As it was when I had hd enough at night, next day to wire in HF antennae293 views
|
|
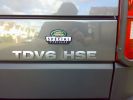
I knew it was special the moment I saw it.349 views
|
|
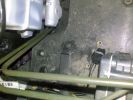
Area where Alarm Sounder was originally fixed97 views
|
|

Thread upload45 viewsImage uploaded in thread 102519
|
|
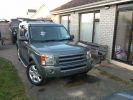
New front bumper with headlamp washers, fogs and PDC complete110 views
|
|
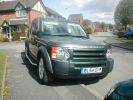
just washed..:)175 views
|
|
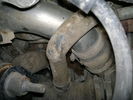
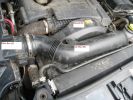
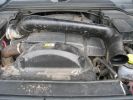
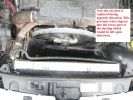
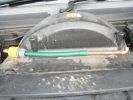
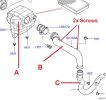
Charge Air Pipe - turbo end.101 viewsThe maint manual identifies releasing the pipe hose clip in the center of the photo. Pity who ever built this engine Put the hose in such a position that access to it was near impossible. I released the other clip at the turbo end of the flexi hose. Easy to get to but a right git to release the hose of the turbo.
|
|
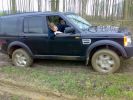
Well and truly stuck on a green lane at the weekend, there was a hill that does not show up in the photo!273 views
|
|
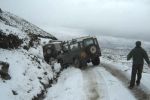
2 90's off at Lochearnhead206 viewsGuess this was why we turned round.
Photo pinched from SLROC website!
|
|

Headlight washer plugs83 views
|
|
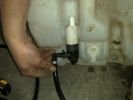
bottle with H/L washer pump and leveling sensor to the right - the space on the far right is for the w/screen pump85 views
|
|

Headlight washer hose85 views
|
|
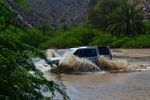
Carwash19 viewsThis seems a long time ago - down on the east coast of Oman
|
|
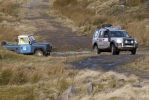
58 viewsColdweathers, classic 90 blew up its expansion bottle, he was glad of the ride to the top but funnily enuf didnt want a tow to the bottom, some say it may have been due to the fact that his 90 looked like it had been taken jet sking on the back of a D3
|
|

Wipers, Front and Rear, plus Washers description and operation.811 viewsThis 17 page pdf describes how the wipers, front and rear, plus the washers are intended to operate. Also described is how the rain sensor is designed to function along with a table of the wiper delay timing parameters.
|
|

Shade is a rare commodity88 viewsRunning through the wadis approaching Jebel Achter, shade is a commodity scarce enough not to waste.
|
|
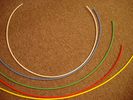
6mm Heat Shrink colours 362 viewsI decided to colour code the tubing so I used 6mm electrical heat shrink.
As there is no apparent colour coding re the 3, I tried to emulate the P38 coding; #1 LR red, #2 RR blue, #3 LF yellow, and #4 RF green. This was not doable as both left side air springs have green coloured tubing coming off the top of the front and rear air springs. I therefore arbitrarily chose the Left Rear to be red; Left Front green; Right Front yellow; Right Rear blue; and for the air compressor supply line, White coloured heat shrink. Since two new lines tie into each air spring line, I made the line between the air spring and the FASKIT, a single solid colour, and the line from the FASKIT to the valve block, White, plus the related appropriate solid colour.
|
|
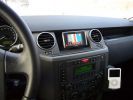
Navi Becker and iPod285 viewsThe Becker Highspeed II was installed in the bin with power connected. Works great, even TMC worked inside the garage right away!
|
|
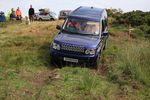
When it was new72 viewsLothian 4x4 Response off-road day at Bathgate July 2010
|
|
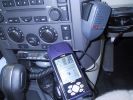
UHF CB374 viewsGME TX3400 UHF CB remote head mounted on the front of the ashtray.
A piece of wood was turned to fit the cup holder to mount the GPS
|
|
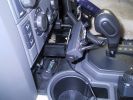
UHF CB439 viewsThe remote head of the GME TX3400 was mounted on the front of the ashtray after unclipping the ashtray facia. The head is very light, double sided tape was used plus 1 screw to hold it.
|
|
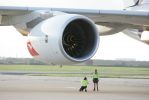
A380160 viewsQANTAS staff pose with the very large A380 whilst it was in Brisbane having some promotional logos attached.
|
|
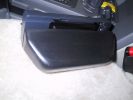
Ham Radio448 viewsThe remote head of an Icom IC706 was mounted on a piece of wood shaped to fit into the coin holder. This is quite a tight fit and does not shake loose. The radio is mounted under the driver seat.
|
|
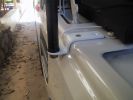
Antenna Bracket388 viewsThis was bent from a piece of 3mm x 25mm alloy flat bar. I used automotive grade double sided tape and two screws to fasten it. I have a dual band VHF/UHF antenna on this bracket
|
|
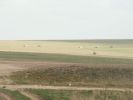
View across the plain111 viewsThis was a shot across the plain taken with my KM Z5 at maximum 12x optical resolution - these vehicles were a long long long way away!
|
|

Add A Circuit Littelfuse Data sheet2268 viewsThe switch connects to what Littelfuse brand calls an Add-A-Circuit model FMH200BP which is an adapter that plugs in place of a Mini fuse and then has space for two Mini fuses, (original and a second one). In this install, only the original 5 amp fuse was used - adapter was so as to route power from fuse box thru fuse, then rocker switch, and then back to fuse box.
Before you install the Add A Circuit for this application, take an ohm meter and trace out the circuit path of the four slots that fuses could insert into. The path is more complicated than one might first think. As such, the orientation of the fuse holder in the socket matters for this application - that is for a circuit diverter, rather than accessory adder.
|
|

Land Rover Aerial Fin images for both Glass and Metal Roof Disco3 / LR3857 viewsAs well as the two different fins, this pdf also shows the plastic blanking plate for glass roof vehicles where no fin is installed.
The glass roof fin is secured by two security screws from the top into a plastic frangible glue on gasket. The hope is that when struck, the fin will shear off and not crack the glass roof. Re the metal roof design, the fin is secured from underneath via two nuts.
The pdf also shows the various electrical bits related to the antennas. In the UK, the fin would house not only a cell phone antenna but the TV and satellite radio antenna electronics as well; in the States, the Sirius sat radio antenna and a G type cell phone antenna if the phone kit was installed would reside within the fin. The SAT NAV GPS antenna is located within the High Mount Brake Light plastic mounted to the upper rear hatch.
|
|

Freshly Washed68 views
|
|
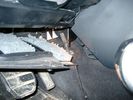
Air Conditioner Drain Hose on Drivers Side (LHD)2268 viewsThe corrugated rubber bit above and to the right of the gas pedal is the drain hose that goes down thru the carpet and floor sheet metal.
While it is bit hard to figure out from the jpg above, there is a rubber "strap" attached to the top of the corrugated hose that one uses to pull on to drag the hose up back around the black plastic heater "pan" drain. The same drain hose arrangement is on the other side as well.
One could I suppose run a plastic snap tie around the vertical pull strap if one was concerned about the hose slipping off again. See also the other jpg sketch which is from the Land Rover manual.
|
|
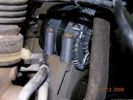
59 viewsOne bolt is visible at the front, but the other two are down the left hand side and best accessed by removing the small plastic guard behind the bumper. I also removed the small metal radiator guard between the bumper and the main sump guard (but that was mostly to retrieve the spanner I dropped!). The only issue with removing the plastic guard is the stupid plastic clips that hold it on may need to be replaced.
|
|

February in the sun!183 viewsNo D3 to drive but the weather and location was excellent!!
|
|

Amp Drawing53 viewsThis is how many amps my vehicle was using when the ign in possision II. Lights where off, radio off,hvac off Crazy?
|
|

176 viewsThis photo was "Autostitched" from 7 individual ones.
|
|
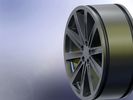
CAD render of a rim I created.71 viewsCAD render of a rim I created. Was supposed to look like the 18" style 2 rims.
|
|
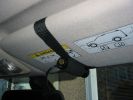
Cam mounted on sun-visor241 viewsI usually place something in between the sun-visor and the roof lining to give the cam a better angle. At Boughrood it was a roll of PVC tape. For Boughrood I also placed a small cardboard box between the cam and the sun-visor to bring the cam away from the dirty section of windscreen.
|
|
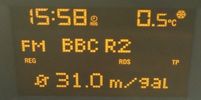
Astra 1.6 fuel consumption29 viewsFuel consumption of a 1.6 petrol Astra after a return trip from Aberdeen to Peterhead.
And yes I know i am sad listening to radio 2, but it was the only station I could understand up there.
|
|

Nav System Error Message19 viewsThis is the error I got onscreen after trying satnav upgrade from a dodgy copy. Same error then using old disc. Solution was to use a 'good' copy or the same type as the duff upgrade disc.
This isn't a duff photo - the screen really does have a double image of the text.
|
|
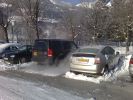
-21 deg and doing my bit for global warming.......... dont think the tree hugging Toyota next to me was too impressed193 views
|
|
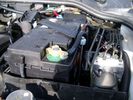
Aux Battery showing ground cable bolt "upside" down 1571 viewsIn order to obtain sufficient height clearance to get the plastic cover back on, I had to install the ground cable to the underside of the battery post connector.
Note the battery vent hose, (approx 5 ft required) is run down into where the windshield washer fluid container is located. There is not much electrical or metal in that area to be corroded by battery gas plus the open end of the vent hose tends to be protected from dirt and stays clean as well.
|
|
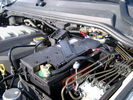
BCI Group 40R Deka 640RMF battery showing vent hose run forward to windshield washer reservoir area 1426 viewsRecessed post "Euro profile" battery to "match" OEM and stock Land Rover bracket; note that the Traxide SC80-LR module is mounted at an angle to allow for the main cable to sit under the cover so cover still closes.
The battery is a nominal 7", (180mm), high, but sits on a 1" battery spacer set under to raise the bottom front end of the battery such that the approx 11", (290 mm), length of the BCI 40R battery rises above the angled plastic nibs at the forward end bottom of the case front; hence sufficient space, (1/4", 5mm) remains at the brake reservoir end.
Also the 40R battery does not have hold down "flanges" on each end; on the sides yes, but not the ends so no additional length is required.
When I had to replace the 40R, this time I installed the shorter, (9.625"), taller, (7.5") Interstate BCI 47 / DIN H5 battery which eliminated the spacer on the bottom and better fit the stock LR tie down bolt lengths. Deka also has a BCI 47 / DIN H5 that would work fine as well.
|
|

got one shot on 4x5 transparency film. then it was gone.142 views
|
|

Caterpillar Battery Size cross reference chart and battery profiles including post layout751 viewsThis pdf has a dimension, (metric and inches), cross reference chart plus another sheet that provides BCI and DIN cross reference numbers and shows post locations plus bottom ridge tie down locations, (or the lack of).
This data was for me, hard to find, and helps one in selecting a suitable physical size of Aux battery for the space available.
|
|
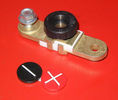
Battery Disconnect side post with + & - caps, top view617 viewsThis disconnect is designed for side post batteries. It can be used on either the + or - terminals. It can also be installed at the "other" end of the battery cable as well. In my install of the Aux battery, I installed this on the negative ground cable where the cable attaches to the body sheet metal. I have never used it but it seemed like a good idea at the time. The main battery hookup is pure stock.
For the hot side of the Aux battery, an Anderson PowerPole was used inline for the cable between the Aux and connecting to the spare bolt hole at the + post of the Main battery cable.
|
|
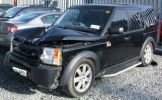
Bent Black Betty228 viewshard to believe that in this condition she\'s a write off, what got her was the cost of tricknology repairs, seatbelt pretensioners, airbags etc etc, & declining values, repair estimates €12500, value €13000. a no brainer really
Note TASTEFULL G4 sticker
|
|
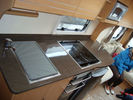
23 viewswhist we was looking round glossop caravans.
|
|
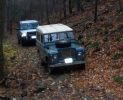
One of the trails at George Washington National Forest - Harrisonburg, VA139 views
|
|

crankshaft bolt24 viewsBolt on left is new one for upgraded oil pump casing. Bolt on right is what came out. Notice damaged end and shortness of bolt. Inside of crank was inspected wirh borescope and threads etc all ok. New bolt goes in and out ok. Few filings inside but otherwise clear. Not sure why old bolt ended up like that.
|
|

Brake Light Switch, Find, Remove, and Install Instructions 7807 viewsThis is a two page doc outlining where to find the brake light switch, how to remove it, and then install the new one.
Note, do not move the brake pedal when removing or installing the switch. Let the brake pedal hang where it wants to. The switch design is actually cunning, and as such is supposed to make the removal and install fool proof. Hence if you think too much about it, you can wreck the new switch.
If you want to inspect the interior of the switch, wait until you have removed the old switch. You can then just unsnap the blue from the white to get it apart. Inside, the switch is quite simple, (no circuit boards), but it will probably show black dust from failing contacts.
I think the reason the switch fails is that the Normally Open, (NO), contacts of the brake light contacts were made too light to carry the current load for make and break of the tail light filaments. I also think the black dust created then fouls the Normally Closed, (NC), second set of contacts for the ABS circuit. As such, the Normally Closed contacts become intermittent in operation and display as a fluctuating open and closed circuit condition to the ABS system when the ABS should be seeing a steady closed circuit. Hopefully the replacement switch contacts are more robust and may be as I recently replaced my switch again just as a matter of maintenance. While in a redesign, ideally the NC contacts should be sealed or at least separated from the NO contacts, when I inspected the removed switch, this time there was no black dust present.
Probably the removed switch will have a Land Rover oval logo moulded into it, the new one, FOMOCO.
|
|

Black Deposits on Brake Light Switch Plunger2737 viewsThis jpg I got off another forum and is typical of what one will see when one opens up the removed brake light switch. The black powder is residue from arcing of one of the pair of contacts within.
Hopefully the newer switches with the FOMOCO logo moulded into the plastic are improved from the Land Rover logo marked early units, however I doubt it.
The Ford part number is SW-6572 and/or 7E5Z-13480-A as used on the 2006 to 2009 Ford Fusion's and Mercury Milan's; the Land Rover part number is XKB500110. Cost of switch could be about twenty five dollars. A previous LR part number for the switch was XKB500030, so hopefully the newer LR part number, XKB500110, reflects some improvement in reliability.
It is possible that the new switches are better as I installed a replacement 72,000 km, (45,000 miles) later, at 195,000 km (121,000 miles). When I took the removed switch apart to inspect, it was clean inside. There was no black dust - the switch looked like new, hence they must be improved now.
|
|
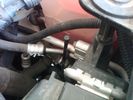
Vertical Breather Hose before cutting off OEM cap.1757 viewsThis shows the plastic vertical breather tubing and OEM cap prior to being cut off. The tubing is located on the driver side at the front near the radiator. One cuts about 3/4" to 1" off from the top. The TSB says 20mm.
I tried blowing thru the cut off piece and was not very successful. The cap seemed plugged. I am beginning to think that there was a very good reason for Land Rovers's Technical Service Bulletin, (TSB).
|
|
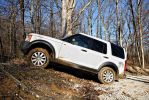
Climbed right up the hill with no hesitation whatsoever, I was shocked, because it took my Dad\'s F150 three tries and a lot of speed to get up it...103 views
|
|
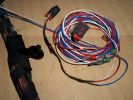
Burnt Bit97 viewsThis bit of wiring going to the connector was so close to bulkhead it got a bit burnt, Its for the clutch switch on a manual used for EPB, It will be replaced connector to pin with the wiring shown.
|
|

Even a D3 cant get through this!745 viewsPicture taken on the B974. My 300TDi is behind the photographer and wasnt going any further.
|
|
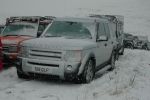
Disco3 in snow415 viewsThis photo was taken in Jan 2009 on a SLROC green road run. This was at the summint of Glen Shria
|
|
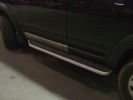
D3 Side Step Repairs164 viewsFinished job all I need to do now is wash it all off. I had already replaced the front door trim using new trim fixers and as you can see it was still dirty.
|
|

Lidl Screenwash19 views
|
|

63 views
|
|

150 viewsCarnage - a log popped outta the mud when the lady was reversing!
|
|
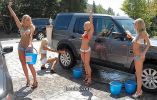
245 views
|
|
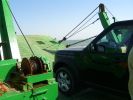
All at sea in an LR3105 viewsThe ferry from the mainland to Mazira Island was packed to the gunnels with vehicles. My LR3 was last on and they left the bow doors partially open for 14 lonnnnng sea miles across the Arabian Gulf!
|
|
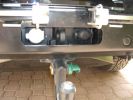
LR towing electrics pack 12N/12S313 viewsThe LR trailer electrics fitted before the Kaymar bumper and spare wheel carriers required no modifications are perfectly accessible. Good strong recovery point between the sockets too. The swing awau wheel carrier securing latches can be seen quite clearly here. Long Ranger tank (painted black) nestles where orignal spare was fitted.
|
|
Heike after a wash93 views
|
|
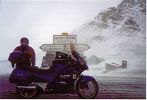
10,000ft up in the Alps!!! Honda Pan European Sept'01392 viewsThis was the first time I had ever fallen off a bike. Snow didn't help! Nothing hurt or damaged so we stopped to take a picture...
|
|
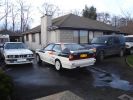
Toy box opened for cleaning468 viewsWork this out! 3x4x4, 1x4x2, 1x2x1, 1x2x0. (Hint: There is a motorbike hiding behind the BMW). SWMBOs car is off to visit the out-laws so I got to wash my toys.
|
|

64 views
|
|
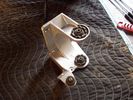
Air Compressor mounting bracket new907 viewsFound this jpg on a forum - thought it was good and is what one breaks when one jacks on the plastic air compressor cover.
|
|

This is what happens when you go too deep in a Discovery!574 viewsMy friend Dave was driving Strata Florida, after heavy rain. The Disco 200tdi was kitted for wading, with snorkel etc, but this demonstrates what happens when you submerge the bonnet.
|
|

Mengel Pass103 viewsOne of the "rocky" sections.
|
|

Mengel Pass110 viewsAnother moderate section.
|
|
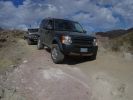
Mengel Pass154 viewsThe only Mantec skidplate in the US!
|
|
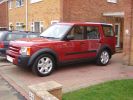
ng on the drive after a legacy of 7 silver Discos477 viewsI\'ve had silver Discos so many times now the neighbours thought that this was a loaner
|
|
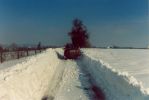
the road between home and work292 viewsthe day before returning from work, I got stuck here in the middle of the snow storm. The plow didn\'t pass yet and wind was blowing snow everywere. Since then I always carry during winter a survival pack consisting of warm coat,cap, warm, high boots and gloves.
It is no fun recovering a car stuck in the snow and sliding down from the road when moving in nothing more than a business outfit (no gloves, city shoes, no coat) with a snowy wind blowing 100km/h..... .
|
|

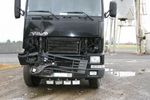
Not much left of bonnet!281 viewsCrash in a Renault Scenic
Head on colition with a Nissan Terrano he lost control came over the central reservation & ended coming at us sideways!
We hit him in the back wheel arch & spun him around so he then hit my drivers side, I walked away having a air bag wife had broken solder coursed by the seat belt, but it did save her life!
Our car was trashed but it did its gob (was only 2 weeks old!) the bonnet tacking lots of energy out of the collision & the inertia staying relatively in tacked.
|
|

Thread upload1 viewsImage uploaded in thread 198799
|
|
Thread upload1 viewsImage uploaded in thread 198799
|
|

I think reverse gear is called for. Ooh my sump guard was still straight here!96 views
|
|
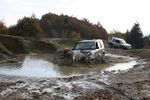
65 views
|
|
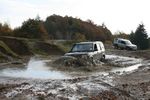
61 views
|
|
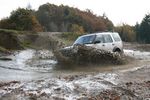
63 views
|
|
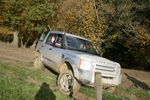
66 views
|
|
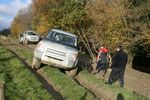
78 views
|
|
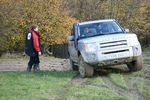
63 views
|
|
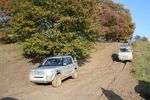
61 views
|
|
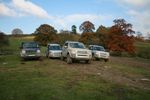
60 views
|
|
58 views
|
|
53 views
|
|
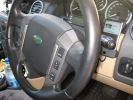
Steering wheel audio controls and iPod dock120 viewsFollowing the instructions I found on Disco3.com.uk it was a breeze the fit the steering wheel audio controls. The iPod dock was a bit more fiddly (took me several hours). Works a treat!
|
|
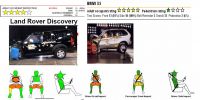
D3 vs X5 in NCAP crash test412 views Looks that D3 was as close as it can be to get 5 stars but falled JUST below the 5 star limit.
|
|
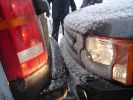
Taken from behind in the snow!!!321 viewsNot sure who bumped me..... but my car was being serviced at the time and this was a courtesy car!
|
|
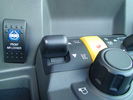
ARB Front Locker in Disco3111 viewsA bit of a challenge for the installer since it was the first they had done but all done and nice and tidy.
|
|
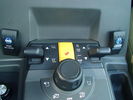
ARB Front Locker in Disco3117 viewsA bit of a challenge for the installer since it was the first they had done but all done and nice and tidy.
|
|
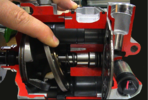
D3_aircon_compressor_maximum_swash_plate16 views
|
|
D3_aircon_compressor_minimum_swash_plate16 views
|
|

D3 Wipers and Washers22 views
|
|
Thread upload1 viewsImage uploaded in thread 149337
|
|

Disco3 on the move in Dangalli Conservation Park - at speed (south of Yunta)177 viewsMusic heard in video is from the stero blasting away inside the Disco - and yes...that was a cattle grid being crossed at the start :-)
|
|
Christmas wash183 views
|
|
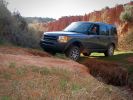
94 viewsWasn't sure I'd make this one. Had to break out the tape measure to make sure my tire would bridge the gap.
|
|

Deka Battery Dimension Data615 viewsThe battery size that I installed for my auxiliary was a BCI 40R battery as it was for me the easiest to fit and was also a cranking battery. The case profile was such that no tie down fins were located on either bottom end, (sides yes), and length wise, it was only about 11" (290 mm) long. As such, I did not have to grind the nibs at the front bottom of the plastic surround.
I did however raise the bottom of the battery above the angled nibs as I set the battery on a 1" (25mm) high plastic spacer. The total height, (battery plus spacer), was about 8" (200mm) so the battery top still fit under the Land Rover factory cover.
For the Aux battery, when I replaced the 40R, I installed an Interstate BCI 47 which is similar in size to a DIN H5. I was therefore able to eliminate the vertical spacer as the Group 47/H5 is the same height as the DIN H7/H8 stock LR spec starting battery. As such, the standard battery tie down bolts can be used without modification. The Group 47 battery is 9 11/16" long x 6 7/8" wide x 7 1/2" (190mm) high.
|
|
Different Llams knob c/w large washer99 views
|
|
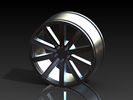
CAD render of a rim I created65 viewsCAD render of a rim I created. Was supposed to look like the 18" style 2 rims.
|
|

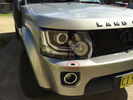
Headlight mod and D4 grill mod64 viewsFirst tackle of mods to my D3, First attempt was the D4 grill, then the de-orange of the headlands, Also installed LED sidelights and indicators
|
|

Car Wash55 views
|
|
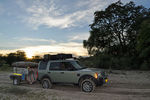
CALENDAR 201145 viewsThis photo was taken near Guma Lagoon camp in December 2009 while touring Botswana
|
|

Car Wash again!58 views
|
|

A new disco and a brand new baby boy246 viewsWhat else does a bloke need, a brand new disco3 and a brand new son with 6 days, he was lucky enough to have his first ride in a car being a Disco3.
|
|
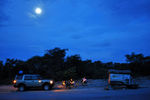
CALENDAR 2011401 viewsIn December 2009 we toured Botswana – first tour with the Disco, I had a yellow Defender previously. I rented a trailer, and the wheel bearing seized 1300km into the trip. This photo was taken while we waited for my friend to bring us a “fixed†hub. The elephant crossed the road less than 300 meters from us. Photo was taken 90Km from Nata
|
|
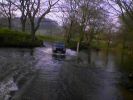
Me fording in Grosmont377 viewsMe have a splash in aford at grosmont north yorkshire was only 18 inches deep nothing big.
|
|

Thread upload2 viewsImage uploaded in thread 159579
|
|
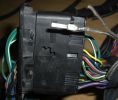
New Speaker Cables.109 viewsThis is the door connector, Main loom to Right, Door side to the left. to the top of the connectors you can see green and Green white wires which are the speaker ones. The door wiring is premium and has two pairs, the main loom was a 1 pair high line, so i am adding the pair you see (one already pinned up) to upgrade the loom to premium.
|
|
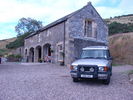
D2 in Fife 201115 viewsShe was called Fi
|
|
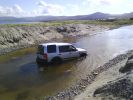
disco 3 wading82 viewsa nice river crossing, the ground was mostly sand and a bit of silt. just remember to turn off dsc. and its salt water. ekkkk
|
|
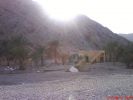
Some of the damage remaining from Hurricane Gonu - this was caused by flash flooding in the wadi86 views
|
|

Lead Car Entering the Finish116 views7 May 2007 - My D3 on duty as lead car in shinfield 10K road race. what a nightmare driving at low speed in the rain. Clock was mounted on standard crossbars. connection to additional batteries in boot cable thru side window. There is a small offroad section (actually an un-made road) Oaklands Road, Shinfield, Reading (suggest anyone test driving in the Reading area take this road)
|
|

Camp over roast lamb with onions - perrrrfect110 viewsThis was the best camp oven roast ever, fed six hungry blokes in the Oz outback on a winters Sunday night
|
|

568 viewsMy father's last wish was to ride in my car one last time, and as such I believe him to be the first person to be carried to his funeral in a Disco 3.
My father's coffin was 6'5" and he was safely carried in the back of my Disco, and for once didn't complain about my driving. Air suspension helped enormously, being set to off-road height, to ease getting him in and out safely.
|
|
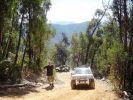
Short stop on Merricumbene FT - while a tyre was changed77 views
|
|
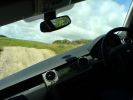
159 viewsLITTLE SCARED, THINKING I WAS GUNA ROLL
|
|
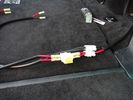
66 viewsI was quite proud of my wiring work - My Nursing Degree didn't cover too much content on auto electrics.
|
|
63 viewsThe spot where the isolator box goes had this small white clip. It looked like it was meant to hold something....so I removed it.
|
|

Kingsley with Sr. Pedro, the chief of police at Foz Do Cunene, Angola.172 viewsSr. Pedro was initially a bit wary of us, but once King had explained his mission, Sr. Pedro and his team couldn't do enough to help. He even brought us sinkers to fish with and beer when we ran out! Kinsley took him to meet his neighbours from Namibia
|
|
The largest pothole we found was as big as a D3193 viewsOn the road to Ondjiva. Worst road in the world (so far)
|
|
Dom descends, it was much steeper than it looks357 views
|
|

GToN Washed out track102 views
|
|
Not the FR rack, but what was left of the Land Rover rack after a door incident216 views
|
|
Not the FR rack, but what was left of the Land Rover rack after a door incident180 views
|
|
Not the FR rack, but what was left of the Land Rover rack after a door incident149 views
|
|
Not the FR rack, but what was left of the Land Rover rack after a door incident171 views
|
|
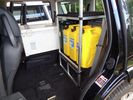
2nd Row seats out and fridge and jerries "in"21 viewsA false floor was made out of ply to support the freezer and 5 x water jerries. I used 3 x fuel jerries for photographic purposes only.
|
|
Heated Washer Jets Offside24 views
|
|
Heated Washer Jets Nearside25 views
|
|
Disco 3 not available, so had to tolerate this awful £60k RRS instead :-o237 viewsOnly the half-day introduction course, but Geordie was an excellent tutor and we had an amazing time.
|
|
Along the beach on the way to Tombua. The wreck in the background is "Consortium Alpha"158 viewsApparently this boat was wrecked on it's maiden voyage cos the prop got caught in the nets
|
|
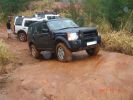
The "alternative route"158 viewsThis was the start of the rocky bit that cut out the snotty slopes. Wasn\'t the way to go unless you quit
|
|

Wash me119 views
|
|
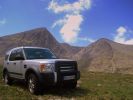
Disco3 at Carantouhill CALENDAR ENTRY 2009441 viewsCarantouhill, Irelands highest peak. a group of us set off in my disco 3 and friends defender 90. it was a nice trek to the base, with a small river crossing and some big rocks to navigate around. we camped out and climbed the mountain the next day. summer of 2008.
|
|
85 viewsafter its first wash
|
|
78 viewsAfter its first wash
|
|
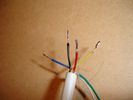
Timer wires tinned - yellow was re-done!44 views
|
|
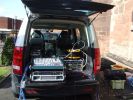
Expensive table?198 viewsOne of the better, if little, publicised advantages of the Disco3 is the split tailgate. Here its serving as the desk area at an outdoor event I was doing sound for. Rain was threatening so the amps got slung back inside rather than sat on the floor, other stuff was either in closed boxes or had to take its chances....
|
|
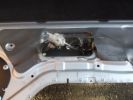
An alternative approach131 viewsDue to low temperature, and the size/mobility of my hands I decided that the easiest way to open the tail gate was to destroy the old Bowden cable and then pull centre core to release the tailgate - it worked, and doing this earlier would have saved a few cuts and grazes.
|
|
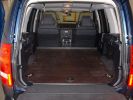
D3 Commercialisation622 viewsThis is the pic that was sent to me by the dealer to show what would be done to turn my SE into a van. (The car shown isnt mine)
|
|
My D3 before I bought it703 viewsThis pic was sent to me by the dealer - just to keep me awake at nights looking at my PC screen!!
|
|
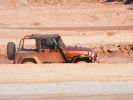
193 viewsFirst off was the TJ Jeep. Made it to halfway along pit 2
|
|
The Road I came up.333 viewsThis is the road which caused my problem, drove up it, not realising there was a T junction which I had to turn right, turned, but could not get myself to get off the brakes and accellarate, so went straight on down a ditch!
|
|
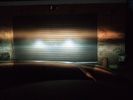
Halogen infill alignment error152 viewsCar was 10-12 ft from wall when this was taken
|
|

It was a bit rough here at Chapel Porth today300 views
|
|
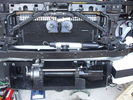
Front bumper view of semi-installed winch119 viewsNote the left-side (looking forward) bracket holding the white windscreen washer bottle.
|
|
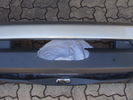
Front bumper with cutout for winch rope entry117 viewsBumper was initially cut "too small" with a low speed hand-held jig saw. It was then progressively filed to about the right size. Finally a very sharp box cutter was used to provide a smooth edge to the cut. This cutout is hidden behind the licence plate.
|
|
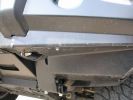
432 viewsWasher bottle guard, I covered the exposed headlight waser hose with protective tubing.
|
|
273 views
|
|
45 ers 228 viewsagain, picture does not do the angle any justice. getting out of the car was pretty difficult. great pay and play site
|
|
45ers - 30 viewslooks tame, but the car was at a pretty extreme angle. picture does not do it justice.
|
|

Gatcombe Park, 09/06 - Claudia frightened of the hills166 views..her friend wasn't
|
|
Warn Winch gromet/retainer for Warn Winch screws197 viewsPart no. for warn winch grommet/washer for warn number plate holder
|
|
My new baby75 viewsJust given the first wash & polish.
|
|

I TOLD YOU IT WAS DEEP !!!!72 views
|
|

The highest dune in the world or so I was told127 viewsSossusvlei
|
|

Waznotwas86 views
|
|

Waznotwas80 views
|
|
WasnotWas96 views
|
|
WasnotWas103 views
|
|
WasnotWas90 views
|
|
WasnotWas102 views
|
|
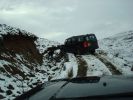
DSL Dangling a wheel186 viewsOops, at least it was the uphill side, not the cliff side!
|
|
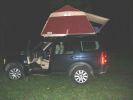
First Night708 viewsfor more than 10 years I'm using my roof tent on a lot of different cars (Mitsubishi L300, Mitsibishi L200, LR 110 Td5, Disco 2 Td5).
Now, on last friday I finished to fitt the tent of the original LR Expedition roof rack.
It was a hard job because I wont neither to change the possition of the GPS antenna nor I was interessted to fitt a second one.
|
|
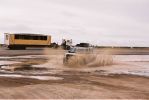
CALENDAR 2008 ENTRY739 viewsWashing the cars. San Antonio (Argentina)
|
|
Socket found attached inside the grille - behind the LR badge51 viewsThe socket was attached behind the grille - and connected but to what I do not know
|
|
1 week old - maybe needs a wash?498 views
|
|
Slimer demonstrating his prowess with his airbag!264 viewsneo was inspecting the underside at the time - not sure why?
Allegedly a 4 ton airbag was needed since the boot was full (and I can confirm this) of crates of Desperado
|
|
View from the Fairmile Carpark of 9 members cars196 viewsRange Rover Au Poivre had turned up by now - VA was having seat as well as steak sauce problems! I think we had 2 more turn up after this photo was taken
|
|
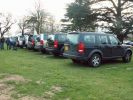
First seven arrivals at South East Pub Meet in Cobham230 viewsOnly neo\'s D2 was out of place at this point - more than made up for my the lovely burble of his V8
|
|
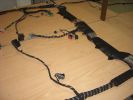
Finished seats area108 viewsThis is a shot of the loom when it was finished from the pass (RHD) door
Both of the seats wiring can be seen, i replaced the conduit on the bottom right and the Yaw rate sensr connector can also be seen in the middle.
|
|
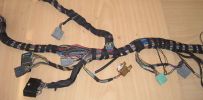
Finished Passenger Kick panel area130 viewsMissing connetor (left most grey) & wiring in, (plastic bracket was broke will use the one in the car) Airbag wires & connector to connector previously cut replaced (on top of grey one to right).
And you can even see the 2 new speaker wires going into the Pass door connector at the very bottom.
|
|
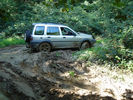
First there was a Freelander21 viewsV6 auto, so it could do things, too:)
|
|
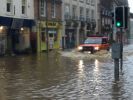
G4 wading down the high street203 viewsTaken by a passer-by as I was enroute to an emergency - just luck that I found the shots.
|
|
Was hoping to use these boxes, but can\'t stack securely so looks like I\'ll be getting some wolf crates afterall133 views
|
|
45 viewsCorvette 5.7 litre engine with 6 speed (7 if one counts reverse) manual trans. Car was custom built for me at the factory in Canada.
|
|
Palmeira34 viewsIt was dificult to clim this dune ..
|
|
Front coupler pad to right front under air filter housing 158 viewsCoupler Pad is attached to the flat metal surface just behind the rectangular drain off of the air filter housing. The last 3 inches (75mm) of the 1/4" (5mm) black flex wiring loom was then threaded over the last bit of wiring. One of the other jpg's is less washed out and shows the coupler pad a bit better.
|
|
Front Lamp Guards Fitted200 viewsThe hardest part was extracting the front grill from behind the nudge bar and driving lights!
|
|

408 viewsID of washer fuse and fuse "pincer" tool
|
|
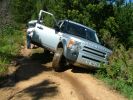
Anchor102 viewsA temporary anchor was created using a tree at the side of the road.
|
|
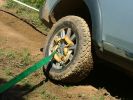
Anchor112 viewsA temporary anchor was created using a tree at the side of the road.
|
|
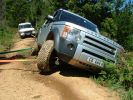
Traction127 viewsAll that held the D3 from certain death was about 25% of the tread width of a Grabber.
|
|
Insane117 viewsThis was the predicament that resulted in the panic recovery attempt.
|
|

Series LR at Oil Sands Plant in Northern Canada circa 1968744 viewsThis is an end of shift picture taken about 1968 at the Great Canadian Oil Sands (GCOS) plant while under construction in the Ft McMurray area of Northern Canada.
I was surprised to see the yellow coloured Series single cab hardtop pickup parked in about the centre of the picture. I would say it is one of the few on site as most vehicles were Chevrolet's, (as are the other three trucks elsewhere in the view). The yellow painted vehicles including the Land Rover are most likely Bechtel owned - not leased - yes, that long ago now.
|
|

Snake Lake136 viewsNo problem getting through this wash on our 2nd try. Tried to straddle rocks on first, that was a bad idea.
|
|
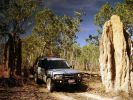
D3 in Kakadu National Park, on the track into Graveside Gorge51 viewsKakadu National Park is in a World Heritage area, with the entrance about 3 hours out of Darwin. It took another hour to get to the un-marked track into Graveside Gorge, which then took three hours to travel the 41km in. Not a tough track, but a series of big wash-outs with very deep and soft sand in the creek beds made driving fun. The most amazing thing, was that we had the whole place to ourselves. No marked tracks, so bushwalking involved blazing a trail using GPS and topo maps to find the way.
|
|
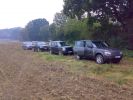
189 viewsCars belonging to the team of guns where I was picking up the other day..... A D3 was in there!!! plus 2 Supercharged RRs with MTRs and a RR Vogue
|
|

Drive & Play149 viewsFitted the screen using a piece of laminate flooring fibreboard underlay & cutting up a 3.99 leatherette cushion, looks like it was fitted from new
|
|

Headlamp Wash26 views
|
|
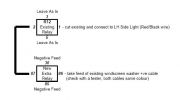
Retro fitted Headlamp Washer Relay Rewiring Circuit Diagram301 views
|
|

26 views
|
|

22 views
|
|

6 views
|
|
Rhino Tow Loop Hitch263 viewsThis is a receiver end view of the Rhino Hitch that ties to the factory tow loop. In addition to improved strength, it does not reduce ground clearance as does the factory style when installed.
Land Rover in early advertising videos when the 3 first came out showed the D3 hanging from a crane via the frame. The intent was to show how strong the frame is and by inference, the rear tow loop, specifically noted as being good for 6 tonne. The video ends before anything dropped or was lowered back to the ground, so one of course does not know for certain. The Rhino Hitch design however picks up on the apparent evidence of strength and certainly the additional clearance.
|
|
Hope she was worth it asshole184 views
|
|
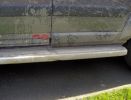
Hmmm, that dent wasn't there when I started.137 views
|
|

John O\'Groats - Think I was the only one there, other than a few locals ..159 views
|
|
It was mostly closed ...169 views
|
|
What was the max wading depth ?167 views
|
|
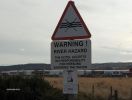
Sure that wasn't there in front of me when I parked up last night ????155 views
|
|
Well, there wasn\'t a lock on the gate ???149 views
|
|
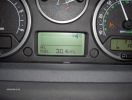
At the 1303 mile mark, Av MPG was 30.4 !!!!!!!!!!!!! With all teh start / stop, and general moochign about, this was quite good !307 views
|
|
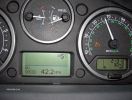
At the 1303 mile mark, Av speed was 42308 views
|
|
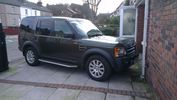
All clean after its yearly wash....34 views
|
|

Underside of the ciruit board127 viewsThis looks more of a mess than needed to be. The Maplins guy tried to be helpful when I bought the relays, he wrote down the switching COM/NO/NC, it was actually NC/COM/NO. Some scratching of head when it didn't work then worked out what happened when I looked on the manufacturers website at the data sheet...lesson of the day check the data sheet!
|
|
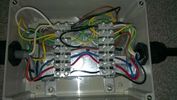
Topside124 viewsWiring from the top, one additional earth added to the internal box after the picture was taken.
|
|
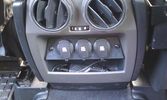
12V outlets for the 2nd row13 viewsI used a part of the old front (which was broke) to cut out a 'mount' for three 12V outlets for the second row.
The outer outlets are switched on whenever the ignition is on as I used the connector that originally was out there.
The middle outlet is connected to the auxiliary battery and is switched on/off through a rocker switch in the central console. (other picture)
This middle one is going to be used for our small fridge that usually resides just there when we're on holiday.
|
|
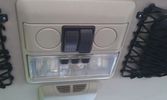
The on/off switches of the multimedia headrests17 viewsThese switches were installed to power on/off the previously installed gamecube and the screens attached to it.
When I removed the gamecube and lately the screens as well, I was clever enough (surprised as well) to leave the switches and all the wiring that I had running around.
They came in handy when I installed the multimedia headrests and are now adding an extra power on/off control of the screens.
|
|
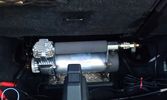
The compressor in the booth16 viewsThe rear of the second row seats are visible and the space behind was big enough to put the compressor.
The compressor is powered from the rocker switch in the front.
|
|
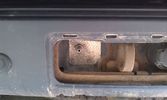
Outside connection to the compressor14 viewsFrom the compressor which is in the booth, the air hose runs to the back of the car.
I was able to install the connector in the space of the second trailer plug (which wasn't installed anyway).
|
|

President Johnson II in its current position18 viewsThis CB was installed some years ago and still is at the same location.
However, I'm planning to move it to the head unit area.
As such, I'm looking around to replace my low end head unit with a single DIN radio and the CB on top of it.
|
|

35 viewsThe facia had some bits sticking out which fit quite nicely with the supplied double DIN support. As I was going to use the DIN supports supplied with either the radio and the CB, I needed to remove those bits sticking out. They made the DIN support bend as well.
|
|
38 viewsWhen adding two single DIN supports together, you get quite a gap at the front.
This gap was way too much in my case, as it turned out that both supports started to bend when putting them both in the facia. Not that good, so I decided to cut off the upper part of the lower DIN support.
|
|
74 viewsThe Pioneer DEH X9500BT on top with the CB President Johnson II beneath.
I had to cut the bottom part of the CB 2 DIN conversion kit in order to have the supplied cover with the facia in place as it should.
I eventually didn't use the supplied facia of the radio as it's bottom part was covered by the CB's kit.
|
|

Cyc.202 viewsOne of My dogs. Cyclops. Yes he has two eyes. He is called Cyclops because He used to walk backwards, sometimes, when he was a pup & He is a monster.
|
|
Think the Landy needs a wash36 views
|
|
a poo with a view24 viewsI popped to a loo this was the view
|
|
Impact Skid after hitting wayward Hilux207 viewsDisco3 was stopped when a skidding Hilux collided with it. Collision caused Disco3 to slide backwards
|
|
Wheel geometry216 viewsThe geometry on the left is the before, anything in red is out of spec, the settings on the right are afte the 4 wheel alignment was finished.
|
|
End of the line at Ras Al Khaimar67 viewsI am led to believe that this example was left overnight on the beach broken down - by morning the natives had stripped every last piece of usefull equipment out of it, engine and all and dragged it across the creek back to their village
|
|
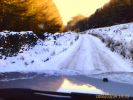
It was very icy down here.360 views
|
|
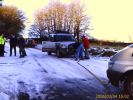
TFC really wanted to recover the Police car, but they moved it.437 viewsThe police were very impressed by the D3\'s, gave them some advice re tyres for their Terrano (which they told me was broken)
|
|
Guess where this was26 views
|
|

Think the Landy needs a wash36 views
|
|

CV boot puncture 84 viewsThis is how the cat was returned from the garage
|
|
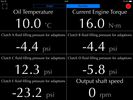
ZF8 adaptions pre-reset 21 Mar 1519 viewsThis was about 5 journeys since the first ever reset of adaptions.
|
|

After a good wash17 views
|
|

89 viewsThis is also how the car was returned after being repaired
|
|
screw and washer25 views
|
|

Loose bolt 87 viewsThis is how my car was returned from the garage
|
|

Headlight mod88 viewsAmber lens was quick to dissappear..
|
|

Sheepwash Fail!96 views
|
|
D4 detail10 viewsThe grill was one of the determining factors
|
|

Baby leopards. Mother was shot3 views
|
|
Blown Turbo126 viewsThe Turbo blew on this D3 with only 30,000k Its a 2007 model and the easiest way to get at the engine was to remove the body which is attached to the body by 10 bolts
|
|

SUN-LR_SET195 viewsThis pic has been taken in Italy,it was almost dark,but the sun was still illuminating the bottom of this high altitude clouds called cirrus
a perfect atmospher
|
|

273 viewsThis pic has been taken in Italy,it was almost dark,but the sun was still illuminating the bottom of this high altitude clouds called cirrus
a perfect atmosphere
Piadina is the man!
|
|
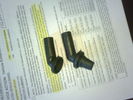
old and new elbows21 viewscomparison of elbows (left is the one that was deteriorated)
|
|
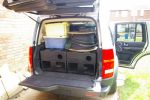
Any space for a .....256 viewsAgain, not \'PJ\', but there was still space for two of us in the front, and good collection of stands etc.
|
|
My Ball76 viewsLaser was happy
|
|
Windy76 viewsPepper showing that it was windy on the Cairn
|
|

823 viewsThe start of using the otherwise wasted space in the Irish commercial convertion
|
|
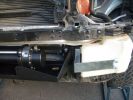
1679 viewsBracket that holds the washer bottel in now that the bumper has gone.
|
|
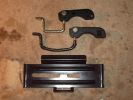
Roof box fixings379 viewsTop original with new one in middle!
Had to make the hole to the left of the plate longer to fit new brackets, it was the same size!
|
|

Switch is blue colour thing thru the rectangular opening.3153 viewsThe blue coloured plastic bit thru the rectangular opening is the brake light switch. The fist time, I found it easier remove the switch by dropping the horizontal plastic panel, (two screws), and then slipping my hand in and rotating the switch clockwise 1/4 turn. The second time, I was able to remove the switch thru the rectangular opening and did not need to remove the horizontal lower panel. Obviously, I had to remove the sloping knee pad panel, (note sort of hinged at the bottom so pull back from the top.)
Regardless, do not touch the brake pedal - just let it sit where it wants to. One has to first remove the angled knee pad panel that sits under the steering wheel. It can be pulled from the top corner at the door side. Pulling releases a pair of those U shaped metal clips that LR loves so dearly. You have to pull quite hard. The bottom is held by a couple of plastic fingers in a couple of slots so you pull at the top till the two clips release and then rotate the panel and pull upwards a bit.
To remove the switch, you rotate it clockwise and pull outwards. Rotating the switch clockwise automatically retracts the plunger back into the switch body away from the brake pedal arm.
Similarly when you install the new switch, the required 1/4 turn anti clockwise rotation action releases the plunger so it lays up against the brake pedal arm and at the same time, secures the switch in place.
To remove the electrical wires, the switch will drop below the horizontal pad and hang from the wires so unclipping the electrical connector plug is fairly easy to do.
|
|
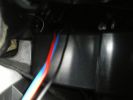
110 viewsview of wires inside dash (from where plug was removed). I ran them through the pre-existing slit in the top of the glove box to wiring loom connector.
|
|
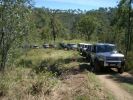
Start of easy hill climb171 viewsTR mode Rock Crawl - although I did turn off Hill Descent as the other side was not too steep and she wanted to keep slowing dramatically which I didn't appreciate in convoy. (Where is my old Pajero that had the inclinometer?)
|
|
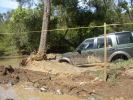
Last D3 through the deep crossing229 viewsThe water was stirred up by this time (didn't start off too clean due to heavy rains in the previous week) water was between 500 and 600mm deep depending on where the driver crossed. Away from the tree was slightly deeper but most drivers chose that line to be well clear of the tree.
|
|
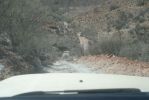
Flinders Ranges Low Range no HDC145 viewsThis was a good bit of track
|
|
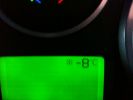
low temp for stoke52 viewsit was -8 the other morning
|
|

Disco near Maria Alm 21.12.200987 viewsDisco I spotted driving down the track from the Bärmooshütte near Maria Alm while I was in the Aberg gondola.
|
|
Half way finished cutting aibox inlet with Dremel - as it was too large to fit the 83mm flexible hose onto it.164 views
|
|
Cut out of inner guard completed - to allow 83mm flexible hose through, as the smaller hole in channel was too small.164 views
|
|

Calendar Entry 2011466 viewsMrH going through Wheelwash at Whitecliff Quarry March 2010
|
|
silver arch and sitting low77 viewsThis was after I changed the arches, I\'d jacked it up so the air bags had let all air out to try and level car
|
|
Towing my 1956 Chevy206 viewsTotal weight was around 5,500 lbs.
|
|
463 viewsFirst step in the journey, installed USB ports.
At the time I installed these, the goal was to use them in combination with the car-computer that resided in the back.
In the meanwhile, I dismantled the car-computer and nearly everything that was connected to it (touchscreen front, Wifi, DVB-T ...).
I kept the USB outlets in the front and turned them into charger for the appliances missus brings with her when we're on holiday. Mainly her iPod and smartphone ...
|
|
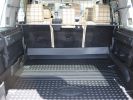
Paddock dog guard view from rear - with LR "high" mat fitted313 viewsYou can see that there was no cutting needed here - but the mat needs a good shove in!
|
|
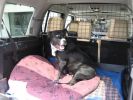
One happy customer - Artù322 viewsYes, whilst I was fitting everything, he was going mad as he loves to be in the car. He\'s actually had a failed entry into the Disco as it\'s too high for him!!
|
|
TowAssistStickers181 views
|
|
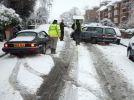
Snow, London, unfortunately for them they couldn't make the small slippery incline, fortunately for me I was in a D3....299 views
|
|
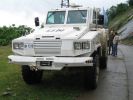
The Thing !299 viewsGuess where it was build ? Let me just tell you that it does not rain so often then than here...
|
|
![Filename=IMG_0336[1].JPG
Filesize=365KB
Dimensions=1706x1280
Date added=14.Jan 2014 IMG_0336[1].JPG](albums/userpics/39057/thumb_IMG_0336%5B1%5D.JPG)
My D3107 viewsJust Washed
|
|
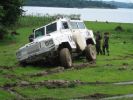
Deep mud 2337 viewsThe ground was quite muddy as all the water from uphill was going through there ont its way to the lake... So, "Of course, it was a good place to reverse !" ;-)
|
|
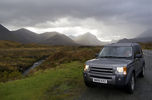
Isle of Skye229 viewsHaving just seen the view in my rear view mirror i thought i'd stop and get a photo of the Disco. This was about 15 minutes north of Portree on the Isle of Skye. A stunning place to visit. With the clouds in the distance just letting the sun peek through them i thought it was worth uploading. Hope you like it.
|
|
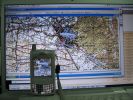
TTQV and PathAway on a Mac...384 viewsThat picture was taken as I was using TTQV from Touratech on a Mac running Windows XP SP2 under Parallels Software beta... The mobile is a Palm Treo 650 running PathAway...
|
|
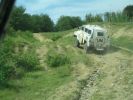
Yes, this was a road...304 viewsGoing uphill...
|
|
331 viewsOops . but this spin was BEFORE we had the training!
(photo by Kai Uwe Richter)
|
|
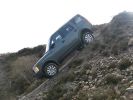
the old mine near truro. and yes the camera was level...258 views
|
|
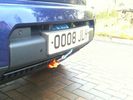
Redg plate mounting127 viewsThe original redg plate mounting was modified. An L-shaped piece of plastic now sticks out rearward from the top of the mounting and this hooks over the back of the top edge of the bumper cover. Then 2 spring clips hold the bottom edge of the mounting in place. Proximity sensor and surround camera seen unaffected.
|
|
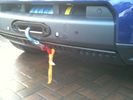
Recessed Hawse 143 viewsI had the hawse powder coated black which was not necessary in the end as it is normally hidden behind the number plate. The cutout of the hole in the bumper cover could have been a bit tidier, but again, it is usually hidden when winch not in use. Note the two clip receivers which hold redg plate mounting in situe.
|
|
Twins282 viewsCALENDAR 2011
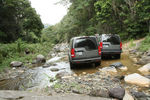
After comming down a nasty rock trail, we found the place we were looking for... This is in Puerto Rico. My LR3 was 3 weeks old! (got permission form the other owner to publish foto), feel free to edit foto.
|
|

Snow foam pre wash24 views
|
|

New puppy's dam with part of litter92 viewsThe dam had eleven puppies, some of which were, when this photograph was taken, with a foster dam.
|
|

New Exide AGM battery - Varta silver/calcium battery was replaced under warranty at 79680km.30 views
|
|
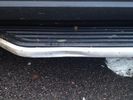
ooops - 21 viewsa great picture which describes why its not a good idea to have side steps fitted if you ever want to go off road. not sure where this happened, but the wife spotted it as soon as I went back to pick them up. Its her D4 and you can imagine she was not impressed. Still, a fun afternoon at a pay and play site whilst I was in inverness on holiday ;-)
|
|
Drumclog wheelwash243 viewsThis was taken on 14-11-10 at Drumclog,photo courtesy of site member Navigator,to late for the 2011 calendar so thought i would enter for 2012.
|
|

Who said this was steep ?96 views
|
|
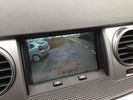
8 viewsNo buttons to press, simply stick it in reverse! This camera is also great @ night. More pictures to follow later this evening, so happy when I was done I just wanted to reverse in & out of car parks lol
|
|
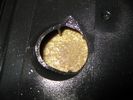
filter58 viewshole where plastic gland was
|
|
LRE Eastnor G4 D3580 viewsCALENDAR ENTRY
Photo taken during the LRW Show at Eastnor Castle, 6th June 2009.
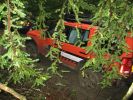
The LR Experience G4 D3 was moving in to position to help out a stricken RR Sport that had gone off track and ended with its\' nose in the trees. A very impressive front (another LRE D3) and rear winching method to extract the RR Sport sideways followed.
|
|
Washed89 views
|
|

47 viewsPlease wash me!
|
|

CALENDAR ENTRY249 viewsCRIMEA - between Bahchisaray and Sevastopol - 2011-07-05 19:43:43 220 m N44 38.481 E33 41.940 Winch was a must to get out of there :)
|
|
Comming back 2 weeks later with new wheels this bridge was... Uhhhmmm let\'s say... broken..145 views
|
|

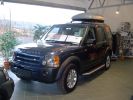
New HSE LUX63 viewsMy new Discovery 4 HSE Luxury in the showroom at Hunters of Chester, this was taken earlier today before she went to the workshop to have the side steps fitted, collection is lunch time Friday...can't wait now.
|
|
I thought it was supposed to be hot and dry in the ressert256 views
|
|
Split intercooler hose97 viewsCaused black exhaust smoke when power was applied
|
|
DISCO 3 Porthallow Beach Cornwall 13 Aug 07 - CALENDAR 2008 ENTRY744 viewsCALENDAR 2008 ENTRY. Picture of my Disco 3 on the beach at Porthallow in Cornwall.
Picture taken in the height of the british summer on the 13th August 07 at approx 2:30 in the afternoon! (notice the hint of sarcasm there as even at that time of the day I had my lights on!).
Getting the car from where we were staying on to that beach was quite an entertaining drive, with the roads (more like lanes) only being just wide enough to fit the car through.
Hope you like it!
|
|
48 viewsA single pin in the headrest screens was pushed in, meaning the screens would power up, but no picture would show.
|
|
French connection272 viewsThis was the culprit
|
|
At this point I was having a hard time getting up the hill, but was slowly managing.315 views
|
|
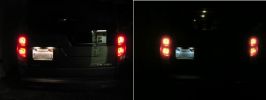
I replaced the incadescent license plate bulbs with new 6-LED bulbs for a cleaner look.420 viewsI was following a 2006 Lexus ES and noticed their license plate bulbs are now using LEDs, so I thought the same thing would look good on the rover.
|
|
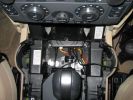
Here\'s a view of the Drive+Play "brain" which I mounted in the empty space in front of the gear selector.650 viewsI ran the power and audio cables to the rear of the center console in order to tap into the 12 volt power and "Aux" adapter. When you're sitting in the back seat, you don't see any cables whatsoever. My entire goal was to make it look as factory original as possible.
|
|

UHF Antenna Mount384 viewsView from underside of bonnet. The lower half of the mount is folded from stainless steel and bolted through an exisitng oval shaped hole in the bonnet. This hole is throught the heavy steel plate that the bonnet hinges bolt to - not just the aluminium panel. A specially machined rectangular nut was made to pass through the oval hole, rotate 90 degrees and then stopped from turning by a slight shoulder on the nut.
|
|
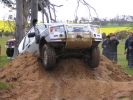
246 viewsNo traction control was getting me out of this one!
|
|
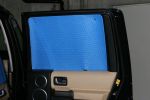
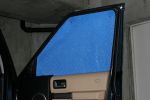
Rear Right215 viewsQuality. Made to measure. Making the template was the hardest part. Absolutely ZERO light ingress through these blinds and keeps those who go dogging out too.
|
|
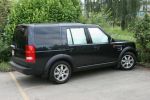
Front Right217 viewsQuality. Made to measure. Making the template was the hardest part. Absolutely ZERO light ingress through these blinds and keeps those who go dogging out too.
|
|
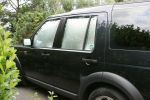
Side Windows235 viewsQuality. Made to measure. Making the template was the hardest part. Absolutely ZERO light ingress through these blinds and keeps those who go dogging out too.
|
|
Side Windows167 viewsMade to measure. Making the template was the hardest part. Absolutely ZERO light ingress through these blinds and keeps those who go dogging out too.
|
|
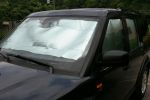
Windscreen Blind170 viewsThe windscreen is particularly hard to come up with an accurate shaped template to make a proper made to measure blind. I gave up.
Here is a make shift arrangement on the inside but I discovered it did little to reflect the heat as once the heat came through the glass it was already inside the car. Doh! Stretching it across the outside of the screen had a much better effect.
|
|

Wast Water at Sunrise117 views
|
|
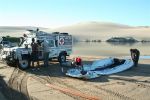
Inflating the boat at Foz178 viewsBruce had 2 Gemini inflatables on top of the Defender, with 2 engines in the rear compartment. Inflating the boats took about 30 minutes. The plan was to cross the Cunene and greet the miners on the Namibian side, which is where the Outside Edge expedition had left off a couple of weeks prior - they couldn\'t cross the Cunene in Land Rovers, so they had to go around - a detour of some 2000km
|
|

Freelander 2 SD4 HSE15 viewsThe missis chose it and was a bit upset when I traded it in for the Disco, she's ok with it now the Disco is growing on her!
|
|

Boulder Pull198 viewsRubber Ducky helping the forest rangers block an off-limits section in George Washington National Forest.
|
|

Boulder Pull150 viewsRubber Ducky helping the forest rangers block an off-limits area in George Washington National Forest.
|
|
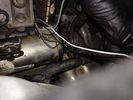
EGR replacement16 viewsBack of left EGR cooler was a swine to replace the clip. Bound it with wire before using pincers to clip together.
|
|
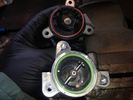
EGR replacement19 viewsOpening up the actuator reveals that all was OK. Even the ball races are OK
|
|
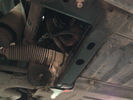
undervody with old intercooler hose9 views6 years and 92,000 kms later, my intercooler hose was about to be replaced
|
|
Urban Disco539 viewsCALENDAR 2008 ENTRY
Parked up in the driveway after a wash.
By CY.
|
|
D3 in Insane179 viewsHmm - doesn\'t handle too well ... I was thoroughly pasted by the Baja Buggies and the Defender
|
|
Washroom23 views
|
|
Intercooler/Rad Washing 1215 views
|
|
Intercooler/Rad Washing 2197 views
|
|
Intercooler/Rad Washing 3220 views
|
|
Intercooler/Rad Washing 4197 views
|
|

Intercooler/Rad Washing 5207 views
|
|
Intercooler/Rad Washing 6215 views
|
|
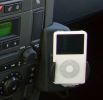
iPod cradle234 viewsThe dealer used the phone fitting and the iPod was installed via cinch connectors. Volume is controlled via the audio, charging function also included.
The sound even with the basic Audio system is terrific!!!
|
|

21 viewssome friends had uploaded temp pix of -21 and -27
so i wanted you all to feel the heat we have here in Kuwait...
it was 52C :( yes, i mean 52C not 25C
my next test will be to fry an egg on the bonnet :)
|
|
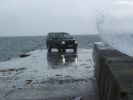
Stormy day in Islay505 viewsCALANDER ENTRY - Summer (?) holiday on Isle of Islay, Scotland. Good weather generally, but a storm came through mid-week. Car is parked at the end of the pier at Port Charlotte, looking towards Bowmore (!).
Sorry not much of a background or good light - but it was a storm. Oh and this is the highest res image I have, 5mp.
|
|
20 views
|
|
| 556 files on 2 page(s) |
 |
1 |  |
|