| Search results - "center" |
center piece529 views
|
|
center piece520 views
|
|
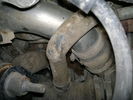
Charge Air Pipe - turbo end.101 viewsThe maint manual identifies releasing the pipe hose clip in the center of the photo. Pity who ever built this engine Put the hose in such a position that access to it was near impossible. I released the other clip at the turbo end of the flexi hose. Easy to get to but a right git to release the hose of the turbo.
|
|

Air con pipe65 viewsIts the brown pipe in the center of the photo. To remove this first you need to remove the "charge air cooler inlet hose" to allow access to the air con pipe securing fixings. But with the "charge air cooler inlet hose" disconnected it can\'t be removed from the veh because the air con pipe is in the way???
|
|
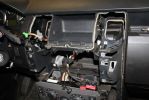
02278 viewsDash center console off and factory head unit out. LR clips suck.
|
|
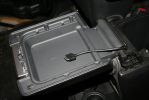
08273 viewsRan the iPod connection up behind and through the center console. I'll be puting an iPod holder in the inside of the console lid.
|
|
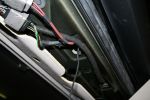
09237 viewsRan the GPS antena up through the rubber gromet in the top center of the boot door jam.
|
|

Let's Get Campy21 views
|
|
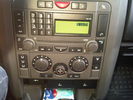
radio dash for BT project68 views
|
|
133 views
|
|

Thread upload6 viewsImage uploaded in thread 68494
|
|

6 views
|
|

Thread upload8 viewsImage uploaded in new thread
|
|

Thread upload4 viewsImage uploaded in thread 40682
|
|

Thread upload2 viewsImage uploaded in thread 40682
|
|

Thread upload26 viewsImage uploaded in thread 171332
|
|
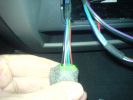
connectors - back side of the center arm rest121 views
|
|
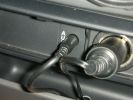
498 viewsRear iPod cabling solution. Notice the hole where the cables descend into the rear of the center console.
|
|
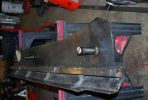
182 viewsAnother shot of the right slider. The center support channel has drainage channels welded in that match the locations of the drain holes on the sill frame.
|
|

Front Center Console Removal21 views
|
|
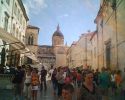
Dubrovnik center116 views
|
|

Stainless Steel Accessory Instructions354 views
|
|

Close up - key removed14 viewsIn the center is the added switch with removable key.
Here the key is removed.
This is to add an additional 'protection' from discharging the auxiliary battery in case other people are working on the car and accidentally switches on any electrical bit :)
|
|
![Filename=IMG_0586[1].JPG
Filesize=371KB
Dimensions=1706x1280
Date added=12.Feb 2013 IMG_0586[1].JPG](albums/userpics/14446/thumb_IMG_0586%5B1%5D.JPG)
ROOF RACK 21 views25.5 KG
1820mm x 1410mm x 140mm
Bars are 225mm centers
|
|
![Filename=IMG_0587[1].JPG
Filesize=451KB
Dimensions=1706x1280
Date added=12.Feb 2013 IMG_0587[1].JPG](albums/userpics/14446/thumb_IMG_0587%5B1%5D.JPG)
ROOF RACK 21 views25.5 KG
1820mm x 1410mm x 140mm
Bars are 225mm centers
|
|
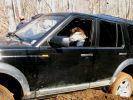
high centered121 views
|
|

Griffin Center Sections8 views
|
|
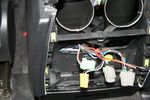
Power supply coming out from center consul, going down carpet split.62 views
|
|
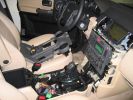
This is what it looks like under the center console at the beginning of my project.465 views
|
|
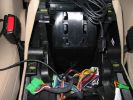
This is the hole that I drilled to get the iPod cable into the center storage area.466 viewsThe hole needed to be this large as both ends of the cable are large.
|
|
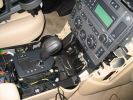
Removing the center console in preparation of installing the Drive+Play components.442 views
|
|
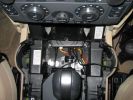
Here\'s a view of the Drive+Play "brain" which I mounted in the empty space in front of the gear selector.649 viewsI ran the power and audio cables to the rear of the center console in order to tap into the 12 volt power and "Aux" adapter. When you're sitting in the back seat, you don't see any cables whatsoever. My entire goal was to make it look as factory original as possible.
|
|
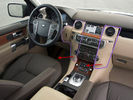
Thread upload13 viewsImage uploaded in thread 99905
|
|

Thread upload8 viewsImage uploaded in thread 159117
|
|
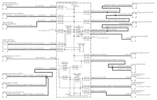
Power Window Circuit centered on Central Junction Box (behind glove box fuse panel)727 viewsRelay 143, the power window relay, and most other relays and FET's as well are built into the back of the passenger side behind the lower glove box fuse panel.
As such, the relays etc are not removable, jump-able, or serviceable.
|
|
Thread upload10 viewsImage uploaded in new thread
|
|

Console Gear Selector Wiring Diagram948 viewsThis is a 3 page wiring diagram centered around the console located gear selector.
|
|
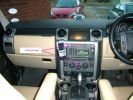
ronp\'s center fascia124 views
|
|
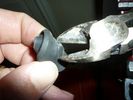
firewall plug run706 viewsThe rubber grommet from firewall plug, removed, with a hole cut in the middle. Instructions say to cut it to the center, but you can cut a hole out by bending it, and using a pair of diagonal pliers, removing excess material so you can fit the plug back in.
|
|
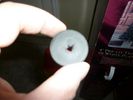
firewall plug run650 viewsThe rubber grommet from firewall plug, removed, with a hole cut in the middle. Instructions say to cut it to the center, but you can cut a hole out by bending it, and using a pair of diagonal pliers, removing excess material so you can fit the plug back in.
|
|
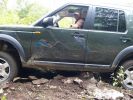
High Centered Permagrin195 views
|
|
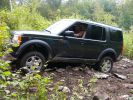
High Centered & Happy(Before)202 viewsEntered extended mode when high centered
|
|
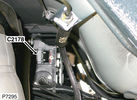
C2178 Module-Parking brake165 viewsPart No.: YPC801020
Colour: BLACK
Cavities: 32WY
Harness: CHASSIS HARNESS
Location: Beneath center of vehicle
|
|
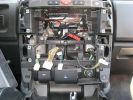
260 viewsPicture of the center console minus IHU and Climate Control. Turns out there is very little room behind there, which is really a pain in the ass.
|
|
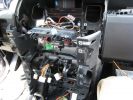
277 viewsHere is the center console with the support pulled away. You can see the wiring for the HD and XM radios working their way through the console and over to the lower glove box.
|
|
198 views
|
|
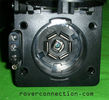
NAS 7 pin + NAS 4 pin Flat Trailer Socket304 viewsThis is the vehicle end of the NAS trailer harness that is located behind the removable plate centered within the rear bumper by the towing loop. Re the four pin flat connector, from the bottom, the exposed bare lower pin is the ground, usually the White wire on a NAS trailer. The next pin up is normally a Brown wire on a trailer and is for the Tail Lights. The third pin, normally a Yellow wire, is the left signal light; the top pin, normally a Green coloured wire, is the right signal light.
Re the round connector, from the notch in the plastic surround, clockwise, the first blade is ignition controlled +12VDC battery power, (only alive when engine running), and on the Land Rover factory harness is an Orange wire; on a NAS trailer, usually Red but perhaps a Black wire.
Next blade clockwise at 3:00 o'clock above, is the Right Turn signal light, a Green wire on the LR harness, and also on a NAS trailer.
At 5:00 o'clock, the next blade is for the Electric Brakes and is Blue on both the LR harness and on a NAS trailer.
The Ground wire is next, White on both the LR harness and on a trailer.
At 9:00 o'clock above, is the Left Turn signal, Yellow on both the LR harness and on a trailer.
The last blade to the left of the line up notch is the Tail Light circuit. On the LR harness, the wire colour is Brown with two White stripes and on a NAS trailer, Brown.
The centre pin is for the Reverse Back Up lights and is Black on the LR harness and often Purple on NAS trailer wiring but can be Black also.
Note that when the socket assembly is installed on the 3, the notch in the plastic surround is on the left - that is rotated 90 degrees anticlockwise to the picture above. In other words, When installed on the 3, the 4 pin flat connector lays horizontal and is located below the round socket.
|
|
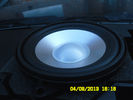
Center dash speaker37 views
|
|
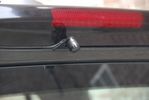
Rear view camera122 viewsRear view camera mounted to the center brake light. It produces a mirrored image. The camera is placed just a little of center to allow it to see the tow hook. When placed in the exact center the view on the tow hook would be blocked by the rear screen whiper
|
|
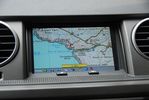
Memorymap on center screen102 viewsThis shows the PDA version from memory map on the center screen. It runs on the HTC Touch Pro in the cubby box that is connected through the GVIF box
|
|
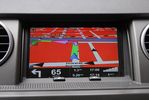
TomTom on center screen113 viewsTomTom running on HTC Touch Pro shows itself on the center screen
|
|
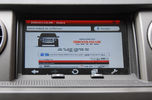
The forum on the center screen122 viewsBrowsing the internet is also possible
|
|
|
|