| Search results - "dent" |
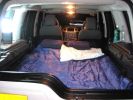
Ensuite or presidential suite ?1208 views
|
|

13 views
|
|

1 General Information, Identification Codes and Jacking and Lifting24 viewsPart 1 of Discovery 3/4 Workshop Manual - General Information, Identification Codes and Jacking and Lifting
|
|
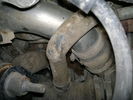
Charge Air Pipe - turbo end.101 viewsThe maint manual identifies releasing the pipe hose clip in the center of the photo. Pity who ever built this engine Put the hose in such a position that access to it was near impossible. I released the other clip at the turbo end of the flexi hose. Easy to get to but a right git to release the hose of the turbo.
|
|

Dent Master to the rescue242 views2hr job....
|
|
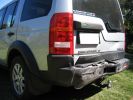
Rear left103 viewsDamage to car after ~60km/h rear end collision
|
|
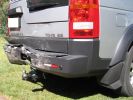
Rear right94 viewsDamage to car after ~60km/h rear end collision
|
|
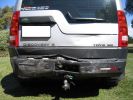
Rear111 viewsDamage to car after ~60km/h rear end collision
|
|
348 views
|
|

Thread upload5 viewsImage uploaded in thread 155907
|
|
Thread upload13 viewsImage uploaded in thread 140021
|
|
Thread upload14 viewsImage uploaded in thread 140021
|
|
Thread upload11 viewsImage uploaded in thread 140021
|
|
Thread upload9 viewsImage uploaded in thread 140021
|
|

Thread upload26 viewsImage uploaded in thread 137536
|
|
Thread upload6 viewsImage uploaded in new thread
|
|

Thread upload28 viewsImage uploaded in thread 137536
|
|

Compressor type TSB106 viewsLand Rover TSB regarding Compressor type identification and fitment.
|
|

That big!21 views
|
|
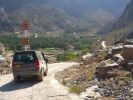
Bald Seet village164 viewsDescendign a steep concrete track over gravel into the villaeg of Ballad Seet. Curious in a dry, desert country to find verdent growth of palms, and agricultural produce on well watered terraces.
|
|

16 views
|
|
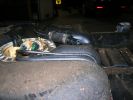
97 viewsRodent? Damage to the elbow on the D3 tank. The same elbow on all cars and only on D3\'s
|
|

D3 infotainment37 views
|
|
Thread upload12 viewsImage uploaded in thread 184914
|
|
Thread upload2 viewsImage uploaded in thread 198491
|
|

Thread upload36 viewsImage uploaded in thread 123326
|
|

Thread upload16 viewsImage uploaded in thread 169573
|
|
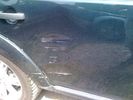
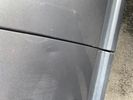
Dent47 views
|
|
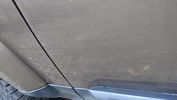
Thread upload0 viewsImage uploaded in thread 164458
|
|

Thread upload2 viewsImage uploaded in thread 183929
|
|

Thread upload0 viewsImage uploaded in thread 164458
|
|
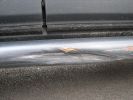
Dented side rails264 viewsShows how thin the metal is.
|
|
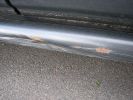
286 views
|
|
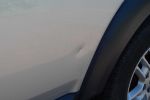
54 views
|
|
dicodent261 views
|
|
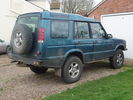
dented side !18 views
|
|
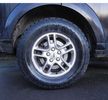
Please identify this wheel122 views
|
|
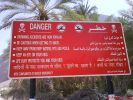
good to know that \'drowning accidents are now popular\' - signpost near the pool139 views
|
|
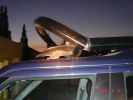
Not the FR rack, but what was left of the Land Rover rack after a door incident213 views
|
|
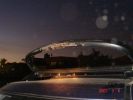
Not the FR rack, but what was left of the Land Rover rack after a door incident173 views
|
|
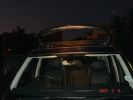
Not the FR rack, but what was left of the Land Rover rack after a door incident148 views
|
|
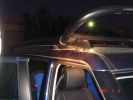
Not the FR rack, but what was left of the Land Rover rack after a door incident168 views
|
|
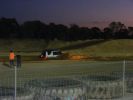
214 viewsRacing out of pit 3, we were pretty confident we\'d beaten the Rangie, but we weren\'t sure ...
|
|
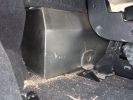
Right side floor-level view of water tank.150 viewsShows tie-down bolt (one of 2 securing the tank). Also note small void on side, which permits tank area to dry out if accidentally overfilled.
|
|
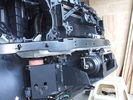
Front-right view (looking forward) of partially installed winch and mount122 viewsThe closest bracket, with three rubber grommets, is the air bag sensor. Before beginning any of this work, be sure to disconnect battery and discharge any remaining electrical power. I didn't want to accidently drop this assembly and cause the airbags to deploy.
|
|
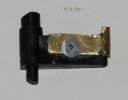
Foto 6c - particolare per riparato127 viewsParticolare con assemblata la lamella di ottone fissata con un rivetto di alluminio. Il rivetto � stato limato da entrambi i lati per permettere al dispositivo di spostarsi da destra a sinistra abbastanza per seguire il percorso all\'interno del portello. Il "dente" guida deve essre arrotondato al fine di agevolare il percorso.
|
|
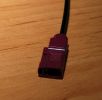
Photo off coax connector on roof top ariel, can you identify it? The name and type is needed.273 views
|
|
Thread upload3 viewsImage uploaded in thread 43009
|
|
Thread upload3 viewsImage uploaded in thread 43009
|
|
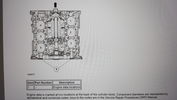
Thread upload10 viewsImage uploaded in thread 199883
|
|

finger indent46 viewsuse your finger to identify unseeable bolts or screws
|
|

Fluid, Filter/Pan Combo removal and install5948 viewsThese are the LR instructions re removal and install of the plastic pan/filter combo for the ZF 6HP26X transmission on the 4.4L petrol V8 LR3.
The instructions tend to ignore the reason you have to lift the right hand side of the engine about 40 mm. This is because of a frame cross member that interferes with dropping down of the plastic pan. The real problem is a vertical "oil filter spout" that rises out of the filter/pan combo up into the transmission. The spout is the suction pipe for filtered transmission oil back up into the tranny.
On the metal pan versions, the filter is separate from the pan, hence the filter remains with the tranny when the metal pan is dropped. The filter is then removed or installed independent of the metal pan, hence with the metal pan, there is no need to lift the engine.
If one is removing the plastic pan so as to install the metal pan, then some do not lift the engine but just drop the plastic pan enough to gain access to saw off the vertical plastic spout - it is a one time procedure.
Be aware however that the metal pan uses a flat gasket and the plastic pan uses a O ring like perimeter gasket that sits in a half round groove in the tranny casing. Also the metal pan uses 21 shorter torx M6x22.5 metric cap screws for the perimeter bolts. The plastic pan uses longer M6x28.5 torx metric cap screws.
|
|

Breather Hose exploded view.1207 viewsThis pdf shows the exploded view of the breather hose from the front differential to the engine compartment. The breather hose part number is TAP500081 and is identified as 4A058 in the drawing.
|
|

Fix stiff gear selector or jumping out of drive into neutral32 viewsThis is a document culled from a topic about a simple fix to teh gearbox selector lever that fixes a problem with jumping out of drive into neutral.
I made the document to give to my local independent and thought it might be useful for others.
Thanks to disco_mikey, EdF and Robbie from the original post whose information and photos made this possible (I take no credit for anything here apart from errors).
|
|

Fix stiff gear selector or jumping out of drive into neutral17 viewsUpdated 19 Dec 2012
This is a document culled from a topic about a simple fix to the gearbox selector lever that fixes a problem with jumping out of drive into neutral.
I made the document to give to my local independent and thought it might be useful for others.
Thanks to disco_mikey, EdF and Robbie from the original post whose information and photos made this possible (I take no credit for anything here apart from errors).
Updated after I did this fix on my own car.
|
|

can you identify this bracket?24 views
|
|
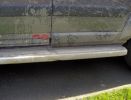
Hmmm, that dent wasn't there when I started.134 views
|
|

Close up - key removed14 viewsIn the center is the added switch with removable key.
Here the key is removed.
This is to add an additional 'protection' from discharging the auxiliary battery in case other people are working on the car and accidentally switches on any electrical bit :)
|
|

President Johnson II in its current position16 viewsThis CB was installed some years ago and still is at the same location.
However, I'm planning to move it to the head unit area.
As such, I'm looking around to replace my low end head unit with a single DIN radio and the CB on top of it.
|
|
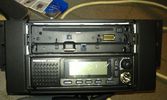
72 viewsThe Pioneer DEH X9500BT on top with the CB President Johnson II beneath.
I had to cut the bottom part of the CB 2 DIN conversion kit in order to have the supplied cover with the facia in place as it should.
I eventually didn't use the supplied facia of the radio as it's bottom part was covered by the CB's kit.
|
|
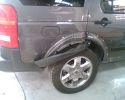
Accident with X5417 views
|
|

Rainbow over Denton51 views
|
|

Dented Disco's Alternator Voltage22 views
|
|
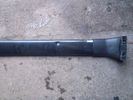
Roof bar dent15 views
|
|
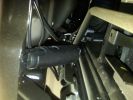
cablaggi sotto sedile67 viewsoggetto nn meglio identificato
|
|
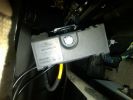
cablaggi sotto sedile96 viewsaltro oggetto non meglio identificato presente sotto entrambi i sedili
|
|
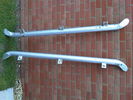
bottom of the side bars - they are 100% straight, just that dent on the bottom of one.131 views
|
|
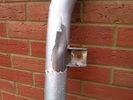
Dent on bottom of side bars - you can see powdercoat and steel underneath140 views
|
|
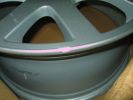
dented RRS wheel164 views
|
|
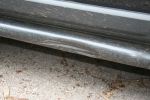
309 viewsSide bars a bit dented 24 hrs after fitting, oops!
|
|
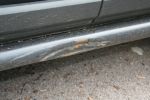
368 viewsEven more dented than other side. Will paint clean up & paint it some time.
|
|

Posizione con lampada 8 LED doppio chip 5000k38 viewsLuce bianca (non azzurra) praticamente identica a quella degli xeno. Illuminazione MOLTO più intensa rispetto al bulbo originale.
|
|

Thread upload10 viewsImage uploaded in thread 132808
|
|

Thread upload3 viewsImage uploaded in new thread
|
|

Thread upload3 viewsImage uploaded in new thread
|
|

Thread upload3 viewsImage uploaded in new thread
|
|
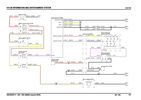
Thread upload8 viewsImage uploaded in new thread
|
|

Thread upload6 viewsImage uploaded in new thread
|
|

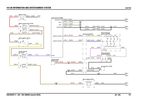
information and entertainment system (wiring diagram).pdf696 views
|
|

D3 infortainment system112 views
|
|

Thread upload4 viewsImage uploaded in thread 183698
|
|
Thread upload7 viewsImage uploaded in new thread
|
|
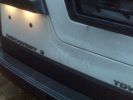
Damage ? just a slight indentation79 views
|
|

Thread upload5 viewsImage uploaded in thread 159579
|
|

wiring audio information and entertainment system1178 viewswiring audio information and entertainment system1
|
|

Air System Schematic with parts identified.1364 viewsAir system block diagram with components numbered and identified.
|
|
Battery Maintainer switch box and connector 716 viewsThe Hammond box contains a DPDT toggle switch with centre off. The Positive and Negative from each battery feeds to the switch. Depending on the setting of the toggle, (full left, full right,or centre off),the respective batteries connect into the pigtail that can stick out thru the grill when one wishes to connect the charger.
This allows one to charge each battery independently via a suitable battery maintainer. I use a CTEK unit that feeds a maximum of 3.3 amps at 14.4 or 14.7 VDC, depending upon setting. The wiring therefore allows for a slow recharge of either of the batteries separately if either one requires such.
|
|
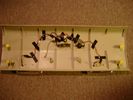
Boot lighting panel, wiring side up 279 viewsThis shows the back side of the plastic cover panel on which the two LED lights are mounted.
Also of note is the SPST rocker switch to switch the new lights off independent of the the Land Rover W5W light.
The new light pair will only power up if the Land Rover light is powered and hence dims and automatically goes off along with the Land Rover light.
The Black wire is ground, the Purple wire is +12VDC.
|
|
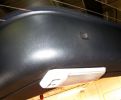
rear hatch light and door release switch389 viewswe\'ll ad a switch "guard" to protect from accidental gear shift popping button. light is slider 3 way so unlikely to be turned on by accident but will be nice down light when hatch is opened out.
|
|

Lug Nut part number RRD500290 outline sketch538 viewsThis single sheet pdf provides dimensions of the LR part number RRD500290 lug nut on vehicles from MY 2005 to 2008, (up to VIN 8A450459). From VIN 8A450460, the part number is RRD500590.
Visually, there is no apparent difference between the two part numbers. The dimensions appear identical as well. The shape, size, and profile of the Stainless Steel "hat" appears identical.
There are I presume differences in metallurgy to reduce corrosion and swelling of the hat or perhaps better sealing between the inside surface of the hat and the steel of the lug nut body. The reality is the differences are not immediately obvious however.
A 22 mm six point half inch or larger socket drive fits over the lug nuts. I use a nominal 36" long breaker bar with the 22mm socket - any shorter bar, best you be in shape. Depending upon your source, for both alloy and steel wheels, the lug nut torque value appears to be 103 lbf ft, (140 Nm); others suggest first tighten to 96 and then finish at 110 lbf ft, (130 and 150 Nm).
|
|
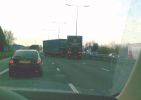
Accident on M577 views
|
|
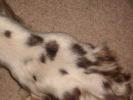
Front left paw60 viewsLump on his front left paw. About 2+ years old. Identified on x-ray with fluffy edge
|
|

Dented Packaging186 views
|
|

Dented Packaging285 views
|
|

Dented Packaging389 views
|
|
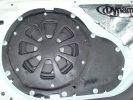
Pioneer TS-SW1041D 10" sub installed120 viewsAfter cutting off the factory sub mount studs, it took ages to bash the indents. To gain more space behind the driver - I changed the driver\'s side license plate from plastic push in lug - to stainless bolt with nyloc nut. Cr@ppy paint job in wrinkle-finish - all I had on hand at the time. Sealed and treated lower tailgate with Dynamat.
|
|
Thread upload28 viewsImage uploaded in new thread
|
|
Thread upload12 viewsImage uploaded in new thread
|
|
Thread upload13 viewsImage uploaded in new thread
|
|
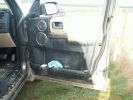
TazDaz door panel after unfortunate splashing incident161 views
|
|
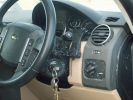
TazDaz dash after unfortunate splashing incident157 views
|
|
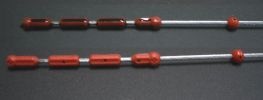
TDv6 Oil dip stick275 viewsPhoto shows oil level on rear stick (cleaned front stick). Note that diesel oil when fresh may not be black like the sample shown (car had travelled 5 000km on delivery oil). You can see small indentations in both sticks. This is where I observe the current oil level. Note also the two arrows at either end of the red plastic indicators showing lower and upper limits (I do not know what the red ball is for however - it just may be a guide.)
|
|

Unidentified ticking noise1 viewsAnyone familiar with this ticking noise? It's at the front of the engine down low. 1st heard on startup this morning.
|
|

TMC Accident & Congestion77 views
|
|
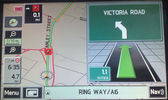
TMC Accident85 views
|
|

Lucky Escape17 viewsPosted on Facebook on 9th July 2014
|
|
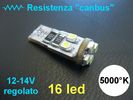
Lampada 8 LED doppio chip 5000k37 views Luce bianca (non azzurra) praticamente identica a quella degli xeno originali. Nessun errore CANBUS.
|
|
|
|
|