| Search results - "from" |
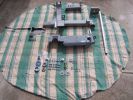
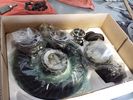
The full complement of bits and pieces, major parts back from the powder coaters, all bolts nuts washers replaced with stainless steel240 views
|
|
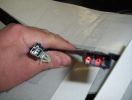
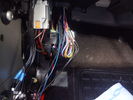
heated seat (base) wiring410 viewsThe Small connector takes the plug from the seat back pad, the larger connector (with red) is fitted into the multiplug casing uder the seat - the male side of this is already pre-wired.
|
|
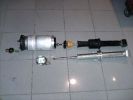
414 views
|
|
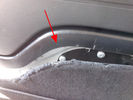
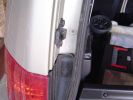
Rimozione pannello dalla sponda - Tailgate panel removing43 viewsPer togliere il pannello moquettato dalla sponda ho fatto leva con un cacciavite abbastanza grosso nel punto indicato, è stato veloce e non ho rovinato niente.
To remove the carpeted panel away from the tailgate I used a big enought screwdriver at the point indicated, it was fast and I have not ruined anything.
|
|
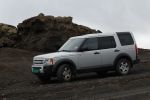
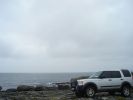
At Reykjanesfólkvangur not far from Reykjavik129 views
|
|
The wet Walk from the pub68 views
|
|
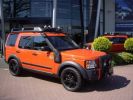
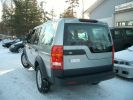
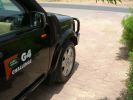
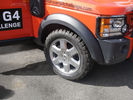
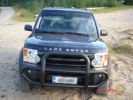
A look alike G4 from 2008 120 viewsA look alike G4 from 2008 (for sale in Holland)
http://autoscout24.nl/Details.aspx?id=vnyzslgvfoja
|
|
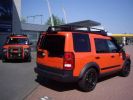
A look alike G4 from 2008108 viewsA look alike G4 from 2008 (for sale in Holland)
http://autoscout24.nl/Details.aspx?id=vnyzslgvfoja
|
|
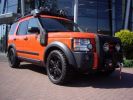
A look alike G4 from 2008117 viewsA look alike G4 from 2008
http://autoscout24.nl/Details.aspx?id=vnyzslgvfoja
|
|
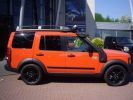
A look alike G4 form 2008128 viewsA look alike G4 from 2008 (for sale in Holland)
http://autoscout24.nl/Details.aspx?id=vnyzslgvfoja
|
|
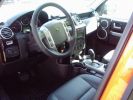
A look alike G4 from 2008116 viewsA look alike G4 from 2008 (for sale in Holland)
http://autoscout24.nl/Details.aspx?id=vnyzslgvfoja
|
|
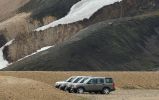
Discovery 4787 viewsCALENDAR 2008 ENTRY - Picture taken at Landmannalaugar in Iceland meeting up with a group Disco3 from safaris.is.
|
|
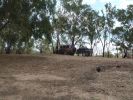
02 Last Photo before the little wheel problem saga221 viewsThis is my D3 with trailer on the banks of the Darling River, literally "back of Bourke" (the regional definition of the start of the Australian Outback). We were the first vehicle in a week to try and drive this route from Bourke to Wilcannia on the account of floods (first water in 7 years). Little did we know that 3 hours later there\'d be a bit of a wheel and tyre problem appearing...
|
|
Gaydon 2010 from the top of the bank58 views
|
|
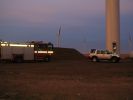
215 viewsMore wind turbines and the pump from my station.
|
|
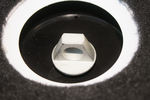
180 viewsThe offending adapter in the D4 courtesy of the bright young designers, who modified it from the perfectly acceptable hex nut
|
|
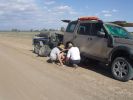
03 First bit of tyre/wheel trouble243 viewsIn the outback a tyre suddenly blew. "No worries" we thought, as we had 3 spares (+ two more if we abandoned the trailer), 150l of water, 3 days of food, and an EPIRB if things got really bad. At the time I didn\'t fully appreciate the fact that my index got a blister from the burning heat of one of the wheel nuts. It was 45 deg C at the time, so everything was hot.
|
|
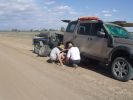
03 The first bit of tyre/wheel problem249 viewsSomewhere in the Australian outback on a 45 deg C day in Jan 08, a D3 had a bit of a flat tyre problem. "No worries, mate" st we had 3 spares (plus 2 more if we abandon the trailer), 150l of water, 4 days of food, and an EPIRB if things really go crook. The first clue that this was not a "normal" flat was when I handled a wheel nut and ended up with a blister from a burning hot nut (the ambient wasn\'t THAT hot).
|
|
379 views
|
|
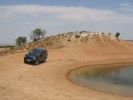
Medinaceli 2.156 viewsRuta de Medinaceli al Monasterio de Piedra.
From Medinaceli to Monasterio de Piedra, Soria and Zaragoza provinces in Spain.
|
|

Estrarre il circuito stampato con la batteria - Exctact the printed board with the battery18 viewsRimossa la parte superiore del contenitore, estrarre il circuito stampato sollevandolo leggermente dalla parte della batteria.
Removed the top of the box, pull out the printed circuit board slightly lifting from the battery side.
|
|
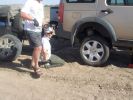
06 Spare tyre on and still suffering from hot wheel nuts296 viewsManaged to get ultra hot wheel nuts back on the spare (using the original 19" D3 wheel, vs the 19" RRS wider wheel which blew - shown in left of photo). Pity we didn\'t note that the disk brake was EXTREMELY hot at this time.
|
|

Silverstone Classic Media Day58 views24 races, 1000+ classic race cars .... from Ferrari to Metro and everything in between.
|
|

Lake Eyre with water in 2000 77 viewsTook a flight from William Creek to view the lake with water in it.
|
|
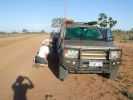
08 D3 stranded with a seized smoking wheel314 viewsAbout 1 hr after replacing the blown tyre, strange noises emanated from the stability control system and speed dropped off. Then I looked in the rear view mirror, and noted a cloud of dust along with a whiff of black smoke. This led to a very quick stop (no traffic on this route for over a week, so no worries about having to signal exiting the road). Took a look and WOW. The right rear wheel was glowing a dull red colour, and burning rubber smoke was wafting from the red glow over the fuel lines.
|
|
After a \'charge\' up the hill from the river- VICTORIOUS!44 views
|
|
Same holes as the disco, took a picture from the right side. Picture taken at Offroad-Training in Linthe/Germany111 views
|
|

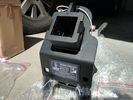
Receiver for toy rack38 viewsSensor bar was made of same heavy tube that the carrier was made from allowing a small 1 1/4" receiver to be placed on it for a multitude of toy racks of my choice. Rack adjust in and out of receiver.
|
|
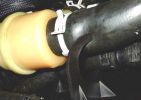
Hose displaced from support bracket315 views
|
|

Trim removed from tailgate135 views
|
|
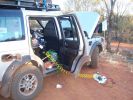
Fuelling up from 200 litre tank replacing rear seat343 views
|
|
From Above18 views
|
|
View From The Rear19 views
|
|
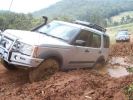
Me stuck at the bog (from RichardK\'s collection)289 views
|
|

12S plug from eBay and Ctek lead (provided with MXS-10) - before cutting the ring terminals off.26 views
|
|
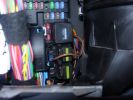
Permanent 12V supply271 viewsPhoto taken of TFC\'s D3 showing where you can take a permanent +12V supply, from the main fuse board behind the glove box.
|
|

Virgin Snow127 viewsWent for a play in some new snow so I could practice and get my driving style right on close to zero friction surfces. Hard to tell from this photo, but car is parked on a 1:6 slope heading uphill, with hard packed ice under the fresh snow covering. I stopped here to practice my hill starts on ice...I was there for some time :)
|
|

Thread upload8 viewsImage uploaded in thread 111125
|
|
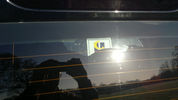
56 viewsSlight damage to rear window tint, the garage I bought it from "removed" the landrover garage sticker and damaged the tint!
|
|
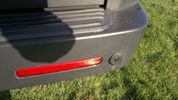
52 viewsSlight dink in parking sensor, caused by under sied trailor. Stops parking sensors from working and didnt see it. Bloody thing!! Parking snsor still working perfectly normal.
|
|

Thread upload128 viewsImage uploaded in thread 92365
Chinese garbage knock off stolen from ARB / Rigid
|
|

15 First sign of bits of parking brake failure335 viewsNote the complete lack of pad from the parking brake. Not only was there no composite brake material left, but the drum was somewhat twisted and connecting bits all smashed. Also a small drip of melted rubber from wheel bearing parts....
|
|
![Filename=15082008064 [640x480].jpg
Filesize=73KB
Dimensions=640x480
Date added=15.Aug 2008 15082008064 [640x480].jpg](albums/userpics/12862/thumb_15082008064%20%5B640x480%5D.jpg)
In Disgrace99 viewsThis is where its been for 3 weeks &3 days waiting for the parts to arrive from England. later that afternoon we aere able to take her home. Civilation at last :)
|
|
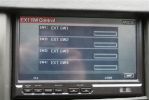
17298 viewsYou can add relay switches to the controller to turn on & off from the touch screen...pretty cool.
|
|
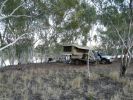
Stretch Lagoon - Canning Stock Route 18 km from Billiluna77 views
|
|
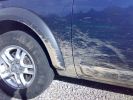
mud from Barston Ford160 views
|
|
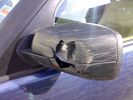
Damage from Mud plugging on way to Barston Ford183 views
|
|
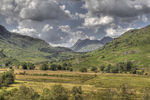
The view from High Tilberthwaite30 views
|
|
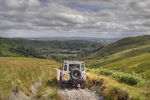
The view from the top of Breasthigh Road28 views
|
|
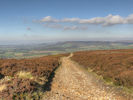
Rudland Rigg45 viewsThe view from the top of Rudland Rigg looking out towards Roseberry Topping and the coast.
|
|

10 views
|
|
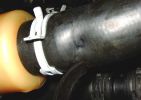
Damage to hose from tip of support bracket248 views
|
|

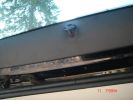
Lock mechanism removed from tailgate128 views
|
|
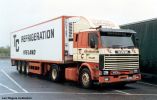
172 viewsFrom http://www.hankstruckpictures.com/pix/trucks/len_rogers/july7a/scania_143m.jpg
|
|
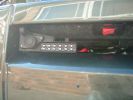
Socket for control lead and switch for radio-remote moved from solenoid pack to bumper1030 views
|
|

Historical Perth Fuel Prices144 viewsAverage prices for diesel and all petrol grades in Perth, Western Australia from 2004 to Oct 2009
|
|

oil seems to be coming from grommet on auto-box80 views
|
|

Looking West from 'Big Red' - Simpson Desert19 views
|
|
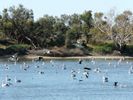
Thousands od Sea Birds Thousands of Km from Ocean - Innamincka28 views
|
|
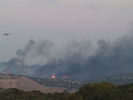
Wildfires 2011 TX185 viewsTaken from cell phone, while evacuated.
|
|
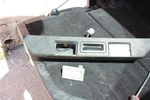
34 viewsRemoved one light from tailgate handle
|
|

94 viewsOut at the C pillar. From here wires were threaded through the rear seatbelt anchor point into the commercial box, which is the hub of all the wiring and CarPC installation
|
|
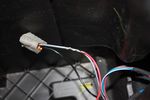
108 viewsThis is the plug for the accessory socket at the rear of the cubby box. On commercial D3 such as this one, there is no accessory socket so this plug is unused. I tapped into the 12V wire as an ignition feed. This will feed a relay coil which opens up power from the aux battery. Like this I can still retro fit and make use of the accessory socket later on.
|
|
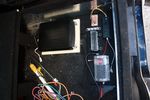
96 viewsDeciding on a layout for the electrical stuff. Bottom right of pic is a fusebox which will take the input power from the traxide kit, then relay box and 12V regulator, ignition busbar and homemade regulated 12V busbar. Big black box is the CarPC
|
|
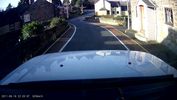
BlackVue DR40030 viewsA still from the first clip (before the date was set), good picture quality.
|
|

400 mm from ground44 views
|
|
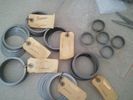
Custom Shim Assortment662 viewsMfd from https://www.facebook.com/DifferentialPartsUS
|
|
sunset from room15 views
|
|
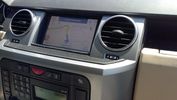
ta-dah! the final result35 viewscomplete GPS satNav system, with iGO software and ALL maps from europe 2012, including POIs speedcams, and personalized land rover skins
|
|

Freelander headrest 30 viewsremoval of the screen from a freelander headrest
|
|

Terratrip 202 V4 possible discrete location134 viewsAttached to ashtray - allowing removal / unplugging when not in use by pulling out the ashtray.
Terratrip is an odometer for use in rallies / raids - very popular with the French when used in conjunction with a roadbook. A mechanical backup in case GPS signal is lost on modern odometers like the Globe 800 I propose to use.
We'll see if there are reflection issues from the screen.
|
|
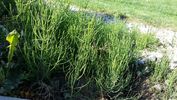
what plant18 viewswant to find out what this plant is and how best to control / remove it from garden
|
|
Locking Kit626 viewsready to install
Mfd from https://www.facebook.com/DifferentialPartsUS
|
|
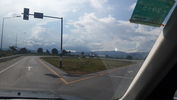
switch16 viewsthe point where you switch from right to left side road.
Laos is drive on right..Thailand left
|
|
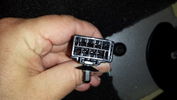
Connector from Main Loom to Heated Rear Seat Harness17 views
|
|

Thread upload13 viewsImage uploaded in thread 110148
|
|
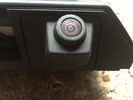
Reverse Camera/ from My 2013/14 close up10 views
|
|
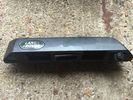
Rear Door handle in Metalic black from 2013-2013 D4 Camera model not same as my 20119 views
|
|
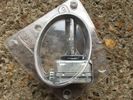
Used Xeno Bulbs from MY2011 Commercial - replaced with Higher capacity7 views
|
|
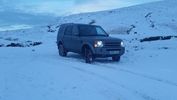
Gospel Pass Jan 2015146 viewsThe Gospel Pass (Welsh: Bwlch yr Efengyl) is the highest road pass in Wales. It is at the head of the Vale of Ewyas in the Black Mountains of southeast Wales.[1] The narrow mountain road climbs steeply from Hay-on-Wye to a height of 549 metres (1,801 ft) [2] above sea level, squeezing between the mountains of Twmpa to the west and Hay Bluff to the east, before dropping down into the valley to the south on its way to Llanthony Priory, Llanfihangel Crucorney and Abergavenny.
|
|
missy home 27 viewsmissy home from vets after week of investigation - treatment
|
|
missy home 15 viewsmissy home from vets after week of investigation - treatment
|
|
low profile solar panel203 viewsThe low profile solar panel, can be seen here, as the fine white line under the light bar. The way it's laid out, the panel should generate decent power between 10am and 4pm depending on the time of year, from the sides or front, with no shadows. Grape Solar 100W flex panel.
https://www.facebook.com/DifferentialPartsUS
|
|
Traxide USI-160 Install493 viewsOverview picture of Traxide USI-160 upgrade install. This was an upgrade from the SC80 which performed flawlessly. The USI-160 had two relays and can deliver more amperage. As a result, the wiring was upgraded to 4/0 Welding Cable (warn) and heat shielding was added. The unit performs flawlessly to support 2 HAM Radios, Fridge, etc. Like me https://www.facebook.com/DifferentialPartsUS
|
|
Winch Power upgrade306 viewsUsing 2 warn kits, and removing one of the wires to use on another project. The purpose was to replace the power and ground wire. I used Warn kits, which are 4/0 Welding cable. The original red #4 warped from getting a little too worn. The 2nd
Battery #1 Deka 9A94 AGM Intimidator, Battery #2 Deka 9A47 AGM Intimidator WARN 36080 28" Quick Connect Cable X 2, WARN 26405 Quick Connect Cable 7' X 2, WARN 15901 Black Cable X 1 -- winch control 72" X 1 https://www.facebook.com/DifferentialPartsUS
|
|
Rhino Hitch385 viewsMore info from https://www.facebook.com/DifferentialPartsUS
|
|

offending part head caught 9 viewsoffending part head caught when standing back up from picking up dropped LTO tape
|
|
Sheltering from the weather13 views
|
|

Embroidered T-shirt96 viewsEmbroidered in Khathmandu in a shop, from any design, by hand, overnight.
(9N1SC is a radio call-sign)
|
|
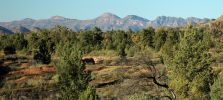
Flinders Ranges - View South from Aroona Valley158 views
|
|

Air con pipe65 viewsIts the brown pipe in the center of the photo. To remove this first you need to remove the "charge air cooler inlet hose" to allow access to the air con pipe securing fixings. But with the "charge air cooler inlet hose" disconnected it can\'t be removed from the veh because the air con pipe is in the way???
|
|
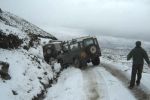
2 90's off at Lochearnhead206 viewsGuess this was why we turned round.
Photo pinched from SLROC website!
|
|

Thread upload7 viewsImage uploaded in thread 189350
|
|

8 views
|
|
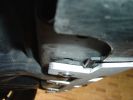
Sandwiched rear tabs (5mm gap from steel crossmember)95 views
|
|
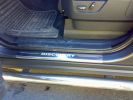
Sill Plates from Tasmod304 views
|
|
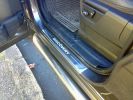
Sill Plates from Tasmod294 views
|
|

Flinders Ranges - The road from Blinman152 views
|
|
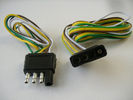
4 pin NAS flat connector from NAS small trailer377 viewsThe connector with the three exposed pins is the end that would commonly be located at the trailer hitch end, (front), of a small NAS lightweight trailer that has no electric brakes. This plug would connect into the flat 4 pin connector at the rear of the 3.
Note the order of the pin functions and wire colours: White is ground; the next pin is for tail/marker lights using the Brown wire; the Yellow conductor is for the left turn signal, and the far pin uses the Green conductor for the right turn signal.
There is no separate brake light conductor as NAS spec vehicles most often combine the brake and signal light functions to the same bulb filament rather separate filaments in different bulbs. The LR factory harness resolves that design difference.
Fortunately, the Land Rover NAS assembly pin order for the 4 pin flat plug maintains the above described conventions.
|
|

Air Distribution and Filtering Systems2047 viewsThis is 3 page pdf with coloured drawings of the air distribution ducting for the front air system.
Also included is a sketch of the pollen filter location within the front heater ducting. Note that two types of filters are available: a) the cheaper dust/pollen filter and b), the activated carbon filter that removes smells from the air. Installing the more expensive activated carbon filter means you never smell a cattle truck or chicken farm again. It really works.
|
|

Alternator and Regulator Wiring Diagrams, TDV6 and petrol V8 and V61973 viewsThis is a three page pdf that shows the alternator and regulator wiring for the petrol V6, petrol V8 and TDV6. The pdf can be either printed or by right clicking on the displayed pdf, rotated as required for viewing.
Of interest is that the regulator gets its instructions primarily from the Engine Control Module (ECM) and only secondarily from the vehicles electrical buss. The conductor from the battery thru the 5 amp fuse F20E is to provide initial power to excite the alternator at startup and then secondarily, to instruct it if the PWM signals were not available. Primary instructions to and from the ECM are thru the two other conductors via a digital like Pulse Width Modulated (PWM) signal.
If F20E, the 5 amp engine compartment fuse box fuse is blown, the red alternator light on the dash will be illuminated. This means that the alternator could be OK, but if the F20E fuse is blown, no electricity will be generated. Hence check the F20E fuse if you get a red ALT light or some indication of the alternator not working.
Regarding operation of the red ALT light on the dash, it is not the regulator within the alternator that tells the red light to illuminate, or not, but instead the ECM. This is the reason the red light does not function in the same manner as with older vehicles. With the 3, sometimes you have illumination and sometimes not depending upon what the ECM is thinking. What this means is that you can have an alternator that is failing but the red light does not illuminate as the ECM is compensating for reduced alternator output - maybe by draining the battery and or cutting back on vehicle electrical loads such as shutting off or cycling the radio amplifier or heated seats.
|
|

4x4 Reliability Comparison - 201127 viewsTaken from Warranty direct survey / reliability index.
|
|
Thread upload0 viewsImage uploaded in thread 5
|
|
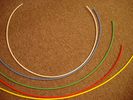
6mm Heat Shrink colours 362 viewsI decided to colour code the tubing so I used 6mm electrical heat shrink.
As there is no apparent colour coding re the 3, I tried to emulate the P38 coding; #1 LR red, #2 RR blue, #3 LF yellow, and #4 RF green. This was not doable as both left side air springs have green coloured tubing coming off the top of the front and rear air springs. I therefore arbitrarily chose the Left Rear to be red; Left Front green; Right Front yellow; Right Rear blue; and for the air compressor supply line, White coloured heat shrink. Since two new lines tie into each air spring line, I made the line between the air spring and the FASKIT, a single solid colour, and the line from the FASKIT to the valve block, White, plus the related appropriate solid colour.
|
|
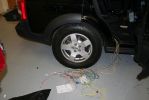
06256 viewsWires from the wiring harness of the V1000 to hook up.
|
|

Tools from dealer110 viewsThis is a cel pic of the tools from the dealer for install and removal of control arm bushings. minus one broken tool.
|
|
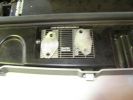
EGR Blanking212 viewsBlanking plates cut from stainless steel plate.
|
|

124 viewsThis is the installation guide from the manufacturer
|
|
Antenna Bracket388 viewsThis was bent from a piece of 3mm x 25mm alloy flat bar. I used automotive grade double sided tape and two screws to fasten it. I have a dual band VHF/UHF antenna on this bracket
|
|

View from verandah towards Norther Ireland172 views
|
|
View from verandah towards Isle of Man198 views
|
|
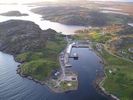
KLB from above.27 viewsI'm lucky enough to live in this beautiful part of the world. My house is in this picture.
|
|

Thread upload10 viewsImage uploaded in thread 167839
|
|
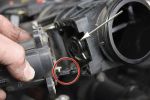
Removing the EGR Butterfly Valve Actuator1522 viewsRemove the 4 TORX screws to remove the actuator. The small black link (circled) connects the actuator drive arm with the butterfly valve spindle (arrowed). The spindle can now be very carefully levered out using a screwdriver inserted beneath the arrowed bit in the photo. A bit scary to do as it takes a fair bit of pressure before the spindle will free itself from the butterfly. Once it starts moving though, it gets easier to pull out.
|
|

Add A Circuit Littelfuse Data sheet2264 viewsThe switch connects to what Littelfuse brand calls an Add-A-Circuit model FMH200BP which is an adapter that plugs in place of a Mini fuse and then has space for two Mini fuses, (original and a second one). In this install, only the original 5 amp fuse was used - adapter was so as to route power from fuse box thru fuse, then rocker switch, and then back to fuse box.
Before you install the Add A Circuit for this application, take an ohm meter and trace out the circuit path of the four slots that fuses could insert into. The path is more complicated than one might first think. As such, the orientation of the fuse holder in the socket matters for this application - that is for a circuit diverter, rather than accessory adder.
|
|

Land Rover Aerial Fin images for both Glass and Metal Roof Disco3 / LR3850 viewsAs well as the two different fins, this pdf also shows the plastic blanking plate for glass roof vehicles where no fin is installed.
The glass roof fin is secured by two security screws from the top into a plastic frangible glue on gasket. The hope is that when struck, the fin will shear off and not crack the glass roof. Re the metal roof design, the fin is secured from underneath via two nuts.
The pdf also shows the various electrical bits related to the antennas. In the UK, the fin would house not only a cell phone antenna but the TV and satellite radio antenna electronics as well; in the States, the Sirius sat radio antenna and a G type cell phone antenna if the phone kit was installed would reside within the fin. The SAT NAV GPS antenna is located within the High Mount Brake Light plastic mounted to the upper rear hatch.
|
|
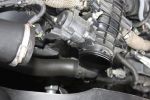
Air Box Removed1052 viewsView showing air box removed from front of EGR butterfly valve housing
|
|
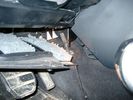
Air Conditioner Drain Hose on Drivers Side (LHD)2258 viewsThe corrugated rubber bit above and to the right of the gas pedal is the drain hose that goes down thru the carpet and floor sheet metal.
While it is bit hard to figure out from the jpg above, there is a rubber "strap" attached to the top of the corrugated hose that one uses to pull on to drag the hose up back around the black plastic heater "pan" drain. The same drain hose arrangement is on the other side as well.
One could I suppose run a plastic snap tie around the vertical pull strap if one was concerned about the hose slipping off again. See also the other jpg sketch which is from the Land Rover manual.
|
|
![Filename=AirJack[1].jpg
Filesize=215KB
Dimensions=1440x960
Date added=16.Apr 2007 AirJack[1].jpg](albums/userpics/10439/thumb_AirJack%5B1%5D.jpg)
316 views4T AirJack from Bushranger
|
|
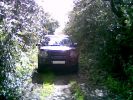
Lunchtime Lane197 viewsNot 200 yards from Manchester Airport can be found a little 1/2 mile lane - did it for the first time today - a few minutes fun in a dreary day
|
|
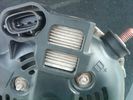
Alternator Plug and B+ terminal910 viewsPictured is the rear of the older Land Rover part # YLE500190 alternator showing the shiny cooling fin of the Regitar VRH2005-142 regulator under.
The first pin in the far left side of the connector is numbered #1 in the LR electrical wiring diagrams and is Battery Voltage Sensing (BVS); the middle pin, #2 receives a Pulse Width Modulated (PWM) signal from the Engine Control Module (ECM), and the right pin, #3 carries a PWM signal back to the ECM. Terminal Pin #2 on the LR wiring diagrams is called Alternator Control or ALT CON; Pin #3 per LR is called Alternator Monitoring or ALT MON.
Pin #1 is similar to what in older designs used to be called A or Batt, but is now called by Denso, S, AS, or Alternator Sensing for this design. Pin #1 also provides power to excite the alternator at startup until the PWM instructions over ride the battery voltage info. Land Rover calls the electronics under the pins a Smart Regulator, ironic, as it has to follow orders from the ECM rather than give the orders - new age thinking I guess. This is different from older design internal regulators that look at just the battery or the electrical buss voltage and then decides itself what to do.
It is almost like we are back to the external regulator designs of old, except that the ECM may decide that instead of telling the alternator to make more power, to load shed, and hence shut down the heated windscreen, seats, or whatever other electrical loads it decides are appropriate. My view is that the "smarts" are in the ECM and that the "regulator" should be regarded if not dumb, then as being a slave to the ECM.
|
|

173 viewsThis photo was "Autostitched" from 7 individual ones.
|
|
Thread upload1 viewsImage uploaded in new thread
|
|
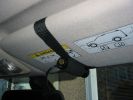
Cam mounted on sun-visor237 viewsI usually place something in between the sun-visor and the roof lining to give the cam a better angle. At Boughrood it was a roll of PVC tape. For Boughrood I also placed a small cardboard box between the cam and the sun-visor to bring the cam away from the dirty section of windscreen.
|
|
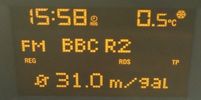
Astra 1.6 fuel consumption29 viewsFuel consumption of a 1.6 petrol Astra after a return trip from Aberdeen to Peterhead.
And yes I know i am sad listening to radio 2, but it was the only station I could understand up there.
|
|
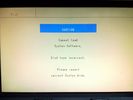
Nav System Error Message18 viewsThis is the error I got onscreen after trying satnav upgrade from a dodgy copy. Same error then using old disc. Solution was to use a 'good' copy or the same type as the duff upgrade disc.
This isn't a duff photo - the screen really does have a double image of the text.
|
|
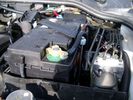
Aux Battery showing ground cable bolt "upside" down 1568 viewsIn order to obtain sufficient height clearance to get the plastic cover back on, I had to install the ground cable to the underside of the battery post connector.
Note the battery vent hose, (approx 5 ft required) is run down into where the windshield washer fluid container is located. There is not much electrical or metal in that area to be corroded by battery gas plus the open end of the vent hose tends to be protected from dirt and stays clean as well.
|
|

Thread upload16 viewsImage uploaded in new thread
|
|
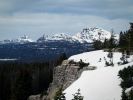
122 viewsThe view from Bald Mountain Overlook. Snow on the road prevented us from going further.
|
|
Bar from above426 views
|
|
Bar from side430 views
|
|
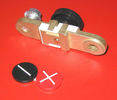
Battery Disconnect side post with + & - caps under view738 viewsThe upper and lower pieces of metal are clamped together but electrically seperate from each other. The connection between the two pieces is via the threaded part attached to the knob. When the knob is turned tight, current will flow between the two sections of metal.
|
|
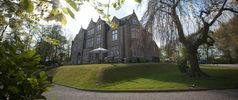
Woodlands Hotel5 viewsGreen Oval Garage would like to say thank you to the Woodlands Hotel in Leeds for allowing us the use of their beautiful grounds for all our future photos shoots.
Woodlands is one of the finest luxury hotels in Leeds. This boutique hotel is set in beautiful landscaped grounds on the outskirts of Leeds city centre, just 2 minutes drive from junction 27 of the M62 motorway, with 23 individually designed bedrooms and an award winning restaurant. Packed with character, this lovingly restored hotel is only three miles from the vibrant, cosmopolitan city of Leeds with superb nightlife and unrivalled shopping.
Woodlands also offers a stylish and contemporary functions venue for all kinds of social and business events. Our three stunning event spaces are suitable for everything from wedding ceremonies and receptions, to corporate meetings and events. The permanent marquee, attached to the hotel, can accommodate up to 150 for dining and 200 for evening parties and receptions, making it one of the most elegant settings for a wedding venue in the Leeds area.
For more information or to make a booking, please contact us on enquire@woodlandsleeds.com or 0113 2381 488
|
|
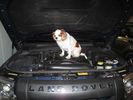
Always start with removing the dog from the engine compartment51 views
|
|

View of bed from entrance26 views
|
|
Thread upload18 viewsImage uploaded in thread 116743
|
|
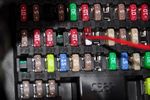
Power taken from fuse 2866 views
|
|

Biodiesel130 viewsBiodisel info from the U.S. Department of energy
|
|
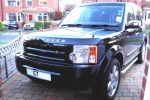
Black Supercharged Badge100 viewsGreat tip drilling from the back and you won\\\'t damage the lip that the badge is recessed in
|
|

Buckingham Blue D3 Screen Saver201 views49 frame (8 base frame) animated 100x46 pixel image in size cut from the Discovery 3 Accessory Builder screen - modelled after my D3 - running on my phone!
|
|

Bodsy's Brake Bible Version 1.6a - LATEST VERSION31790 viewsMinor updates from Version 1.6
|
|
LED light ON - looking out from boot80 views
|
|
LED light OFF - looking out from boot67 views
|
|
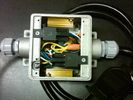
Box open showing Hella Relays and Putco Load Resistors735 viewsInterior of the box - note the two gold coloured 6 ohm 50 watt load resistors are a bit distant from the other items so as to provide some separation for dissipation of the heat generated.
Rather than a moulded plastic weather resistant box which I would have preferred, I used a bulky and much heavier metal weather tight style electrical box so the metal can act as a heat sink.
|
|

72 viewsThe Smaller Nashers in their SIB which is inflated with an Electric pump mounted in the RIB. Great as a Taxi to and from the beach and for them (and me) to tear about in.
|
|

Black Deposits to interior of Brake Light Switch2831 viewsThere are two contacts, one on each side of the vertical plunger under the copper metal. The set of normally open contacts on the left side that carries the power for the brake light filaments, (15 amp fuse F15P), is apparently not heavy enough as the contacts deteriorate and generate the black residue.
The set of normally closed contacts on the other side appear to be sized OK. There is not as much current, (5 amp fuse F66P), flowing thru the contacts to the ABS module, however the contacts are likely adversely affected by the black residue produced by the other deteriorating set of contacts.
One presumes/hopes that the newer replacement switch now has contacts heavy enough to carry the brake light power. It would be ideal if the ABS set of contacts were sealed from the brake light contacts to prevent contamination of the normally closed set of contacts.
|
|

Brake Light Switch, Find, Remove, and Install Instructions 7782 viewsThis is a two page doc outlining where to find the brake light switch, how to remove it, and then install the new one.
Note, do not move the brake pedal when removing or installing the switch. Let the brake pedal hang where it wants to. The switch design is actually cunning, and as such is supposed to make the removal and install fool proof. Hence if you think too much about it, you can wreck the new switch.
If you want to inspect the interior of the switch, wait until you have removed the old switch. You can then just unsnap the blue from the white to get it apart. Inside, the switch is quite simple, (no circuit boards), but it will probably show black dust from failing contacts.
I think the reason the switch fails is that the Normally Open, (NO), contacts of the brake light contacts were made too light to carry the current load for make and break of the tail light filaments. I also think the black dust created then fouls the Normally Closed, (NC), second set of contacts for the ABS circuit. As such, the Normally Closed contacts become intermittent in operation and display as a fluctuating open and closed circuit condition to the ABS system when the ABS should be seeing a steady closed circuit. Hopefully the replacement switch contacts are more robust and may be as I recently replaced my switch again just as a matter of maintenance. While in a redesign, ideally the NC contacts should be sealed or at least separated from the NO contacts, when I inspected the removed switch, this time there was no black dust present.
Probably the removed switch will have a Land Rover oval logo moulded into it, the new one, FOMOCO.
|
|
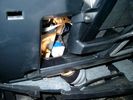
Smooth Talker Amplifier Box mounted below near steering column.179 viewsThe gold look box due to the lighting, (actually black), is the antenna amplifier located near the steering column. It can be put anyway but this seemed an OK location as I ran the antenna connector cable rearward from here to the back corner of the 3 and then up to the underside of the roof glass at the rear. The blue/white thing is the brake light switch that often must be replaced. See the Brake Light Switch file within this Gallery regarding the switch replacement.
|
|

Black Deposits on Brake Light Switch Plunger2731 viewsThis jpg I got off another forum and is typical of what one will see when one opens up the removed brake light switch. The black powder is residue from arcing of one of the pair of contacts within.
Hopefully the newer switches with the FOMOCO logo moulded into the plastic are improved from the Land Rover logo marked early units, however I doubt it.
The Ford part number is SW-6572 and/or 7E5Z-13480-A as used on the 2006 to 2009 Ford Fusion's and Mercury Milan's; the Land Rover part number is XKB500110. Cost of switch could be about twenty five dollars. A previous LR part number for the switch was XKB500030, so hopefully the newer LR part number, XKB500110, reflects some improvement in reliability.
It is possible that the new switches are better as I installed a replacement 72,000 km, (45,000 miles) later, at 195,000 km (121,000 miles). When I took the removed switch apart to inspect, it was clean inside. There was no black dust - the switch looked like new, hence they must be improved now.
|
|
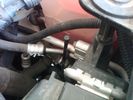
Vertical Breather Hose before cutting off OEM cap.1742 viewsThis shows the plastic vertical breather tubing and OEM cap prior to being cut off. The tubing is located on the driver side at the front near the radiator. One cuts about 3/4" to 1" off from the top. The TSB says 20mm.
I tried blowing thru the cut off piece and was not very successful. The cap seemed plugged. I am beginning to think that there was a very good reason for Land Rovers's Technical Service Bulletin, (TSB).
|
|
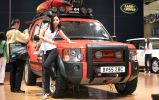
BV55 ZBC Modelling!196 views
|
|
EGR Blanking202 viewsBlanking plates cut from stainless steel plate.
|
|
Cables out from bottom LH corner of LHS cubby hole160 views
|
|
Power pickup from white towbar skt153 views
|
|
Power pickup from white towbar skt153 views
|
|
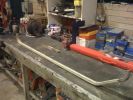
D3 Side Step Repairs155 viewsAluminium trim has been straightend out but need to remove all the old rivets from the rear of the trim.
|
|
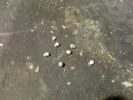
D3 Side Step Repairs145 viewsThe old rivet ends which I removed from the trim. I took one rubber end off the trim and let them all out by shaking it to save them rattling around inside the trim for years to come.
|
|
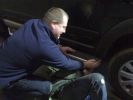
D3 Side Step Repairs166 viewsWhilst I held the trim in place a second person inserted the rivets from behind the step edge. We started in the middle and worked out either way to ensure a snug fit of the aluminium trim.
|
|
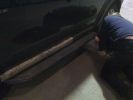
D3 Side Step Repairs149 viewsI then punched out the remaining rivets from the step edge. I used a small hammer and a small punch.
|
|
LEDs13 viewsBig box of LEDs from HIDS4U
|
|

Thread upload0 viewsImage uploaded in thread 183462
|
|

71 viewsMS excel sheet for monthly mileage report will give average fuel consumption.(most cells have formulas to help fill in from previous line)
on first sheet add details you want on monthly sheets. during use the data needed to be added is ending reading on clock, places visited (if you want).
how much fuel when you purchased it also fuel in tank at start and end of month
|
|
Casino Royale from iPod75 views
|
|

504 views
|
|
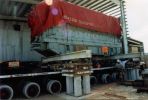
Grand Cayman97 viewsA 120tonnes Diesel Engine being skidded from road transport vehicle to final position in Grand Cayman,we were responsible from Stockport up to final job site,including al shipping and transportation.
|
|

Newest LR recruits NIECES from my little bro125 views
|
|
The Cheviot from my Kitchen32 views
|
|
Chicken Little from in-built DVD64 views
|
|
This show that the angel of the radio body is diffrent from the original, hence shall some plasic be removed - I used a dremmel and removed 7 mm of the horizontal bar inside 160 views
|
|
"H" panel after paint74 viewsPainted the vents and H panels and added some alu - nice change from the original look
|
|
All at sea in an LR3103 viewsThe ferry from the mainland to Mazira Island was packed to the gunnels with vehicles. My LR3 was last on and they left the bow doors partially open for 14 lonnnnng sea miles across the Arabian Gulf!
|
|
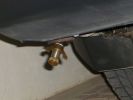
The fantastic exhaust bung214 viewsExhaust bung supplied from UK courtesy of a Disco3 forum member.
|
|
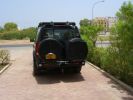
From behind400 views
|
|
Rear end294 viewsLocally made wheel covers. LH is zipped from bottom to top to fit over registration plate with zip fasteners top and bottom. Rear IPF Reversing /camp lights on rack linked to reverse light circuit.
|
|
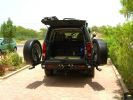
Rear end open329 viewsEccentric latch clamps for wheel carriers are very strong. No rattles on graded roads. Canvas seat covers from \'Escape\' in SA on rear jump seats can be seen, and Front Runner Wolfpack storage boxes - great for toolkit, winch and recovery straps etc.
|
|
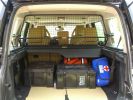
Load space366 viewsShows the SA Front Runner Wolfpack stacking plastic storage boxes that I keep laod straps etc in and the 2nd is tool kit, spare belts, jerry can funnel and tools, plus airline and tyre inflator/deflaotr for ARB on-board compressor, HD jump leads. ARB Winch pack (Orange)with strops, snatch blocks, shackles, gloves, and 2 ARB recovery dampers. Really great 4x4 1st Aid kit from Outdoors warehouse in SA. LRs own loadspace guard - not the best design if you want to store a long load. Mods to be carried out!
|
|
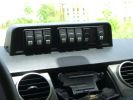
Mud UK switch binnacle453 viewsToo many switches for the roof mounted console, so this binnacle from Mud UK (desigend for the Defender) is an almost perfect match for the leather finished dash in the LR3. Switches, connectors etc bought from them too. From L - R switch functions are:
LH side mounted rack lamps
Driving lamps rack mounted
Spot lamps rack mounted
Bumper mounted driving lamps
RH side mounted rack lamps
Warn winch isolator
Rear mounted rack lamps (reversing)
Telescopic work lamp (fitted behind RH spare wheel)
|
|
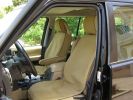
\'Escape\' canvas seat covers269 viewsFull set of these well made SA seat covers fitted to protect the Alpaca leather from constant exposure to Middle EAst sunlight and sand. They fit well, and to date have proved very durable. They include headrest and arm rest covers too.
|
|
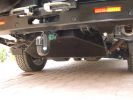
LongRanger auxiliary fuel tank356 viewsThe LR fuel tank imported from ARB in Australia with its 115 litre capacity has more than doubled the range of the car. This is important in the desert where fuel consumption increases at times to 10mpg or less. On a cruise on highways, the car now has a range approaching 850 miles. The tank fits neatly, has not affected handling in a detectable way apart from over speed humps, when a little more bounce from the rear suspension is detected! Suspension copes with the additonal loads without any problem.
|
|
2009 MY?237 viewsThe wheelarches, door sills, and door mirror bodies have all been sprayed to match the body colour. Same as 2009 MY? I think this looks really good, and is so much easier to keep clean than the textured plastic that suffered badly out here from dust/dirt ingraining and UV discolouration.
|
|
Border crossing into Botswana from SA53 views
|
|
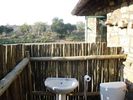
Bathroom No 234 viewsThe view from Bathroom No 2 is realy spectacular. The bathroom is in Botswana and the view is over the Limpopo River with South Africa in the back ground
|
|

View from outside bathroom47 views
|
|
View from inside the house - South Africa in the back ground 32 views
|
|
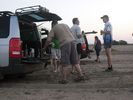
Sundowners from the portable bar (D3) in the Shashi River59 views
|
|

Mounted in 12v socket from driver\'s side42 views
|
|
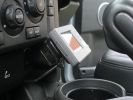
Dash Mounting from passenger side43 views
|
|

nice quiet spot to sleep201 views3 week spring road trip from NC to Colorado.
|
|
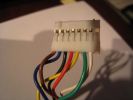
Clock Spring / Rotary Coupler Connector from horn controls209 views
|
|

74 viewsComing down from the summit seconds before blowing out the front passenger-side tire.
|
|
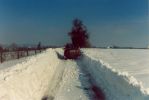
the road between home and work290 viewsthe day before returning from work, I got stuck here in the middle of the snow storm. The plow didn\'t pass yet and wind was blowing snow everywere. Since then I always carry during winter a survival pack consisting of warm coat,cap, warm, high boots and gloves.
It is no fun recovering a car stuck in the snow and sliding down from the road when moving in nothing more than a business outfit (no gloves, city shoes, no coat) with a snowy wind blowing 100km/h..... .
|
|
Driving West from Bowra Station, Cunnamulla59 views
|
|

View from the mountain top of north Corsica42 views
|
|
CounterAct Power supply mounted under brake lines.191 viewsThis top view shows where I located the power supply. It is attached with 3M sticky to the black plastic surface that is located under the brake lines.
When the system is operating properly, the red LED pulses about twice per second.
Some users claim they can hear a very slight hum or whine coming from the unit. My unit seems silent.
|
|
View from chalet360 views
|
|
Drivers seat wiring Cut146 viewsSpare connector from my second hand seats shows where wiring to seat gets cut presumably by emergency services.
|
|
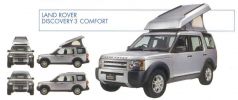
Land Rover Discovery 3 'Comfort' - Detailed views405 viewsCopied from Land Rover Magazine Number 40 (Japanese edition)
|
|

Steering wheel audio controls and iPod dock103 viewsFitted an iPod dock and steering wheel audio controls. Got then both from Nick at Yeoval Landrover in the UK at a fraction of the price that the Aussie dealer wanted.
|
|
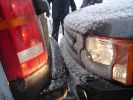
Taken from behind in the snow!!!319 viewsNot sure who bumped me..... but my car was being serviced at the time and this was a courtesy car!
|
|
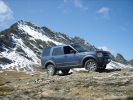
D3 High Alpine Pass450 viewsCALENDAR ENTRY
Sept.08 on the way back from Monaco towards Switzerland. The \'Col de L\'Iseran\' is the 3rd highest road in Europe and this shot is taken slightly higher than that!
|
|
Picture of Height sensor borrowed from D3Matt238 views
|
|

Chris 200100\'s Alarm instructiosn with pic from JKP & Simon493 views
|
|
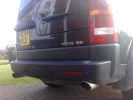
Griffin Perfromance Exhaust170 views
|
|

18 views
|
|

Heating element removed from base foam42 views
|
|
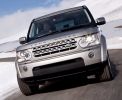
Discovery 4 From Press Release104 views
|
|

20 viewsCourtesy of: Interactive Land Rover MENA
24 April
Back in the city – after a wild set of adventures in destinations from mountains to deserts, cities to nomad camps, the Land Rover Journey of Discovery heads through urban Beijing at journey’s end.
|
|

83 views
|
|

75 views
|
|

D4 XS Water Ingress203 viewsWater leaking from behind rear view mirror onto dash.
|
|
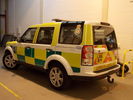
D4 Being Prepped for LAS26 viewsThis is a Disco 4 (unknown spec) being prepped up at my workplace for the LAS, having new comms kit put in and stuff. What you can't see from this angle is that the front grille and headlights have been taken out.
|
|
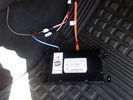
D4 Bluetooth AH42 10F845 AA module connected to 12VDC and MOST1191 viewsThis jpg shows the MOST bus connected to the AH42 10F845 AA module used in the D4 as well as +12VDC power from F58P connected. The power is split with a Y harness as the IHU (radio) for some reason required +12VDC power to the C2115-10 "mute" pin to keep the radio/CD audio from muting all the time.
With power on the pin, the radio audio does mute as it should when the cell phone rings and the hands free connects. The brown conductor feeds to C2115-10 and the blue to the module.
The module tucks up and hides behind the grey plastic section covering the forward portion of the passenger side tranny hump for left hand drive vehicles; for RHD, it would be located on the left side.
The pairing code is 2121 with this setup and not 1234 or 0000.
|
|

Maintenance Check Sheet All Models UK & EU Discovery 411 viewsMaintenance Check Sheet All Models UK & EU Discovery 4
|
|
Tap in to C2443 pin 3162 viewsC2443 pin 3 provides easy access to the high beam signal from MY14 onward. My13 and earlier the signal has to be taken from C583 Pin 34 (CJB)
|
|
+12V supply135 views+12V taken from the regulator used to power the start/stop battery from MY14 onwards
|
|

A-Pillar 115 viewsWires run from the roof console along the A-pillar
|
|
Cable routed from secondary battery box to front grille110 views
|
|

Disco3 on the move in Dangalli Conservation Park - at speed (south of Yunta)177 viewsMusic heard in video is from the stero blasting away inside the Disco - and yes...that was a cattle grid being crossed at the start :-)
|
|
arm rest fit212 viewsthis is gary from trim-line... a job he knows to well as he is in landrover dealers most weeks..
|
|

TRIMLINE SYSTEMS what can i say.... 119 viewsThank you Gary from trimline
|
|
Hard wired tomtom493 viewsThe fused output from a tapa-circuit feeds into a female socket (Cigar lighter sized) into which the tomtom power adaptor is plugged. All hidden away behind the glove box.
|
|
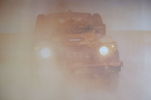
Defender in the Fog, another day on the job.456 viewsThis is another normal work day for a Defender - actually the jpg is from a Land Rover advertising shot, but it may just not be a set up one. I think it is an actual working Defender. Note the visible front tow hook and how the hi lift is just rope tied on; also the normal stock headlights and I guess dual spare tyres - just another day on the job.
|
|
Wood kit from Apsis USA498 views
|
|
ipod detail159 viewsipod mounted without lr´s ipod kit. A cable cames from HK back aux input.
|
|

D3 reqar diff lock181 viewsView from right rear tyre well, left rear tire/rim visible on other side. Actuator motor visible
|
|
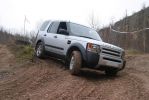
D3 - Vanilla, as from the dealers405 views
|
|
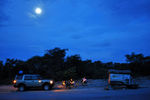
CALENDAR 2011401 viewsIn December 2009 we toured Botswana – first tour with the Disco, I had a yellow Defender previously. I rented a trailer, and the wheel bearing seized 1300km into the trip. This photo was taken while we waited for my friend to bring us a “fixed†hub. The elephant crossed the road less than 300 meters from us. Photo was taken 90Km from Nata
|
|
153 viewsA pic \'borrowed\' from the Landrovernet site
|
|

69 viewsBadges removed from bonnet and fitted to a bar
|
|
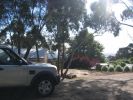
Disco3 overlooking our city of Adelaide, Australia212 viewsThe TDV6 will make it a dream to climb the 450m above sea level to our ridge top home from the city each day.
|
|
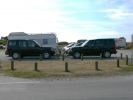
2 Discos Meet at Utah Beach93 viewsSpending the day on Utah Beach, Normandy, went to get something from my Disco (on the left) and found a French Disco parked opposite...Way cool...
|
|

2 more awards for D3167 viewsMedia release from LRA - Dec 2008
|
|

Info cut and pasted from a tech document re the options for the video system320 views
|
|

D4_MY2015_05B_Camera_Equipment_(Rear)29 views05B Camera Equipment (Rear)
|
|
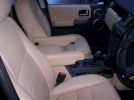
Interior from front159 views
|
|
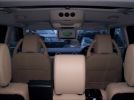
Interior from rear147 views
|
|
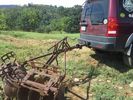
LR3 to plow your garden290 viewsI found this jpg where a current LR owner is using his LR3 for a similar purpose as the original Series units were designed to do - that is serve as a tractor for plowing a field or I suppose a garden.
In this case, I note the hitch is one of those that attach to the factory tow loop, (Rhino Hitch), rather than the factory product that inserts from the bottom and hangs down - (like a plow), but all the time. One of the other jpg's in this album shows the two factory variations plus a third jpg shows a closeup of the Rhino Hitch.
|
|

big mel21 views
|
|
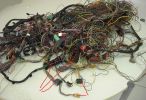
Donar Loom98 viewsThis ball of wires is from a LHD which has been opened and had all audio wires removed, however it is a gold mine for the bits i need. I have pointed out the connectors i know i need for starters near the bottom.
|
|
Small Metal rod removed from the lever164 views
|
|
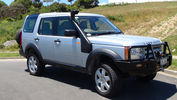
Disco 3 - 21 December 2012163 viewsJust back from having Front & Rear Bar, Compressor and Snorkel fitted.
|
|
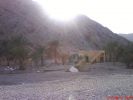
Some of the damage remaining from Hurricane Gonu - this was caused by flash flooding in the wadi86 views
|
|
Take power direct from battery, routed cable through some rubber pipe, then taped up166 views
|
|
another picture of the direct feed from the headlight163 views
|
|
A disco 3 emerges, sphynx like, from the mire268 views
|
|
View from Drivers seat102 views
|
|
67 viewsrainsensor as seen from outside. Note tinted film around sensor
|
|
Nice new Rims from Ken127 views
|
|
The camp site - from a short distance up the Dampier Mountain Fire Trail.77 viewsThere is a silver D3 in the photo - belonging to eran48.
|
|

New Nav Sat option from Land Rover (Kenwood DNX7200)243 views
|
|

New Nav Sat option from Land Rover (Kenwood DNX7200)227 views
|
|
distance from rack to end of glass roof is about 37mm324 views
|
|
clearance from rack to roof is about 58mm307 views
|
|

Kingsley with Sr. Pedro, the chief of police at Foz Do Cunene, Angola.167 viewsSr. Pedro was initially a bit wary of us, but once King had explained his mission, Sr. Pedro and his team couldn't do enough to help. He even brought us sinkers to fish with and beer when we ran out! Kinsley took him to meet his neighbours from Namibia
|
|
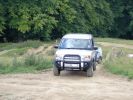
Slimer emerges from the training pit354 views
|
|
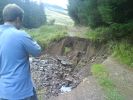
Damage to road from floods75 views
|
|
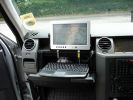
Navigator display mount453 viewsKeyboard is optional, all functions including alphanumric input can be carried out from the touchscreen
|
|

Pigeon Island, St. Lucuia, with \'The Black Pearl\' from Pirates of The Carribean in the foreground.48 views
|
|
Babu - great guy from Mozambique who joined Kingsley\'s core team.150 views"How the heck am I gonna fit all that in there?!"
Packing all the kit in Ondangwa. Amazing what you can get into a Defender!
|
|

Kids from Ruacana school in Namibia147 viewsThe kids at some South African schools donated libraries and stationery which we were handing out. THe also filled a book with pictures of themselves and messages to the kids of the schools Kingsley\'s mission were to visit. In return the kids from the destination schools wrote messages back to the SA kids. Very Cool!
|
|
NSF ARB Bush (as viewed from front)14 views
|
|
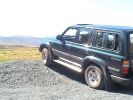
My old Landcruiser180 viewsApart from a battery and an exhaust I spent nothing on it.
|
|
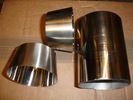
10 views2 reducing cones and short length of pipe ordered from the bay of evil
|
|
disco at finore75 viewsfound a little patch that strayed from the main road near finore, co clare.
|
|
Camera from inside473 views
|
|
Smoked stripe on the windscreen438 views Installed 5 % foil into windscreen to hide the rear mirror tft lcd display a bit from the possible thiefs.
|
|
wire from reversing light130 views
|
|
Powered directly from plug147 views
|
|

Coming back down from beggining of Baboons91 views
|
|

View from Carter Bar, Scottish Border6 views
|
|
The Best Trailer Tent Ever74 viewsBought this trailer tent from Trek Overland, and think I should of kept it !!!
|
|
Down from the top following the track along the bottom of the wadi137 views
|
|
Returning from Skye December 2006.217 views
|
|
View from above Big Tree Rd196 views
|
|
Out from water, and on60 views
|
|
Mine\'s right at the far end, as usual a long way from the door60 views
|
|

rear vents trim178 viewsto remove just pull starting from the lower part
|
|
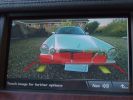
All red - 9" from bumper - continuous beep303 views
|
|
Back to normal after scrutineering132 viewsWe passed! Starting from position 28 (random draw)
|
|
Halogen infill alignment error152 viewsCar was 10-12 ft from wall when this was taken
|
|
View from mount Olympus159 views
|
|
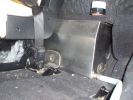
Left hand side of internal 40 Litre water tank161 viewsView from floor looking towards tank. Top white cover is 50mm plastic pipe cap. It protects the tank vent valve. Dispensing hose is at lower corner of tank
|
|
My Old Car From The Old Country115 views
|
|
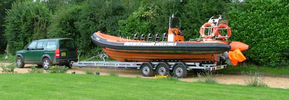
849 viewsD3 doing it's job rather well ! 17m from front to back! Belize green
|
|
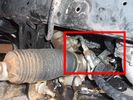
Detail of hydraulic hoses attached to power steering hoses153 viewsHoses are attached to the upstream side of power steering rack. When winch not running, PS rack sees full pressure (ie, no change from design). Biggest challenge is running stiff hoses so that they align with attach points. I got Qantas employee who repairs hydraulic baggage loaders to braise in fittings (very tight spaces and tough access).
|
|

Air defences around 10 mansions suprisingly included patriot missiles.... I wonder where they came from350 views
|
|
Front view from home284 views
|
|
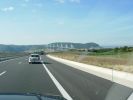
Millau bridge approach from north181 views
|
|
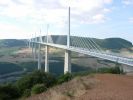
Millau bridge from vantage point168 views
|
|
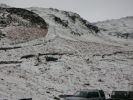
View from slate mine buildings looking up at D3 climbing173 views
|
|
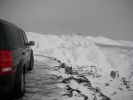
Looking out from the top of the slate mine187 views
|
|
CALENDAR 2008 ENTRY974 viewsView from top of Honnister Slate Mine. Disco3.co.uk Lake District trip 10 Feb 2007
|
|

Twin boot mats from eBay455 views
|
|
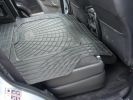
Twin boot mats from eBay383 views
|
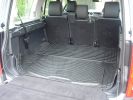
|
Twin boot mats from eBay384 views
|
|
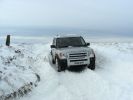
CALENDAR 2010294 viewsFebruary 2009. Coming from Great Fryup Dale onto Glaisdale Rigg. North York Moors
|
|
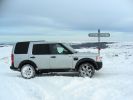
CALENDAR 2010315 viewsFebruary 2009. Glaisdale Rigg.
As it says on the sign, "2 miles from Lealholm, 7 miles from Rosedale!"
North York Moors.
|
|
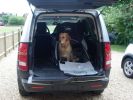
DogBag287 viewsMedium size DogBag from www.roofbox.co.uk
|
|
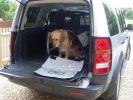
DogBag290 viewsMedium size DogBag from www.roofbox.co.uk
|
|
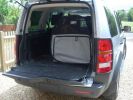
DogBag263 viewsMedium size DogBag from www.roofbox.co.uk
|
|
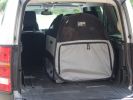
DogBag282 viewsMedium size DogBag from www.roofbox.co.uk
|
|
Mantec tray453 viewsPut some pieces of foam between the tray and the painted from bumper to protect the paintwork.
|
|
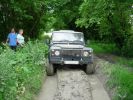
D3matt entering lane from hell103 views
|
|
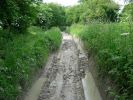
Lane from hell107 views
|
|
DiscDunc pulling D3matt through the \'lane from hell\'112 views
|
|
Duncan stuck in the lane from hell142 views
|
|
Duncan stuck in the lane from hell139 views
|
|
Lane from hell130 views
|
|
Lane from hell123 views
|
|
Lane from hell133 views
|
|
Lane from hell131 views
|
|
Looking across to Kintyre from Arran55 views
|
|
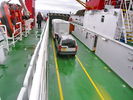
On the Ferry from Arran to Kintyre53 views
|
|

188 viewsMt Skene - 3 hours NE from Melbourne, Victoria. One of the few accessible but mostly snow-blocked alpine roads in Victoria\'s "high" country, that doesn\'t lead to a resort (and get cleared).
|
|

calendar entry 2009540 viewsCrossing a river in Iceland June 2008 - some of the rivers have deep sticky black basalt sand on their edges and some times needs a running approach! Car is G4 Challenge Event Car from 2006 - Team Germany / Spain - Stage 3/4 Bolivia
|
|
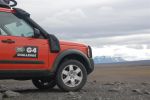
calendar entry 2009528 viewsHigh in the Iceland Interior June 2008 - F88 to Askjar Volcanoe - The mountain is called the "Queen of the Mountains - Herðubreið" Car is G4 Challenge Event Car from 2006 - Team Germany / Spain - Stage 3/4 Bolivia
|
|
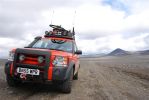
calendar entry 2009582 viewsHigh in the Iceland Interior June 2008 - Car is G4 Challenge Event Car from 2006 - Team Germany / Spain - Stage 3/4 Bolivia
|
|
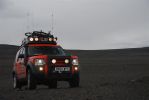
calendar entry 2009542 viewsHigh on the Iceland Interior - On the Road to Askja - G4 D3 Discovery V8 HSE - Team vehicle from 2006 G4 Stage 3/4 Bolivia -
|
|

calendar entry 2009525 viewsCrossing a river in Iceland June 2008 - some of the rivers have deep sticky black basalt sand on their edges and some times needs a running approach! Car is G4 Challenge Event Car from 2006 - Team Germany / Spain - Stage 3/4 Bolivia
|
|
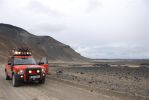
calendar entry 2009540 viewsRoad F88 to Askja - Iceland Interior June 2008 - Car is a G4 challenge event car from 2006 - Stage 3/4 Bolivia - Team Germany / Spain
|
|

calendar entry 2009521 viewsCrossing a river in Iceland June 2008 - some of the rivers have deep sticky black basalt sand on their edges and some times needs a running approach! Car is G4 Challenge Event Car from 2006 - Team Germany / Spain - Stage 3/4 Bolivia
|
|
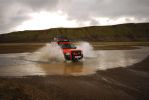
calendar entry 2009539 viewsCrossing a river in Iceland June 2008 - some of the rivers have deep sticky black basalt sand on their edges and some times needs a running approach! Car is G4 Challenge Event Car from 2006 - Team Germany / Spain - Stage 3/4 Bolivia
|
|

calendar entry480 viewsHigh in the Iceland Interior June 2008 - View towards the Vatnajökull Glacier range - Car is G4 Challenge Event Car from 2006 - Team Germany / Spain - Stage 3/4 Bolivia
|
|
61 viewsThought we were going to practice recovering planes from fields for a minute!
|
|
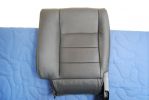
209 viewsalmost as from the pro trimmer ;)
|
|
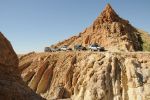
CALENDAR 2011525 viewsFrom lead: TFC, Rescue01, NJF, GLYNNE, DSL, Tunisia, 2009
|
|
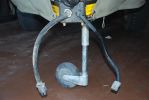
added battery connector for charging direct from vehicle - the solar panel also plugs in here, so can be used for vehicle or trailer charging104 views
|
|
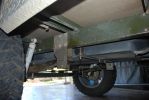
136 viewsraised susspension - this i bought from the factory, so I assume you could order a trailer with this fitted. only necessary if you are fitting big tyres like I have. the axle is a standard alco axle which I ordered from alco with blank hubs. hubs were machined to accept LR studs. Wheel centres had to be slightly machined to fit over bearing caps
|
|
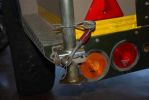
fitted stronger rear strut holders. not a great mod. the holes i drillled for the "R" clips are the best mod, as they stop the legs from sliding up under pressure. requires bracing inside to stop chassis bending100 views
|
|
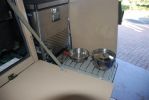
gas stove slides out under fridge107 viewsvery useful mod - youdon\'t have to unpack anythinig to be ready to cook. the stove gas is piped from the rear of the trailer, ie. the standard gas cylinder. pipe goes thru grommets along bodywork, and uder the fridge. works a treat. the door adds shielding in high winds if need be
|
|
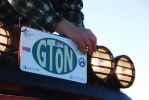
2008 GToN vehicle plaque107 viewsFrom 2008 GToN www.gton.co.uk
|
|
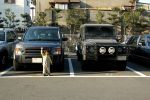
Changed to DISCO3 from Def110146 views
|
|
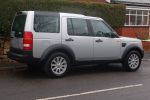
Discovery 3 SE98 viewsJust arrived back from Bradford
|
|

130 viewsLooks a lot worse from the drivers seat!
|
|

148 viewsThis is a JPEG Taken from the CAD drawing, it has nothing to do with NEXT BASE OR LAND ROVER,FORD TATA, its just a FUN Model and not to be used.......
|
|

tent closed from the backside413 views
|
|

101 viewsSome elk checking me out from across the canyon.
|
|
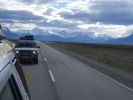
CALENDAR 2008651 viewsFrom El Chalten to El Calafate.
|
|
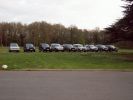
View from the Fairmile Carpark of 9 members cars194 viewsRange Rover Au Poivre had turned up by now - VA was having seat as well as steak sauce problems! I think we had 2 more turn up after this photo was taken
|
|
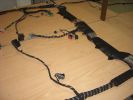
Finished seats area107 viewsThis is a shot of the loom when it was finished from the pass (RHD) door
Both of the seats wiring can be seen, i replaced the conduit on the bottom right and the Yaw rate sensr connector can also be seen in the middle.
|
|
Thread upload11 viewsImage uploaded in new thread
|
|
Approaching the Flinders from the East - from Erudina Woolshed152 views
|
|
Approaching Wilpena Pound at Sunset - from Erudina Woolshed135 views
|
|
Engel positioned for easy access from front seats145 views
|
|

Fluid, Filter/Pan Combo removal and install5950 viewsThese are the LR instructions re removal and install of the plastic pan/filter combo for the ZF 6HP26X transmission on the 4.4L petrol V8 LR3.
The instructions tend to ignore the reason you have to lift the right hand side of the engine about 40 mm. This is because of a frame cross member that interferes with dropping down of the plastic pan. The real problem is a vertical "oil filter spout" that rises out of the filter/pan combo up into the transmission. The spout is the suction pipe for filtered transmission oil back up into the tranny.
On the metal pan versions, the filter is separate from the pan, hence the filter remains with the tranny when the metal pan is dropped. The filter is then removed or installed independent of the metal pan, hence with the metal pan, there is no need to lift the engine.
If one is removing the plastic pan so as to install the metal pan, then some do not lift the engine but just drop the plastic pan enough to gain access to saw off the vertical plastic spout - it is a one time procedure.
Be aware however that the metal pan uses a flat gasket and the plastic pan uses a O ring like perimeter gasket that sits in a half round groove in the tranny casing. Also the metal pan uses 21 shorter torx M6x22.5 metric cap screws for the perimeter bolts. The plastic pan uses longer M6x28.5 torx metric cap screws.
|
|
Front Coupler pad to right front under air filter housing 155 viewsThe brighter white "square" behind the black air cleaner drain is the Coupler Pad location I chose for the right front corner. The 1/4", (5mm), black wiring loom carries a single blue colour conductor between the power supply and pad.
A second coupler pad, (white conductor), is located near the left rear tail light. The mounting location is accessible from the rear compartment access "door" where the trailer hitch wiring attaches to the factory loom.
|
|
From Discotr.es81 views
|
|
From Discotr.es96 views
|
|
Front Lamp Guards Fitted200 viewsThe hardest part was extracting the front grill from behind the nudge bar and driving lights!
|
|

Breather Hose exploded view.1209 viewsThis pdf shows the exploded view of the breather hose from the front differential to the engine compartment. The breather hose part number is TAP500081 and is identified as 4A058 in the drawing.
|
|
Thread upload12 viewsImage uploaded in thread 156159
|
|
Thread upload13 viewsImage uploaded in thread 156159
|
|
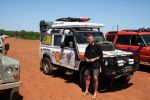
All the way from Argentina...196 views
|
|
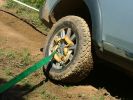
Traction124 viewsAll that held the D3 from certain death was about 25% of the tread width of a Grabber.
|
|
194 views
|
|

Fix stiff gear selector or jumping out of drive into neutral32 viewsThis is a document culled from a topic about a simple fix to teh gearbox selector lever that fixes a problem with jumping out of drive into neutral.
I made the document to give to my local independent and thought it might be useful for others.
Thanks to disco_mikey, EdF and Robbie from the original post whose information and photos made this possible (I take no credit for anything here apart from errors).
|
|

Fix stiff gear selector or jumping out of drive into neutral17 viewsUpdated 19 Dec 2012
This is a document culled from a topic about a simple fix to the gearbox selector lever that fixes a problem with jumping out of drive into neutral.
I made the document to give to my local independent and thought it might be useful for others.
Thanks to disco_mikey, EdF and Robbie from the original post whose information and photos made this possible (I take no credit for anything here apart from errors).
Updated after I did this fix on my own car.
|
|

Thread upload3 viewsImage uploaded in new thread
|
|

Thread upload3 viewsImage uploaded in new thread
|
|
My other Toy262 viewsAt Great Keppel, can see home from here.
|
|
93 viewsI hiked up to a cave, this is from about halfway up. Very steep climb.
|
|

Hamilton Island. View from One Tree Hill.52 views
|
|
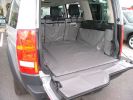
Discovery 3 boot liner from www.hatchbag.co.uk396 views
|
|
Humber Bridge from afar136 views
|
|

Drive & Play148 viewsFitted the screen using a piece of laminate flooring fibreboard underlay & cutting up a 3.99 leatherette cushion, looks like it was fitted from new
|
|

Highland 4WD Club Run 2009. 18 miles on offroad tracks continuously. (special permission granted from landowners)65 views
|
|

43 views
|
|
Rhino Tow Loop Hitch263 viewsThis is a receiver end view of the Rhino Hitch that ties to the factory tow loop. In addition to improved strength, it does not reduce ground clearance as does the factory style when installed.
Land Rover in early advertising videos when the 3 first came out showed the D3 hanging from a crane via the frame. The intent was to show how strong the frame is and by inference, the rear tow loop, specifically noted as being good for 6 tonne. The video ends before anything dropped or was lowered back to the ground, so one of course does not know for certain. The Rhino Hitch design however picks up on the apparent evidence of strength and certainly the additional clearance.
|
|

HK Logic 7 Amp28 viewsStill dirty from the breakers yard
|
|
Les Falaises Cahors France151 viewsOur first hotel stop. View of car and coffin from our room.
|
|
Good View.166 viewsView from our Villa near Havea Spain. Oilver my eldest son (pictured) flew out to see us
|
|
150 views View of my D3 from balcony of our room at Hotel le Biarritz, Biarritz France.
|
|
"Jerry" from Salvage Squad, watching his RR ( you can see the roof) ....251 views
|
|
A Dam looms up from knowwhere !147 views
|
|
A Dam looms up from knowwhere !141 views
|
|
A Dam looms up from knowwhere !142 views
|
|
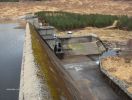
A Dam looms up from knowwhere !145 views
|
|

20 minutes after collection from the dealer42 views
|
|

Topside of the circuit board144 viewsLooks better from the top :D
|
|
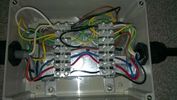
Topside123 viewsWiring from the top, one additional earth added to the internal box after the picture was taken.
|
|

Close up - key removed14 viewsIn the center is the added switch with removable key.
Here the key is removed.
This is to add an additional 'protection' from discharging the auxiliary battery in case other people are working on the car and accidentally switches on any electrical bit :)
|
|
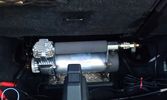
The compressor in the booth16 viewsThe rear of the second row seats are visible and the space behind was big enough to put the compressor.
The compressor is powered from the rocker switch in the front.
|
|
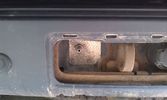
Outside connection to the compressor14 viewsFrom the compressor which is in the booth, the air hose runs to the back of the car.
I was able to install the connector in the space of the second trailer plug (which wasn't installed anyway).
|
|

64 viewsAdded a lead coming from the 12V outlet in the front console. That one is activated only when the ignition is set to I. So that's actually what is referred to as accessories in the manual of the radio. The OEM connector for the head unit did not have any similar lead. The yellow is permanent 12V, the red (on the converting OEM 2 ISO) is the accessories 12V.
|
|
45 viewsI still needed to cut some small bits away from the DIN in order to have the facia cover fit nicely.
|
|
View from the \'\'cab\'\'.205 viewsMoolert Grain handling facility Victoria.
|
|

Pressie from Gerd!62 views
|
|

Salisbury Plain299 viewsMy other club (Range Rover Register) had a plains day, ironically none of the 5 vehicles present were RR but 3 were at least from the same factory!
|
|

a landslide from earthquake29 viewsstill evidence of the barrier lakes formed from this
|
|
Separating Hilux from Disco3210 views
|
|
Snowy Kent570 viewsLow Res pic taken from Nokia Phone in Tunbridge Wells Kent
|
|
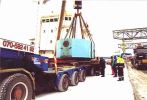
90 tonnes Press from somewhere to somewhere else !!!91 viewsCannot say too much about this as i will have to kill everyone !!!
The Heavylift Ship is fitted with a single 300t derrick,
|
|

Front Rack Bracket Cover from the rear381 views
|
|
Front Rack Bracket Cover from the side403 views
|
|

nice view from the top but its getting there that counts25 views
|
|
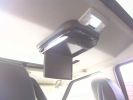
Alpine DVD from rear passenger door203 views
|
|
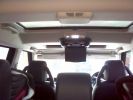
Alpine DVD from rear door214 views
|
|
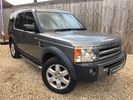
Dealer disco7 viewsThe for sale pic of my disco from the dealer
|
|

Day 16 viewsCollection from Grange 04/10/2016
|
|
Thread upload1 viewsImage uploaded in thread 175087
|
|
|
|