| Search results - "gas" |
460 views
|
|
468 views
|
|
Thankfully it\'s nearly a week old. they wanted to dig underneath my drive to install gas. Nov 5th, Bang,78 viewsNo, and i was worried about the rangerover!
|
|
478 views
|
|
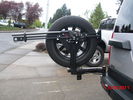
highlift and new sensor wire loom30 viewsNew wire loom added to protect sensor wires and keep things sanitary looking
. Highlift jack mount arms added and gas strut
|
|

The Gas14 views
|
|

2 Maintenance Schedules - Gasoline Engines12 views2 Maintenance Schedules - Gasoline Engines
|
|

Land Rover Aerial Fin images for both Glass and Metal Roof Disco3 / LR3850 viewsAs well as the two different fins, this pdf also shows the plastic blanking plate for glass roof vehicles where no fin is installed.
The glass roof fin is secured by two security screws from the top into a plastic frangible glue on gasket. The hope is that when struck, the fin will shear off and not crack the glass roof. Re the metal roof design, the fin is secured from underneath via two nuts.
The pdf also shows the various electrical bits related to the antennas. In the UK, the fin would house not only a cell phone antenna but the TV and satellite radio antenna electronics as well; in the States, the Sirius sat radio antenna and a G type cell phone antenna if the phone kit was installed would reside within the fin. The SAT NAV GPS antenna is located within the High Mount Brake Light plastic mounted to the upper rear hatch.
|
|

Fin cell phone aerial drawing190 viewsThe factory aerial for the factory NAV / GPS on my 2005 HSE is within the high mounted stop light lens at the top of the upper hatch door. I do not have the factory installed phone kit, and as such, do not have the fin installed; instead there is just a plastic blanking insert to fill the cell phone aerial wiring hole in the metal portion of the roof; hence this requirement for an "external" cell antenna. For those that do have the fin on their glass roof, the fin is screwed on to a glued on plastic gasket, (sort of), and not bolted thru as per the metal roof 3's.
|
|
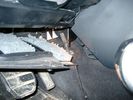
Air Conditioner Drain Hose on Drivers Side (LHD)2257 viewsThe corrugated rubber bit above and to the right of the gas pedal is the drain hose that goes down thru the carpet and floor sheet metal.
While it is bit hard to figure out from the jpg above, there is a rubber "strap" attached to the top of the corrugated hose that one uses to pull on to drag the hose up back around the black plastic heater "pan" drain. The same drain hose arrangement is on the other side as well.
One could I suppose run a plastic snap tie around the vertical pull strap if one was concerned about the hose slipping off again. See also the other jpg sketch which is from the Land Rover manual.
|
|
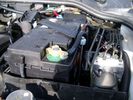
Aux Battery showing ground cable bolt "upside" down 1568 viewsIn order to obtain sufficient height clearance to get the plastic cover back on, I had to install the ground cable to the underside of the battery post connector.
Note the battery vent hose, (approx 5 ft required) is run down into where the windshield washer fluid container is located. There is not much electrical or metal in that area to be corroded by battery gas plus the open end of the vent hose tends to be protected from dirt and stays clean as well.
|
|

LATEST VEGAS LIMO107 views
|
|

Betsys head gasket204 views
|
|

Betsys head gasket241 views
|
|
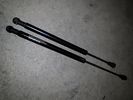
bonnet gas struts, old vs new3 viewsImage uploaded in thread 177818
|
|

Thread upload2 viewsImage uploaded in thread 192845
|
|
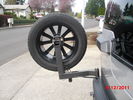
36 viewsgas strut
|
|
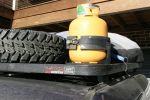
Gas bottle holder is awesome124 views
|
|

7 views
|
|
Thread upload11 viewsImage uploaded in thread 169922
|
|
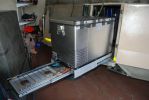
built fridge slider in front door (as opposed to rear) which makes fridge available at the kitchen. Also added drawer for gas stove - stows easily under the fridge when not in use. can be used independantly of fridge, ie. whether fridge is pulled in or ou113 views
|
|
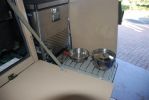
gas stove slides out under fridge107 viewsvery useful mod - youdon\'t have to unpack anythinig to be ready to cook. the stove gas is piped from the rear of the trailer, ie. the standard gas cylinder. pipe goes thru grommets along bodywork, and uder the fridge. works a treat. the door adds shielding in high winds if need be
|
|
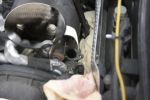
EGR Valve/Pipe Flange888 viewsThe bolts in the inset are the ones to be removed. Note the rag stuffed down beside the EGR to prevent dropped bolts or gaskets disappearing for ever. Don\'t forget to take the rag out if you don\'t want your D3 to go up in flames next time you use it!
|
|

Thread upload5 viewsImage uploaded in thread 162129
|
|

Wynns EGR3 Spray Instructions88 views
|
|

Fluid Pan, Gasket and Filter.pdf988 views
|
|

Fluid, Filter/Pan Combo removal and install5950 viewsThese are the LR instructions re removal and install of the plastic pan/filter combo for the ZF 6HP26X transmission on the 4.4L petrol V8 LR3.
The instructions tend to ignore the reason you have to lift the right hand side of the engine about 40 mm. This is because of a frame cross member that interferes with dropping down of the plastic pan. The real problem is a vertical "oil filter spout" that rises out of the filter/pan combo up into the transmission. The spout is the suction pipe for filtered transmission oil back up into the tranny.
On the metal pan versions, the filter is separate from the pan, hence the filter remains with the tranny when the metal pan is dropped. The filter is then removed or installed independent of the metal pan, hence with the metal pan, there is no need to lift the engine.
If one is removing the plastic pan so as to install the metal pan, then some do not lift the engine but just drop the plastic pan enough to gain access to saw off the vertical plastic spout - it is a one time procedure.
Be aware however that the metal pan uses a flat gasket and the plastic pan uses a O ring like perimeter gasket that sits in a half round groove in the tranny casing. Also the metal pan uses 21 shorter torx M6x22.5 metric cap screws for the perimeter bolts. The plastic pan uses longer M6x28.5 torx metric cap screws.
|
|

14 views
|
|

1 views
|
|
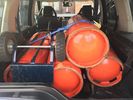
gas11 views
|
|

Thread upload6 viewsImage uploaded in thread 193381
|
|

Thread upload0 viewsImage uploaded in thread 200758
|
|
43 views
|
|
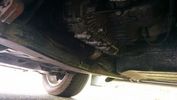
Leaky Gasket9 views
|
|
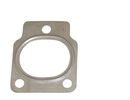
Thread upload3 viewsImage uploaded in thread 193762
|
|
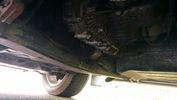
Thread upload12 viewsImage uploaded in thread 128446
|
|
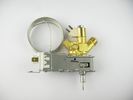
gas valve fridge5 views
|
|

Thread upload1 viewsImage uploaded in thread 156265
|
|

Thread upload13 viewsImage uploaded in thread 164207
|
|

Thread upload9 viewsImage uploaded in thread 192214
|
|

homergas100 views
|
|

Inlet & exhaust gaskets0 views
|
|

Inlet & exhaust gasket2 views
|
|
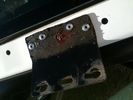
A pillar mount pop-rivetted in place and form-a-gasket used to seal underneath161 views
|
|

iPhone Gas Cubby18 viewsScreenshot showing the fuel economy of the LR4
|
|

New toys - 2" lift Lovells Gas Legend - (+100kg springs)49 views
|
|

On Pegasus Bridge28 views
|
|

Pegasus Bridge25 views
|
|

Electric and Gas Heating33 views
|
|

Jetboil with large gas canister207 views
|
|

LR3 Air Conditioner Drain Tubes behind centre console2092 viewsThis shows the two air conditioner drain tubes located left and right under the radio stack.
The tube on the left side, (steering wheel side, LHD), disattached itself and the carpet on the floor under the gas pedal etc became soaked. I think rain water from outside that comes in the outside cowl vents also exits via the tubes as I first noticed the carpet was wet after parking outside during a big rain storm.
It was relatively easy to slide up and reattach the rubber hose that runs from the rectangular shaped plastic discharge hole(s) of the heater "pan" down along the transmission hump area and thru the floor pan. There is a hose on each side of the transmission hump, but only one hose had let go on my 3. The rubber hoses just slide over the rectangular plastic openings of the two heater housing drain outlets.
To get at each drain hose, remove the vertical sort of triangle carpeted piece below each side of the radio stack. The triangles of carpet will just pull away as each is held on with those metal U clips Land Rover so likes. Dislodge each triangle at least sufficiently to get ones hand in to slide the rubber hose back on.
You will rarely see AC water on the ground as the front drains pour onto a metal underside protection skid plate and the rear drain onto the top of the left rear muffler.
|
|

Battery Maintainer pigtail sticking out of Grill723 viewsThis is all you see when everything is put back together - just the pigtail and Weather Pack blanking plug. Most often, I have it all tucked back behind the grill.
In winter, there may be a second cord hanging out as well - the 120 VAC power cord for the engine block heater, a tea kettle like element inserted in the engine block. NAS petrol V8's do not have the Fuel Burning Heater, (FBH), installed, but instead in cold area markets have the block heater element assembly available as a dealer installed option. There is an argument to say that the heating element is factory installed in all cold climate V8 gasoline engines, however the appropriate power cord is not. If true, this means that all one needs to purchase is the area specific power cord and plugging in / attachment to the engine block located block heater.
As such, you will often see a conventional 120VAC three prong power plug hanging loose out of the grill of most vehicles here in the wintertime. In summer, most drivers tuck the plug back behind the grill as it is no beauty mark.
|
|
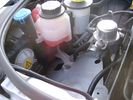
Empty space in NAS LR3 for location of FASKIT panel595 viewsThe empty space is available as the North America Spec gasoline engine LR3's do not have the Fuel Burning Heater installed. The air lines from the four air springs and the air tank will appear to rise up from under the headlight assembly. The lines to the front block valve assembly located behind the front right fog light will sort of run within the bumper across the front of the radiator down into behind the righthand fog light. The rear lines somewhat follow the path of the existing air feed line from the front valve assembly to compressor. Rather than be located between the left front fender liner and left metal wing however, the four lines will feed thru the empty wing space inside and above the wheel well arch and exit down by the left front mud flap. From there, the lines run along the left frame member above the air tank and then parallel the frame over top the compressor to the top of the rear left air spring where the rear air block valve assembly is located.
|
|

Thread upload2 viewsImage uploaded in thread 197211
|
|
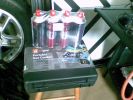
Much cheapness - the nine quid gas cartridge cooker72 views
|
|
Thread upload3 viewsImage uploaded in thread 80467
|
|

Thread upload1 viewsImage uploaded in new thread
|
|
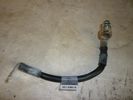
Negative Battery Cable203 viewsThis shows the corrosion from the negative terminal on the Negative to body ground. This is likely due to gas released through the negative post. It appears to be a common problem with the LR3. As a result of this corrosion left unchecked will damage the computer ecu and cables mounted near and below the battery.
|
|

A tutto gas sulle dune137 views
|
|
JK gas heater14 views
|
|

Pegasus 2131 viewsDamage caused to our Bailey Pegasus 514 by the front towing protector upper securing sucker
|
|

Pegasus 1129 viewsDamage caused to our Bailey Pegasus 514 by the front towing protector upper securing sucker
|
|

LR3 in Las Vegas86 viewsI was having a holiday with my mates in Las Vegas (sept 2007) when I spotted this!
|
|

GAS GAS 300EC267 views
|
|

gas issue9 viewsnon lr plugs
|
|
24 viewspompa a sifone manuale per travaso gasolio
|
|

fuel filter posit99 views
|
|

fuel filter position72 views
|
|

milano 201362 views
|
|

Gunbarrel Highway - Kata Tjuta (the Olgas)226 viewsAfter 300 kms of mud, the olgas appear
|
|

The Olgas216 views
|
|

The Olgas74 views
|
|

Thread upload7 viewsImage uploaded in thread 136766
|
|

The Disco 3 the day I bought it71 viewsSince then here's what's been done
1) New slotted and dimpled EBC rotors and Pads
2) Rover Specialties rock sliders
3) Clear color side markers
4) Front & Rear LR lamp guards
5) Rebuilt both of my Non working Key FOBS by replacing batteries. - I can't believe I didn't even check these when I bought the vehicle.
6) Changed the LR3 emblem to Discovery 3
7) Terrafirma Front Skid Plate
8) Tactical 4x4 Gas Tank Guard
9) ASFIR Rear Diff Guard
10) Here are the things now mounted on Roof Rack
- Full size 18" MTR/Kevlar
- (2) 5 Gallon Jerry Cans mounted in Front Runner holder
- 60" Hi-Lift X-treme Jack
- Shovel
- Magnetic CB Antennae
|
|

Egypt - Farafra - run off gas !!!142 views
|
|

Thread upload3 viewsImage uploaded in thread 155787
|
|

ZF 6HP26X-28X Plastic and Metal Pan part numbers and list573 viewsThis 3 page pdf lists the ZF part numbers for the factory metal and plastic pans. Note that the plastic pan is listed as the General pan, and the two metal pans as the BMW and Ford pans. The differences are subtle - drain related it appears.
Torx cap screw descriptions are provided as well as data on the differing gaskets and oil filters.
|
|

ZF 6HP26 Metal Pans, (top and bottom views), and separate Filter top and bottom views.1755 viewsThis single sheet pdf two views of the ZF metal pan for the 6HP26 transmission. The inside view shows the two magnets; the other is the bottom view. Also visible are the transmission bottom oil fill and oil drain holes that are sometimes utilized where access to the side fill is not possible. The ZF part number for the metal pan kit for our 6HP26X six speed is 1068_103_820_01 This includes the 21 shorter Torx screws, the metal pan gasket, and the separate oil filter as well as round filter seal. The ZF six speed LifeGuard6 transmission oil is extra.
|
|
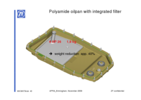
ZF_6HP26_Plastic_Filter_Pan_ combo.png1096 viewsThis is the plastic oil pan on the bottom of our ZF 6HP26X transmissions. Note the two round magnets at the right end of the pan; the drain plug is between them. The filter is the grey part and the vertical oil suction pipe is to draw oil up to the transmission from the filter element. There are 21 Torx screws around the perimeter and the pan gasket is O ring like in design where a half round channel is moulded into the plastic of the pan. The metal pan uses a more conventional flat gasket and in both cases, the metal mating surface of the transmission case is a flat machined metal surface.
|
|

ZF Transmission parts exploded views1282 viewsA 35 page pdf showing exploded views of the inside of the transmission along with oil fill procedures and part numbers. There is also the suggestion of a metal pan but no part number given and the appearance of a more usual type of oil pan gasket, flat rather than O ring.
|
|
|
|