| Search results - "out" |

Thread upload2 viewsImage uploaded in new thread
|
|

Thread upload2 viewsImage uploaded in new thread
|
|
Thread upload1 viewsImage uploaded in new thread
|
|

Thread upload2 viewsImage uploaded in thread 183138
|
|

Thread upload3 viewsImage uploaded in thread 189811
|
|

Thread upload3 viewsImage uploaded in thread 189811
|
|

Thread upload2 viewsImage uploaded in thread 183138
|
|

Thread upload3 viewsImage uploaded in thread 189811
|
|

Thread upload0 viewsImage uploaded in new thread
|
|

Thread upload1 viewsImage uploaded in new thread
|
|
Thread upload5 viewsImage uploaded in thread 183138
|
|

Thread upload4 viewsImage uploaded in thread 183138
|
|

Thread upload2 viewsImage uploaded in thread 183138
|
|
Thread upload2 viewsImage uploaded in new thread
|
|
Thread upload2 viewsImage uploaded in thread 190357
|
|

Thread upload1 viewsImage uploaded in new thread
|
|

Thread upload1 viewsImage uploaded in new thread
|
|
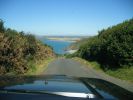
1 in 3 lane south of Widemouth Bay101 views
|
|

Widemouth Bay102 views
|
|
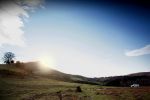
Welcome around where we live, in the French Basque Country, south west of France.571 viewsright by the spanish border.
|
|
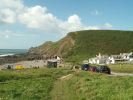
Surfer Disco at Northcott Mouth96 views
|
|
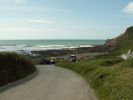
Two Discos at Northcott Mouth - neither of them mine99 views
|
|
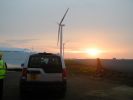
187 viewsOut at the local wind farm construction site.
|
|
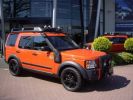
A look alike G4 from 2008 120 viewsA look alike G4 from 2008 (for sale in Holland)
http://autoscout24.nl/Details.aspx?id=vnyzslgvfoja
|
|
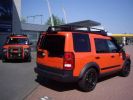
A look alike G4 from 2008108 viewsA look alike G4 from 2008 (for sale in Holland)
http://autoscout24.nl/Details.aspx?id=vnyzslgvfoja
|
|
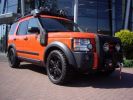
A look alike G4 from 2008117 viewsA look alike G4 from 2008
http://autoscout24.nl/Details.aspx?id=vnyzslgvfoja
|
|
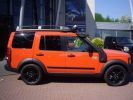
A look alike G4 form 2008128 viewsA look alike G4 from 2008 (for sale in Holland)
http://autoscout24.nl/Details.aspx?id=vnyzslgvfoja
|
|
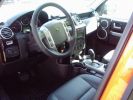
A look alike G4 from 2008116 viewsA look alike G4 from 2008 (for sale in Holland)
http://autoscout24.nl/Details.aspx?id=vnyzslgvfoja
|
|
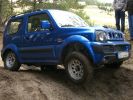
200 viewsSuzuki Jimny. Some holes were deep enough to swallow the little fella, but it got out as long as all wheels were on the ground. No difflocks or electronics in this one.
|
|
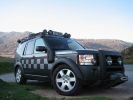
CALENDAR ENTRY 20091190 viewsBonatti grey TDV6 S, ambulance conversion, MTR's, winch, RAI, safety devices roof rack, rear ladder, bash plate, warn lighting, LED lighting throughout.
Owned by me, Rich Bell, Director of Extreme Medical Ltd, providers of medical support to Land Rover events.
|
|
02 On banks of Darling River, Back of Bourke155 views"Back of Bourke" is the typical definition of the start of the Australian Outback. This was after crossing the Darling River "back of Bourke" on 8 Jan 08. We were the first vehicle to start driving after floods had closed (first time in 8 yrs there was any water in the river).
|
|
02 Last Photo before the little wheel problem saga221 viewsThis is my D3 with trailer on the banks of the Darling River, literally "back of Bourke" (the regional definition of the start of the Australian Outback). We were the first vehicle in a week to try and drive this route from Bourke to Wilcannia on the account of floods (first water in 7 years). Little did we know that 3 hours later there\'d be a bit of a wheel and tyre problem appearing...
|
|
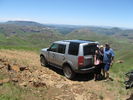
Bastervoetpad pass 25/12/20153 viewsPart of 8 passes route Northern Eastern Cape near Rhodes/Ugie
|
|

key out security switch 143 views
|
|

key out and car running 117 views
|
|
chilling out in marlborough139 views
|
|
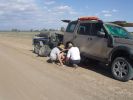
03 First bit of tyre/wheel trouble243 viewsIn the outback a tyre suddenly blew. "No worries" we thought, as we had 3 spares (+ two more if we abandoned the trailer), 150l of water, 3 days of food, and an EPIRB if things got really bad. At the time I didn\'t fully appreciate the fact that my index got a blister from the burning heat of one of the wheel nuts. It was 45 deg C at the time, so everything was hot.
|
|
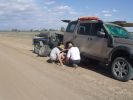
03 The first bit of tyre/wheel problem249 viewsSomewhere in the Australian outback on a 45 deg C day in Jan 08, a D3 had a bit of a flat tyre problem. "No worries, mate" st we had 3 spares (plus 2 more if we abandon the trailer), 150l of water, 4 days of food, and an EPIRB if things really go crook. The first clue that this was not a "normal" flat was when I handled a wheel nut and ended up with a blister from a burning hot nut (the ambient wasn\'t THAT hot).
|
|
Garmin GPS mount without GPS bracket245 views
|
|
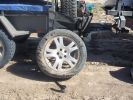
04 Damaged Tyre300 viewsYes, there\'s no doubt that this was a flat tyre. The ultra hot wheel nuts, look of the flat (note in a later photo that the back of the tyre appeared okay) and increased fuel consumption should have been a clue, but it was 45 deg C, and we had been doing about 105 km/hr on a dirt road for hours, so we just assumed it was a flat = WRONGO!
|
|
Thankfully it\'s nearly a week old. they wanted to dig underneath my drive to install gas. Nov 5th, Bang,78 viewsNo, and i was worried about the rangerover!
|
|

Estrarre il circuito stampato con la batteria - Exctact the printed board with the battery18 viewsRimossa la parte superiore del contenitore, estrarre il circuito stampato sollevandolo leggermente dalla parte della batteria.
Removed the top of the box, pull out the printed circuit board slightly lifting from the battery side.
|
|
ready to go out105 views
|
|
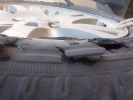
05 No doubt the tyre is flat273 viewsThis is the view of the flat tyre. Again, didn\'t think it anything more than a "normal" explosive blowout, as the tyre was about 90% worn, we were heavily loaded, it was 45 deg C, and driving 105 km/ho on a rough dirt road in the outback.
|
|
testing "cross axel"647 viewstesting "cross axel" with and without TR on
|
|
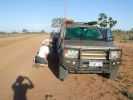
08 D3 stranded with a seized smoking wheel314 viewsAbout 1 hr after replacing the blown tyre, strange noises emanated from the stability control system and speed dropped off. Then I looked in the rear view mirror, and noted a cloud of dust along with a whiff of black smoke. This led to a very quick stop (no traffic on this route for over a week, so no worries about having to signal exiting the road). Took a look and WOW. The right rear wheel was glowing a dull red colour, and burning rubber smoke was wafting from the red glow over the fuel lines.
|
|
7 views
|
|
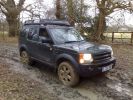
D3 in Southwater170 views
|
|
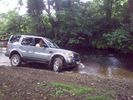
Si taking a slightly wetter route...54 views
|
|
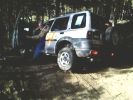
Freelander trying hard.107 viewsStill not stuck but getting there. In the end pulled it out with a Defender. Picture taken at Offroad-Training in Linthe/Germany
|
|
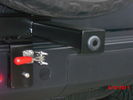
Sensor bar33 viewsSensor has been moved out to tire carrier where it should be. It does not pick up the tire anymore. "no faults".
|
|
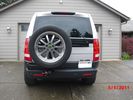
Highlift mount added27 viewsHighlift mounted in this position allows for any length with out overhead clearance issues if stood upright
|
|
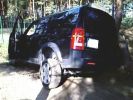
Not stuck - only got out to take a picture :) Picture taken at Offroad-Training in Linthe/Germany140 views
|
|

09 Starting to remove the seized brake assembly295 viewsBy this time we\'d poured about 8l of water on the dull-red glowing and burning wheel assembly (too close to 140l of 98 octane petrol). Sudden cooling cracked the disk brake which showed mangled park brake parts. How to remove a brake disk without the right star fitting? First remove the caliper then get a sledge hammer?!!
|
|

Receiver for toy rack38 viewsSensor bar was made of same heavy tube that the carrier was made from allowing a small 1 1/4" receiver to be placed on it for a multitude of toy racks of my choice. Rack adjust in and out of receiver.
|
|
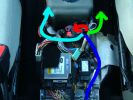
1 Ctr csle ICE loom routing55 views
|
|

10 Cracked smoking parking brake drum337 viewsNote the crack in the face of the brake. This showed mangled parking brake springs and other bits. Also a bit of melted rubber was drooling out of the crack. Started to remove the brake caliper and enjoying the flies in 45 deg C heat. Ah, the wonderful Aussie climate in January.
|
|

10-20200928_Vigor166_Static_Route_Set6 views
|
|
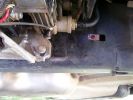
Repositioned compressor bracket735 viewsThe bracket was snapped in two, so I had it re-welded and slotted out the mounting holes so that it could be positioned 10mm higher (no longer protrudes under the chassis rail)
|
|
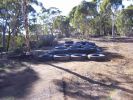
The tyre hill181 viewsWe had to drive over this without stopping. Made it, no problem :)
|
|
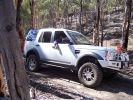
off-camber hill348 viewsAnd no, I wasn\'t hanging my arm out to balance the car - I was stopped at this point waiting for the Jeep in front to try and finish. It was a pretty steep off-camber slope!
|
|
Its - 3 c outside Llanchinda Farm Our B&B For Rally GB 99 views
|
|
Black RRS Wheels about to go deep138 views
|
|

222 viewsOuter set
|
|
New Defender32 viewsNew Defender at National Trust park on route back home.
|
|
New Defender40 viewsNew Defender at National Trust park on route back home.
You can tell its new, its too shiny. Never looked like that again!
|
|
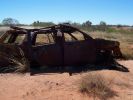
Burnt out Ford Elplorer263 views
|
|
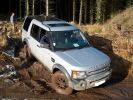
mind out for Steve\'s Bollard!204 views
|
|
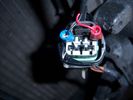
Chinese socket power outlet16 views
|
|
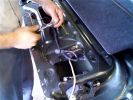
Putting all the bits back in52 viewsNotice the rope (Kevlar) coming out of the actuator box on the right side.
|
|

The old Trooper parked outside the house in 2009.25 views
|
|
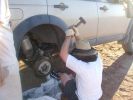
11 Lesson in removing a jammed brake assembly in the Outback378 viewsSpent the next 4 hours doing this to my D3. Gave the photos to Land Rover dealer and they did not think this constituted abuse of the vehicle. I thought that was charitable, but if we hadn\'t done this, the tow back to civilisation would have been even longer.
|
|
Outside view of camera64 views
|
|
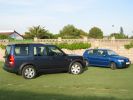
Quite a contrast!460 viewsMy outgoing Polo looked like a toy next to my new Disco.
|
|

12 Half way through removing a jammed disk brake in the Outback296 viewsThis was just before breaking the sledge hammer. Note we luckily carried a spare hammer. Ended up using (or breaking) every tool we had on this little repair job. Bed sheets are a good way of gathering the bits to show for the inevitable warranty claim.
|
|
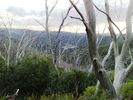
Walking out after getting bogged - half way!53 views
|
|
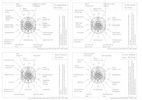
301 viewsImage of the 13 pin electric Layout
|
|
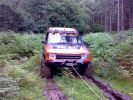
93 viewsJUST WINCHING A JEEP OUT OF A BOG
|
|
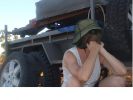
14 "Are we having fun yet?"348 viewsSWMBO is pondering why attempting to drive 3,900 kms across the outback on dirt roads is more fun than, say, spending New Years in Paris......
|
|
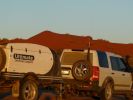
About to set up camp near Old Andado93 views
|
|

13 views
|
|
Stretch Lagoon - Canning Stock Route 18 km from Billiluna77 views
|
|
Suspension dragster mode440 viewsAfter I succesfully changed my wintertyres to summertyres, I found out that the front suspension was on access level and rear at off-road. Situation cleared after I switched engine on.
|
|
Now which route am i on again?40 views
|
|

What the weekend was all about41 views
|
|
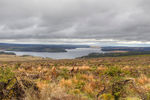
Looking out over Kielder Water9 viewsLooking out over Kielder Water
|
|
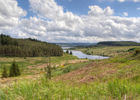
Looking out over Kielder Water13 views
|
|
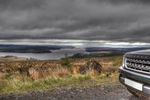
Looking out over Kielder Water105 views
|
|
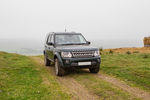
D4 HSE15 viewsOut with All Terrain Tours on their Northumberland Tour
|
|
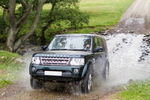
D4 HSE91 viewsOut with All Terrain Tours on their Northumberland Tour
|
|
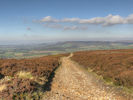
Rudland Rigg45 viewsThe view from the top of Rudland Rigg looking out towards Roseberry Topping and the coast.
|
|

Thread upload44 viewsImage uploaded in thread 102519
|
|
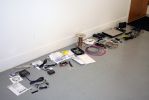
01310 viewsAll the new junk laid out on the floor.
Kenwood KOS-V1000 AV Controller
Kenwood KCA-iP500 iPod Control Interface
Kenwood KOS-L702 Monitor
Kenwood KCA-BT200 Bluetooth interface
Kenwood KNA-G510 Add-on navigation system
|
|
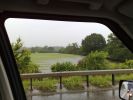
Area of the new housing expansion south of Swindon.142 viewsFlood plains will be flood plains - insurance anyone? Oh sorry forgot; all top 8 insurance companies refused to insure a house in this area, so the developers are going ahead building anyway...
|
|
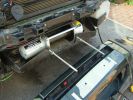
Marking the bumper for the cutout1093 views
|
|
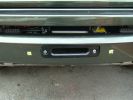
Hawse almost flush, not the neatest cutout but it won't be on view much936 views
|
|
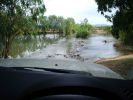
D3 in the Mary River Flood plains47 viewsIn this part of the world, on the flood plains out to Kakadu, you never get out to wade a creek first as the theory says you should. If the water isn\'t clear, like it was on this causeway, and it is this wide, you either wait for someone else who is braver than you to cross first, or you turn around and go home. These rivers are full of estuarine (salt-water) crocodiles, and they are starting to reach 7 metres in size in some still rare instances. However, seeing as a 2.5m crocodile can kill a grown man,
|
|
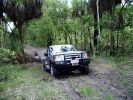
D3 in the Mary River Flood plains49 viewsFamily was down South with the In-laws, so I went for a drive on Boxing Day - which is the monsoon time, or \'The Wet\'. Was doing a test run with the off-raod trailer in preparation for the trip I was planning to the Kimberley six months later. Couldn\'t quite make it out of the creek, so a self-recovery was in order. Good thing it all worked, as I didn\'t see another car in over four hours. They were too smart to drive down the track I was on!
|
|
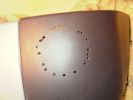
Drilled all round the marked pattern inside then used Dremel to cut out neatly810 views
|
|
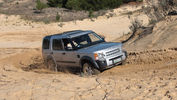
Brakkeduine - South Africa80 views
|
|
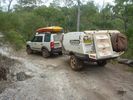
Southern entry Sam Creek - Old Telegraph Track Cape York31 views
|
|
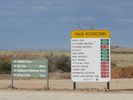
Southern end of Strzelecki Track - Lyndhurst SA23 views
|
|
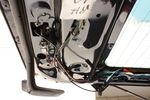
28 viewsRouting the camera wire
|
|
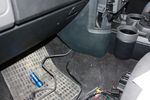
88 viewsCables out into passenger footwell
|
|

94 viewsOut at the C pillar. From here wires were threaded through the rear seatbelt anchor point into the commercial box, which is the hub of all the wiring and CarPC installation
|
|
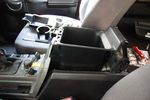
70 viewsCubby box coming out
|
|
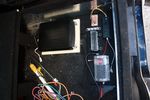
96 viewsDeciding on a layout for the electrical stuff. Bottom right of pic is a fusebox which will take the input power from the traxide kit, then relay box and 12V regulator, ignition busbar and homemade regulated 12V busbar. Big black box is the CarPC
|
|
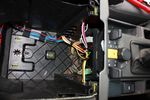
70 viewsAll switch wiring neatly routed to exit hole
|
|

67 viewsJungle of wires coming out of the cubby box
|
|

63 viewsCables grouped together and routed neatly. Cable sleeving can be seen cable tied to the VGA screen cables at this point
|
|
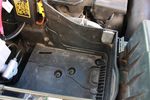
112 viewsDue to the side terminals protruding out the side and affecting the battery clamp, I found the battery will fit better if it could be pushed a few millimeters towards the engine. This lip will have to be removed.
|
|
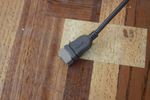
63 viewsCut a slot in the socket grip to fit the cutout
|
|
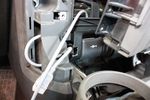
62 viewsCutout done, all that's left is to stuff the socket into the cutout
|
|
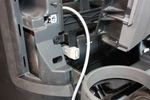
69 viewsUSB socket finally wedged in place. Cable routing will take the same route as VGA screen cables
|
|

most loop out cable 80 views
|
|

2011 passenger fuse box layout49 views
|
|
dont stand out sunroof20 views
|
|
outside hotel27 views
|
|
Clamp - outside25 views
|
|
en route to snowdonia50 views
|
|
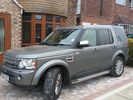
My Disco 4 HSE32 viewsUnwashed...blame outdoor LHR T1 2 week parking!!
|
|
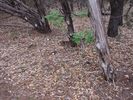
Western Diamondback Rattlesnake88 viewsAbout 4.5 Ft long
|
|
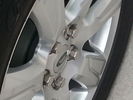
ohh sticky out nuts17 views
|
|
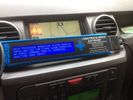
My MSV2155 viewsNeed more help to get the most out of this tool.
So far used for fault code reading, 4x4 display, suspension tight setting before wheel alignment,
|
|

Terratrip 202 V4 possible discrete location134 viewsAttached to ashtray - allowing removal / unplugging when not in use by pulling out the ashtray.
Terratrip is an odometer for use in rallies / raids - very popular with the French when used in conjunction with a roadbook. A mechanical backup in case GPS signal is lost on modern odometers like the Globe 800 I propose to use.
We'll see if there are reflection issues from the screen.
|
|
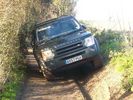
Bit of polishing required, but good day out!127 views
|
|
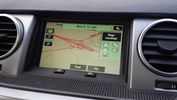
Proof of updated map data23 viewsPostal code CH4 0FB
Showing roundabouts where on current LR DVD are none.
|
|
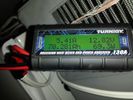
battery consumtion348 views24 hour power usage of an Engel 32L + NL 72L at 1c & -18c freezer in 80-92 degree heat in the shade. That's about 70amp hours.
|
|
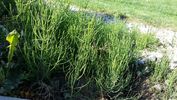
what plant18 viewswant to find out what this plant is and how best to control / remove it from garden
|
|
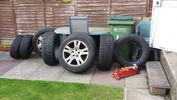
wheel mountain laid out flat30 views
|
|
over Tynemouth16 views
|
|
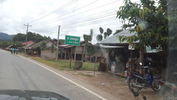
route R3 Laos14 views
|
|
gold roundabout15 views
|
|
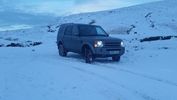
Gospel Pass Jan 2015146 viewsThe Gospel Pass (Welsh: Bwlch yr Efengyl) is the highest road pass in Wales. It is at the head of the Vale of Ewyas in the Black Mountains of southeast Wales.[1] The narrow mountain road climbs steeply from Hay-on-Wye to a height of 549 metres (1,801 ft) [2] above sea level, squeezing between the mountains of Twmpa to the west and Hay Bluff to the east, before dropping down into the valley to the south on its way to Llanthony Priory, Llanfihangel Crucorney and Abergavenny.
|
|
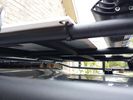
solar panel install347 viewsAt least at this point, I mounted it by using Clear Silicone RTV. This stuff is kind of like glue, but can be removed. If it doesn't hold up after curing and driving, I'll remove it and come up with another plan. I used heavy cable ties on the 4 grommets, in case it lets loose, it won't take out my wiring and the car behind me. 2 Panels are dandy like this, but I don't want to permanently block the roof space. Grape Solar to power my snomaster fridge
|
|
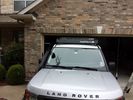
low profile solar panel203 viewsThe low profile solar panel, can be seen here, as the fine white line under the light bar. The way it's laid out, the panel should generate decent power between 10am and 4pm depending on the time of year, from the sides or front, with no shadows. Grape Solar 100W flex panel.
https://www.facebook.com/DifferentialPartsUS
|
|
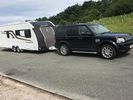
Swift 635 hitched to Disco 49 viewsSecond time out with new 2017 Swift Challenger 635 Hi-Style
|
|
Thread upload1 viewsImage uploaded in thread 201091
|
|
Thread upload2 viewsImage uploaded in thread 201091
|
|

Front Differential Description and Operation1509 viewsThe 4 page pdf describes of the operation of the front differential plus displays an exploded view of the front differential.
The fill plug is item 36 and the drain plug, item 8.
It is suggested one first unscrew the fill plug before unscrewing the drain plug - and it might take two different wrench sizes, hence get this detail sorted out before any oil drains out.
|
|
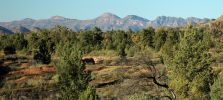
Flinders Ranges - View South from Aroona Valley158 views
|
|
This road isnt on a bus route!122 viewsWent to see how my new house is looking in Czech Republic, this is one of two roads out of the village
|
|

AUTOROUTE99 views
|
|
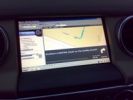
NAVIGATORE AUTOROUTE109 views
|
|
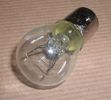
Land Rover Stop Tail Light dual filament bulb nominal 12 volt 21 / 5 watt filaments1412 viewsThis is the Land Rover part number 264590 dual filament bulb, (P21/5), that inserts into the upper two tail lamp receptacles. In the upper one, both filaments function, in the lower one, only the 5 watt tail light filament functions.
I regard it as not a good practice to routinely switch bulbs when the tail light filament, (5 watt), burns out on the lower bulb. The broken filament can jiggle over onto the brake light filament, (21 watt), and short the circuit to ground or something else not predicable.
There are also arguments to say that quality control is better on the Land Rover marketed bulbs than say far east sourced bulbs. Filament construction, and hence resistance can vary and mislead the current sensing circuits monitoring the signal light systems. Also when the bulbs are properly installed, all filaments should be standing vertically and not at any slope.
These are the sort of obscure circumstances that can lead to false trouble messages on the display, dropping to the stops, and subsequent concerns - all over a tail/signal light bulb.
For example, the filament life of both the tail light and the brake light filaments in the P21/5 bulb is significantly less than the USA common 1157 dual filament bulb, (1000/250 vs 5000/1200 hours); brightness in the P21/5 is a bit more, (3cp/35cp vs 3cp/32cp where cp is candle power), but current consumption is oddly less, (0.44a/1.86a vs 0.59a/2.10a where a is amps). It is the quest for efficiency vs maintenance trade off.
|
|

Legless winching out215 views
|
|
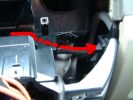
29 Dash Loom49 views
|
|
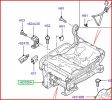
HTG500042 RH Out 2nd Row Seat Frame Assy203 views
|
|
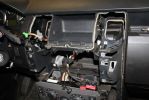
02278 viewsDash center console off and factory head unit out. LR clips suck.
|
|
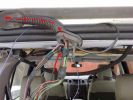
3 TMC Facra Route52 views
|
|
Thread upload3 viewsImage uploaded in new thread
|
|

Rescue Call Out 392 viewsRescue Call Out in North Yorkshire; Cleveland Search and Rescue and the Police
|
|
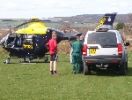
Rescue Call Out 86 views
|
|

24 viewsOut and about
|
|
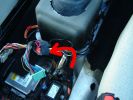
4 phone cadle loom routing50 views
|
|
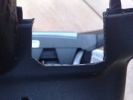
4 cutout44 views
|
|
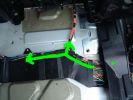
4 ICE Loom - routing of cable behind drivers seat58 views
|
|

Alternator and Regulator Wiring Diagrams, TDV6 and petrol V8 and V61973 viewsThis is a three page pdf that shows the alternator and regulator wiring for the petrol V6, petrol V8 and TDV6. The pdf can be either printed or by right clicking on the displayed pdf, rotated as required for viewing.
Of interest is that the regulator gets its instructions primarily from the Engine Control Module (ECM) and only secondarily from the vehicles electrical buss. The conductor from the battery thru the 5 amp fuse F20E is to provide initial power to excite the alternator at startup and then secondarily, to instruct it if the PWM signals were not available. Primary instructions to and from the ECM are thru the two other conductors via a digital like Pulse Width Modulated (PWM) signal.
If F20E, the 5 amp engine compartment fuse box fuse is blown, the red alternator light on the dash will be illuminated. This means that the alternator could be OK, but if the F20E fuse is blown, no electricity will be generated. Hence check the F20E fuse if you get a red ALT light or some indication of the alternator not working.
Regarding operation of the red ALT light on the dash, it is not the regulator within the alternator that tells the red light to illuminate, or not, but instead the ECM. This is the reason the red light does not function in the same manner as with older vehicles. With the 3, sometimes you have illumination and sometimes not depending upon what the ECM is thinking. What this means is that you can have an alternator that is failing but the red light does not illuminate as the ECM is compensating for reduced alternator output - maybe by draining the battery and or cutting back on vehicle electrical loads such as shutting off or cycling the radio amplifier or heated seats.
|
|

GPS NAV system components and operation987 viewsThis 16 page pdf describes the operation of the GPS navigation system and provides pin outs and equipment layouts. The GPS antenna amp and location is also shown.
|
|
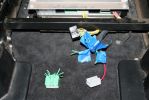
04272 viewsThe green wiring harness is the speaker outputs. Green is + and Green with white stripe is -. We tested all the wires with a 9V battery to figure out which went to what speakers then clearly labeled them as we did.
|
|

5 phone cradle loom41 views
|
|

5 Dash Loom38 views
|
|

Thread upload10 viewsImage uploaded in thread 159153
|
|
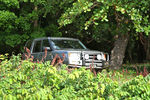
279 viewsCALENDAR 2011 ENTRY
This is in Puerto Rico. LR3 parked in the shade while we hang-out at a secluded beach that can only be accessed in 4x4.
|
|

Matzker photo showing their car using 25mm wheel spacers. Thus the outboard look of tires.402 views
|
|
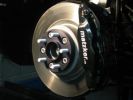
the Matzker wheel spacer - nicely machined. people warn about wheel bearings.375 views
|
|
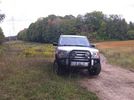
Ooops, found the mountain bike trail. KW Hydrocut15 viewswe were out one day and suddenly I seemed to recognize the power lines, and the fact that the mountain bike trail runs alongside the lines.
This is obviously a wide section of trail, but it's still the KW Hydrocut mountain bike trail.
|
|
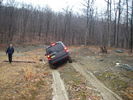
60 viewsland rover dealer outing
|
|
61 viewsDiffs getting a little workout
|
|
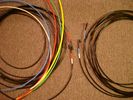
6mm PA12 grade nylon tubing with heat shrink applied 539 viewsShows some of the 6mm air line with heat shrink applied to one end of tubing. Shrink will be applied to the other end once field cut to length. These four tubes, each about 20 ft (6m) long, feed to the rear. Re the front air lines, (not shown), four additional lengths, each about 10 ft (3m) long, are required plus one more 3 metre length for compressor air. The 6mm tubing is a Nylon product specified as PA12. There is also a very similar Transport grade PA11 material, however it seems that PA12 is the more common Transport grade now in use. Also the applicable DIN standard seems to be both DIN 73378 and DIN 74324 for the nylon tubing. The working pressure of the 6mm tubing is about 27 Bar and bursting 82 Bar @ 20C. This is for the 1mm nominal wall thickness material, (4mm ID, 6mm OD).
|
|
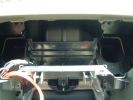
7 Pocket now cut out of dash64 views
|
|
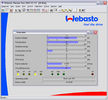
7 FBH Burn Out Shut Down61 views
|
|

7-20200928_Vigor166_Router_Mode6 views
|
|
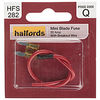
Mini Blade Fuse with Breakout Wire8 views
|
|
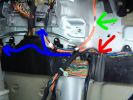
8 ICE Loom - routing at centre consoule66 views
|
|

9 ICE Loom - routing behind passenger front seat for DVD Nav77 views
|
|

10 views
|
|
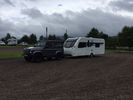
En route to Brora8 views
|
|
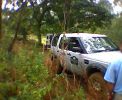
She is out!316 views
|
|

Pulled out344 views
|
|
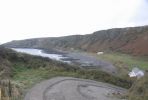
Cliff Drive233 viewsThe drive is quite steep but nothing to worry about!
|
|

Thread upload1 viewsImage uploaded in new thread
|
|
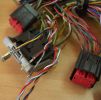
AirBag Pins78 viewsNew Wiring at AirBag ECU just need to back out the pins of the old and clip in the new.
|
|
Thread upload4 viewsImage uploaded in new thread
|
|
286 views
|
|

52 views
|
|
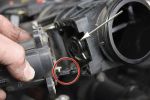
Removing the EGR Butterfly Valve Actuator1522 viewsRemove the 4 TORX screws to remove the actuator. The small black link (circled) connects the actuator drive arm with the butterfly valve spindle (arrowed). The spindle can now be very carefully levered out using a screwdriver inserted beneath the arrowed bit in the photo. A bit scary to do as it takes a fair bit of pressure before the spindle will free itself from the butterfly. Once it starts moving though, it gets easier to pull out.
|
|

Add A Circuit Littelfuse Data sheet2264 viewsThe switch connects to what Littelfuse brand calls an Add-A-Circuit model FMH200BP which is an adapter that plugs in place of a Mini fuse and then has space for two Mini fuses, (original and a second one). In this install, only the original 5 amp fuse was used - adapter was so as to route power from fuse box thru fuse, then rocker switch, and then back to fuse box.
Before you install the Add A Circuit for this application, take an ohm meter and trace out the circuit path of the four slots that fuses could insert into. The path is more complicated than one might first think. As such, the orientation of the fuse holder in the socket matters for this application - that is for a circuit diverter, rather than accessory adder.
|
|
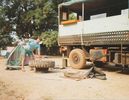
Puncture repair11 viewsI think in total we did this about 10 times, in 6 months, not a bad record, but not easy in the Bush !!
|
|
Thread upload4 viewsImage uploaded in thread 146587
|
|

AFS Retrofit loom info77 viewsinformation about how to build a loom to retrofit AFS
|
|
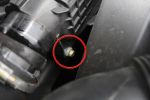
Air Box Lower Securing Bolt1063 viewsThis bolt must be undone in order to remove the air box. It is long and tricky to get out and could be dropped easily.
|
|
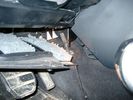
Air Conditioner Drain Hose on Drivers Side (LHD)2257 viewsThe corrugated rubber bit above and to the right of the gas pedal is the drain hose that goes down thru the carpet and floor sheet metal.
While it is bit hard to figure out from the jpg above, there is a rubber "strap" attached to the top of the corrugated hose that one uses to pull on to drag the hose up back around the black plastic heater "pan" drain. The same drain hose arrangement is on the other side as well.
One could I suppose run a plastic snap tie around the vertical pull strap if one was concerned about the hose slipping off again. See also the other jpg sketch which is from the Land Rover manual.
|
|

V8 defender air filter19 views
|
|

how to install Altox WBUS-4 in engine room on Discovery 395 viewsthis is to show how to install the Altox WBUS-4 in engine room of a Discovery 3, but i would recommend to install it inside car in footwell, see other PDF in this album
|
|
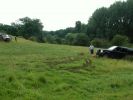
AndrewS winching BobbyCrispBox\'s motor out of the bog73 views
|
|

Thread upload28 viewsImage uploaded in thread 108346
|
|

Ark Royal - Portsmouth70 views
|
|
167 viewsAfter a nice day out with lot of fun at Avon Dasset Quarry.
|
|

Thread upload11 viewsImage uploaded in thread 138228
|
|
Thread upload14 viewsImage uploaded in thread 159338
|
|

TransK9?b1041 views
|
|

The babies, Seren & Llwyd.. \'Psssst, did you hear the one about....?\'140 views
|
|
44 views
|
|
152 views
|
|
Base Layout95 views
|
|

Caterpillar Battery Size cross reference chart and battery profiles including post layout749 viewsThis pdf has a dimension, (metric and inches), cross reference chart plus another sheet that provides BCI and DIN cross reference numbers and shows post locations plus bottom ridge tie down locations, (or the lack of).
This data was for me, hard to find, and helps one in selecting a suitable physical size of Aux battery for the space available.
|
|
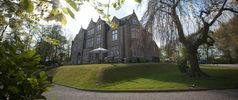
Woodlands Hotel5 viewsGreen Oval Garage would like to say thank you to the Woodlands Hotel in Leeds for allowing us the use of their beautiful grounds for all our future photos shoots.
Woodlands is one of the finest luxury hotels in Leeds. This boutique hotel is set in beautiful landscaped grounds on the outskirts of Leeds city centre, just 2 minutes drive from junction 27 of the M62 motorway, with 23 individually designed bedrooms and an award winning restaurant. Packed with character, this lovingly restored hotel is only three miles from the vibrant, cosmopolitan city of Leeds with superb nightlife and unrivalled shopping.
Woodlands also offers a stylish and contemporary functions venue for all kinds of social and business events. Our three stunning event spaces are suitable for everything from wedding ceremonies and receptions, to corporate meetings and events. The permanent marquee, attached to the hotel, can accommodate up to 150 for dining and 200 for evening parties and receptions, making it one of the most elegant settings for a wedding venue in the Leeds area.
For more information or to make a booking, please contact us on enquire@woodlandsleeds.com or 0113 2381 488
|
|
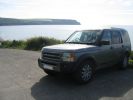
2008 Calendar Entry - D3 go mad in Cornwall669 viewsMy D3 just above Pendower beach on the Roseland Peninsula in Cornwall in August 2007. Wife and kids are out of shot.... standing in the road to prevent other cars parking!!
|
|
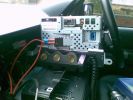
Sat Nav Screen Out - OMG115 views
|
|
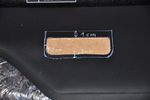
Grab handle - Cut-out dimensions34 views
|
|

Thread upload0 viewsImage uploaded in thread 197070
|
|

285 viewsMake sure you have the sound on....
|
|
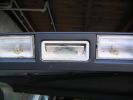
upper tailgate switch without rubber117 views
|
|
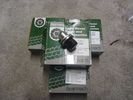
clearout black wheel nuts1 views
|
|
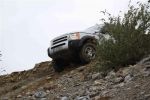
DiscoBlitzen\'s first day out63 views
|
|
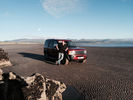
First Outing towing4 viewsMy d3
|
|
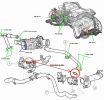
Pipinig lay out EGR214 views
|
|
where this bit go155 viewsproject 5ser heater blower..... joy
|
|
This definitely needs investigating.....171 viewsI had already picked this BOAT out on the O/S map but now I\'ve seen it in the flesh, it needs to be investigated
|
|

crankshaft bolt22 viewsBolt on left is new one for upgraded oil pump casing. Bolt on right is what came out. Notice damaged end and shortness of bolt. Inside of crank was inspected wirh borescope and threads etc all ok. New bolt goes in and out ok. Few filings inside but otherwise clear. Not sure why old bolt ended up like that.
|
|
LED light ON - looking out from boot80 views
|
|

LED light OFF - looking out from boot67 views
|
|
Thread upload0 viewsImage uploaded in new thread
|
|
Thread upload2 viewsImage uploaded in new thread
|
|
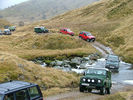
Another Highland 4WD Club Run. Boxing Day 2005, south of Inverness. We're in the second green 90.78 views
|
|

72 viewsThe Smaller Nashers in their SIB which is inflated with an Electric pump mounted in the RIB. Great as a Taxi to and from the beach and for them (and me) to tear about in.
|
|

Thread upload2 viewsImage uploaded in thread 200758
|
|

Brake Light Switch, Find, Remove, and Install Instructions 7782 viewsThis is a two page doc outlining where to find the brake light switch, how to remove it, and then install the new one.
Note, do not move the brake pedal when removing or installing the switch. Let the brake pedal hang where it wants to. The switch design is actually cunning, and as such is supposed to make the removal and install fool proof. Hence if you think too much about it, you can wreck the new switch.
If you want to inspect the interior of the switch, wait until you have removed the old switch. You can then just unsnap the blue from the white to get it apart. Inside, the switch is quite simple, (no circuit boards), but it will probably show black dust from failing contacts.
I think the reason the switch fails is that the Normally Open, (NO), contacts of the brake light contacts were made too light to carry the current load for make and break of the tail light filaments. I also think the black dust created then fouls the Normally Closed, (NC), second set of contacts for the ABS circuit. As such, the Normally Closed contacts become intermittent in operation and display as a fluctuating open and closed circuit condition to the ABS system when the ABS should be seeing a steady closed circuit. Hopefully the replacement switch contacts are more robust and may be as I recently replaced my switch again just as a matter of maintenance. While in a redesign, ideally the NC contacts should be sealed or at least separated from the NO contacts, when I inspected the removed switch, this time there was no black dust present.
Probably the removed switch will have a Land Rover oval logo moulded into it, the new one, FOMOCO.
|
|
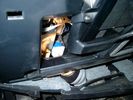
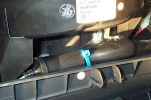
Brake Switch Visible thru Opening4934 viewsThe blue and white bit is the switch; the sort of gold appearing box,(it is really black), you will not see in your 3 as it is a Smooth Talker brand amplifier for my Blackberry phone antenna. This install is detailed in the SmoothTalker phone antenna section of my gallery.
One way to remove and install the switch is to lower the "horizontal" panel above the brake pedal as shown where the flashlight head is located. To actually remove the switch, you slide your hand thru the gap and rotate the switch clockwise 1/4 turn while watching thru the rectangular opening. Installation of the new switch is the reverse of above - 1/4 turn counterclockwise.
Before you remove the switch, note its orientation - horizontal with electrical wires to the left. That is the way it should look after replacement as well.
The second time I replaced the switch, I did it all thru the rectangular opening and did not remove the horizontal panel - that is experience helping out.
The knee kick you have to remove regardless. It is sort of hinged at the bottom so you just pull at the top and sort of rotate the knee panel and then pull upwards for two plastic "fingers" to clear the slots they reside in.
|
|

Black Deposits on Brake Light Switch Plunger2731 viewsThis jpg I got off another forum and is typical of what one will see when one opens up the removed brake light switch. The black powder is residue from arcing of one of the pair of contacts within.
Hopefully the newer switches with the FOMOCO logo moulded into the plastic are improved from the Land Rover logo marked early units, however I doubt it.
The Ford part number is SW-6572 and/or 7E5Z-13480-A as used on the 2006 to 2009 Ford Fusion's and Mercury Milan's; the Land Rover part number is XKB500110. Cost of switch could be about twenty five dollars. A previous LR part number for the switch was XKB500030, so hopefully the newer LR part number, XKB500110, reflects some improvement in reliability.
It is possible that the new switches are better as I installed a replacement 72,000 km, (45,000 miles) later, at 195,000 km (121,000 miles). When I took the removed switch apart to inspect, it was clean inside. There was no black dust - the switch looked like new, hence they must be improved now.
|
|
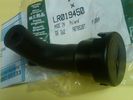
Breather Cap part # LR0194501510 viewsThis is the replacement breather cap as manufactured by the Gore Tex people, (Gore), for the engine compartment end of the front differential breather line.
You can with some difficulty, both blow and suck thru the breather filter material. The Gore Tex filter material has what are called hydrophobic and oleophobic properties. This means the filter material keeps oil in and water out, while at the same time, allowing air pressure to slowly equalize, (air permeable). Additionally, the transfer of dust, salt, and road debris is inhibited.
|
|
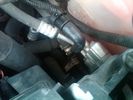
Breather Cap Installed1971 viewsThe black L shaped tube is is the Gore manufactured, (the Gore-Tex people), LR4 Breather Valve installed in an LR3. Naturally the installation looks similar to what one sees on an LR4 or RRS as the Gore breather valve is now OEM for new production.
The part number of this upgraded front differential breather valve is LR019450 and costs about thirty dollars.
|
|
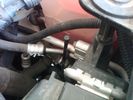
Vertical Breather Hose before cutting off OEM cap.1741 viewsThis shows the plastic vertical breather tubing and OEM cap prior to being cut off. The tubing is located on the driver side at the front near the radiator. One cuts about 3/4" to 1" off from the top. The TSB says 20mm.
I tried blowing thru the cut off piece and was not very successful. The cap seemed plugged. I am beginning to think that there was a very good reason for Land Rovers's Technical Service Bulletin, (TSB).
|
|
62 views
|
|
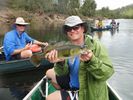
Clarence River Cod7 viewsWe spent a whole day pulling these and Bass out of the Nymboida River
|
|
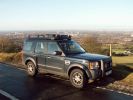
The Blue Beastie fully kitted out overlooking Manchester128 views
|
|

Grommit20 viewsOn manual D3's this is used by the clutch. Om Autos it may be free for routing a cable
|
|

Thread upload0 viewsImage uploaded in thread 200758
|
|

334 views
|
|

BV Folders14 viewsscreen shot of BV folder layout
|
|
Cables out from bottom LH corner of LHS cubby hole160 views
|
|

Thread upload28 viewsImage uploaded in thread 92518
|
|
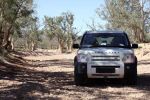
CALENDAR 2008 ENTRY641 viewsWillochra creek near the disused Warrakimbo outstation
South Australia
|
|
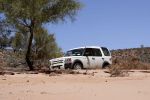
CALENDAR 2008 ENTRY617 viewsPartacoona station
South Australia
|
|
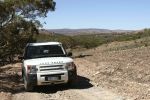
CALENDAR 2008 ENTRY587 viewsArkaba station
South Australia
Whyall 4WD club outing
|
|
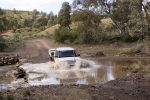
CALENDAR 2008 ENTRY659 viewsAroona Valley
South Australia with camper in tow
|
|
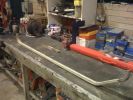
D3 Side Step Repairs155 viewsAluminium trim has been straightend out but need to remove all the old rivets from the rear of the trim.
|
|
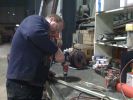
D3 Side Step Repairs185 viewsThere are about 10 rivets to drill out. I also increased the hole size to 5.5mm as I will be using larger rivets to hold the trim back in place. 5.5mm is the larger rivet size commonly available at motor factors etc.
|
|
D3 Side Step Repairs161 viewsI then drilled out the holes in the step edge to 5.5mm to accomodat my larger rivets.
|
|
D3 Side Step Repairs146 viewsCarefully drill out the old rivet ends. Some were a bit stubborn and I used a small chisel and drift to punch them, out.
|
|
D3 Side Step Repairs145 viewsThe old rivet ends which I removed from the trim. I took one rubber end off the trim and let them all out by shaking it to save them rattling around inside the trim for years to come.
|
|
D3 Side Step Repairs166 viewsWhilst I held the trim in place a second person inserted the rivets from behind the step edge. We started in the middle and worked out either way to ensure a snug fit of the aluminium trim.
|
|
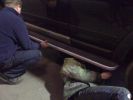
D3 Side Step Repairs168 viewsNearly finished - just the last two rivets to put in. We used a very basic and cheap hand rivet gun which can be bought in places like Halfords for about £10.00 and usually come with a supply of rivets to do the job.
|
|
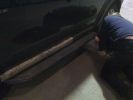
D3 Side Step Repairs149 viewsI then punched out the remaining rivets from the step edge. I used a small hammer and a small punch.
|
|
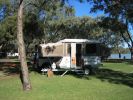
Jayco Dove Outback camper144 viewsPerfect setup for a young family
|
|

Can Bus10 views0s - Start of trace
5s - unlock 1
10s - ignition on (In-I-II)
30s - ignition off (II-I-Out)
Non accurate timings - +/- ~2s.
|
|
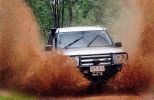
D3 on the Gold-fields Loop South of Darwin, and North of Pine Creek. 67 viewsThis is the middle of January, so is right in the middle of the Wet. Red mud. EPB hates it.
|
|
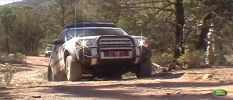
Bendleby Ranges South Australia432 views
|
|

147 viewsCarnage - a log popped outta the mud when the lady was reversing!
|
|

The Disco3 Squad, Saturday Morning214 viewsA stitch together of two photos showing all sixteen vehicles read for the off out and about in the Peak District on 1st July
|
|
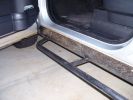
Sill protectors 2735 viewsThe side protection bar comes out a good 170mm. Prevents side panel damage and car-park knocks! Still deciding whether to fit the chequerplate tops, as originally designed.
|
|

Snow reflections338 viewsA quick stop to reflect about the snow in January 2010.
|
|

13 views
|
|

15 views
|
|

Charlottes Pass (Mt Kosciuszko)46 viewsMay 2009
|
|
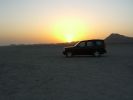
Sunset on Mazirah100 viewsOur camp site for the night - nothing but us, sand and green turtles. Fabulous view out over the Arabian Gulf, blue skies, blue seas and isolation. Almost paradise.
|
|
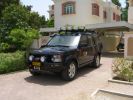
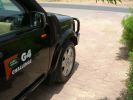
RHS view371 viewsSHows the Front Runner (SA) slimline windcheetah rack which is immensely strong. Takes my 110kg (oh gawd, I must get back on the diet and exercise regime) tramping over it when loading/unloading gear without a problem. Fittings are simply fixed or removed, and IMO very well designed and made. IPF 800 series driving and spots fitted to the front of the rack. IPF cam/reversing fitted each side and to rear of rack for negotiating rocky wadis at night. The G4 stickers were bought off E-bay as a set.
|
|
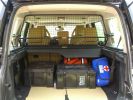
Load space366 viewsShows the SA Front Runner Wolfpack stacking plastic storage boxes that I keep laod straps etc in and the 2nd is tool kit, spare belts, jerry can funnel and tools, plus airline and tyre inflator/deflaotr for ARB on-board compressor, HD jump leads. ARB Winch pack (Orange)with strops, snatch blocks, shackles, gloves, and 2 ARB recovery dampers. Really great 4x4 1st Aid kit from Outdoors warehouse in SA. LRs own loadspace guard - not the best design if you want to store a long load. Mods to be carried out!
|
|
Auxiliary power sockets - TracTronics, Australia381 viewsA complete kit including two outlets, wiring etc connected to auxiliary Optima Blue top battery using their very effective SC40 split charge relay. One outlet between rear and front seats, and 2nd alongside loadspace 12v outlet, enables fridge to run when engine is not running, without affecting start capacity or vehicle functions.
|
|
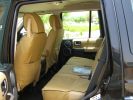
Escape seat covers rear254 viewsJust shwing the good fit of these canvas seat covers made in South Africa. The whole set for a 7 seat HSE £542 with air freight as unaccompanied baggage (inside 5 Front Runner Wolf pack boxes) costing and additional £150 - still a bargain out here!
|
|
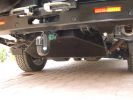
LongRanger auxiliary fuel tank356 viewsThe LR fuel tank imported from ARB in Australia with its 115 litre capacity has more than doubled the range of the car. This is important in the desert where fuel consumption increases at times to 10mpg or less. On a cruise on highways, the car now has a range approaching 850 miles. The tank fits neatly, has not affected handling in a detectable way apart from over speed humps, when a little more bounce from the rear suspension is detected! Suspension copes with the additonal loads without any problem.
|
|
2009 MY?237 viewsThe wheelarches, door sills, and door mirror bodies have all been sprayed to match the body colour. Same as 2009 MY? I think this looks really good, and is so much easier to keep clean than the textured plastic that suffered badly out here from dust/dirt ingraining and UV discolouration.
|
|
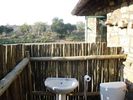
Bathroom No 234 viewsThe view from Bathroom No 2 is realy spectacular. The bathroom is in Botswana and the view is over the Limpopo River with South Africa in the back ground
|
|
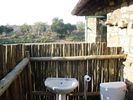
Outside bathroom53 viewsOver looking the Limpopo River with South Africa in the back ground
|
|

View from outside bathroom47 views
|
|
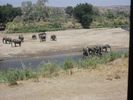
View from inside the house - South Africa in the back ground 32 views
|
|
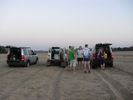
Sundowners in Shashi River68 views3 Countries in 1 picture, Left is Zimbabwe, Right is Botswana and on the horizon is South Africa
|
|
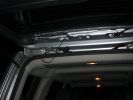
Cable Routing through top of tailgate49 views
|
|
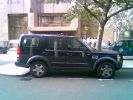
My Disco3 outside its other home, the City Inn Westminster304 views
|
|

My Disco3 outside its other home, the City Inn Westminster205 views
|
|
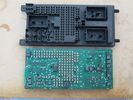
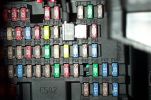
central junction box, without fuses.200 viewsthe print circuit board is easily dropped, after you pull out all the fuses.
|
|
Remove Clip944 viewsRemoving the air box/EGR butterfly housing securing clip
|
|
3 views
|
|
3 views
|
|
4 views
|
|
4 views
|
|
3 views
|
|
3 views
|
|

3 views
|
|
4 views
|
|
3 views
|
|
6 views
|
|
Thread upload8 viewsImage uploaded in new thread
|
|

Thread upload6 viewsImage uploaded in new thread
|
|
Thread upload3 viewsImage uploaded in new thread
|
|

Thread upload11 viewsImage uploaded in thread 142432
|
|
Thread upload11 viewsImage uploaded in thread 155787
|
|
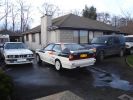
Toy box opened for cleaning465 viewsWork this out! 3x4x4, 1x4x2, 1x2x1, 1x2x0. (Hint: There is a motorbike hiding behind the BMW). SWMBOs car is off to visit the out-laws so I got to wash my toys.
|
|

74 viewsComing down from the summit seconds before blowing out the front passenger-side tire.
|
|
178 views
|
|
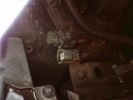
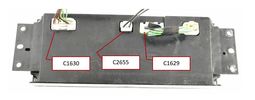
Connector without blanking plug280 views
|
|
Thread upload3 viewsImage uploaded in new thread
|
|

Cooling system hoses - 4.4L petrol V81098 viewsThese are the cooling system hoses on the 4.4L petrol V8. The little odd shaped bleeder hose, (LR006158), shown in the top right hand corner can give problems. There is a plastic tee with a threaded air bleeder outlet located in the middle of the hose. The plastic tee can or will fail due to I guess heat distress.
A BIC pen can serve as a field fix, however for your parts kit, a nominal 3/8" ID hose size brass hose barb inline connector plus a couple of hose clamps is suggested. Better yet is a threaded hose barb brass coupling or a tee and bleeder valve to allow bleeding of the line. Land Rover now makes the plastic bleeder valve that breaks available as a separate part, # LR027661, where 0 is a zero. As such, one can now purchase that part only for addition to your field fix parts kit.
|
|
Thread upload0 viewsImage uploaded in thread 154757
|
|

Thread upload0 viewsImage uploaded in thread 154757
|
|

Thread upload0 viewsImage uploaded in thread 154757
|
|
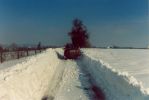
the road between home and work290 viewsthe day before returning from work, I got stuck here in the middle of the snow storm. The plow didn\'t pass yet and wind was blowing snow everywere. Since then I always carry during winter a survival pack consisting of warm coat,cap, warm, high boots and gloves.
It is no fun recovering a car stuck in the snow and sliding down from the road when moving in nothing more than a business outfit (no gloves, city shoes, no coat) with a snowy wind blowing 100km/h..... .
|
|
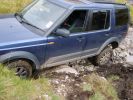
Backing out admting defeat318 views
|
|
CounterAct Power supply mounted under brake lines.191 viewsThis top view shows where I located the power supply. It is attached with 3M sticky to the black plastic surface that is located under the brake lines.
When the system is operating properly, the red LED pulses about twice per second.
Some users claim they can hear a very slight hum or whine coming from the unit. My unit seems silent.
|
|
G4 Expo Rack Cowl Cut Outs78 views
|
|
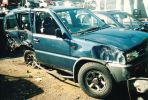
The car that we hit, pushed the back axle about 2\' through the car!283 views
|
|

Not much left of bonnet!278 viewsCrash in a Renault Scenic
Head on colition with a Nissan Terrano he lost control came over the central reservation & ended coming at us sideways!
We hit him in the back wheel arch & spun him around so he then hit my drivers side, I walked away having a air bag wife had broken solder coursed by the seat belt, but it did save her life!
Our car was trashed but it did its gob (was only 2 weeks old!) the bonnet tacking lots of energy out of the collision & the inertia staying relatively in tacked.
|
|
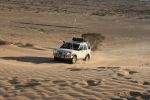
About to tackle a large dune227 views
|
|

Bike on the trip, our "outrider".186 views
|
|
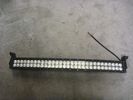
clearout curved lightbar0 views
|
|
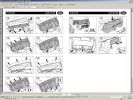
cutout2428 views
|
|

Cut out Disco 3357 views
|
|

Thread upload2 viewsImage uploaded in thread 189928
|
|
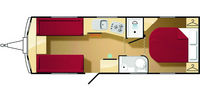
Layout39 views
|
|

ARB air compressor switch, gauge, outlet.312 views
|
|
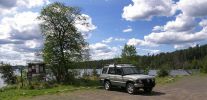
2004 disco, MN near Canadian border191 viewsmy mom out on hiking day with the disco I set up for her.
|
|
Lunch out.115 views
|
|
Just in case the D3 scrabbles about a bit!114 views
|
|
Blanked out windows229 views
|
|
D3 Camp out Kielder74 views
|
|
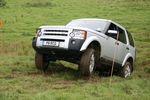
dicky just about to not make progress56 views
|
|

dry route64 views
|
|

moist route58 views
|
|

My Discovery465 views
|
|

B1C6257 viewsBATTERY SAVER OUTPUT CIRCUIT
|
|
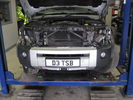
229 views
|
|
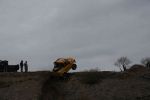
V8 4.6 71 viewsD3 completed a down run & not to be out done 90 completed an up run in grand style
|
|
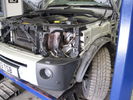
253 views
|
|
242 views
|
|
clearout d3 wheel0 views
|
|

fit to park out front now, put Aston in hayshed92 views
|
|
Fit to park out front now80 views
|
|
D3Matt scaring the sh*t out of himself127 views
|
|
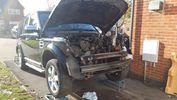
Thread upload27 viewsImage uploaded in thread 153207
|
|
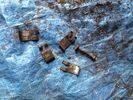
Thread upload4 viewsImage uploaded in thread 143646
|
|
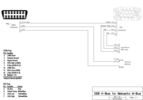
Thread upload4 viewsImage uploaded in thread 198875
|
|

50 viewsD3 model year 2006 fuel pipes
|
|

Seat Base out of car rear view36 views
|
|

Seat Base out of car37 views
|
|
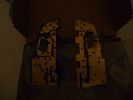
clearout d3-d4 conversion pcb's1 views
|
|
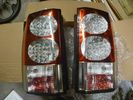
clearout D4 rear lights0 views
|
|
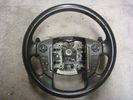
clearout D4 steering wheel0 views
|
|
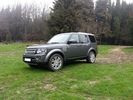
D4 woods Parnitha139 viewsOut on 01-03-2013 at Parnitha forest with a bit of fog and rain - pic 1.
|
|
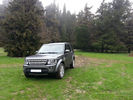
D4 Woods Parnitha 239 viewsOut on 01-03-2013 at Parnitha forest with a bit of fog and rain - pic 2.
|
|
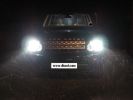
D4 hid kit installed and outside in the dark 6000k conversion.284 views
|
|

Blackbox-Soloutions Faultmate MSV2 Discovery 4 fuel burning heater test options.147 views
|
|

121 views
|
|
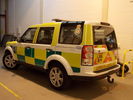
D4 Being Prepped for LAS26 viewsThis is a Disco 4 (unknown spec) being prepped up at my workplace for the LAS, having new comms kit put in and stuff. What you can't see from this angle is that the front grille and headlights have been taken out.
|
|

Routine Services Replacement schedule Discovery 414 viewsService Schedule Discovery 4
|
|
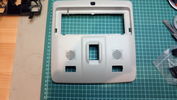
Roof console with cutout for switch(es)59 views
|
|
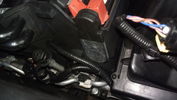
Cable routed from secondary battery box to front grille110 views
|
|

Disco3 on the move in Dangalli Conservation Park - at speed (south of Yunta)177 viewsMusic heard in video is from the stero blasting away inside the Disco - and yes...that was a cattle grid being crossed at the start :-)
|
|
Danggali Conservation Park (south of Yunta)151 views
|
|

Thread upload0 viewsImage uploaded in thread 179056
|
|
Border Rover on a Day Out.45 views
|
|
Tapa-circuit383 viewsTapa-circuit fitted to fuse box behind glove box. Red cable to top is the fused output cable leading to the PDA charger
|
|
Tapa-Circuit Fuse Tap407 viewsTapa-circuit fuse tap fitted in existing fuseway provides extra fuseway which I have used to hard wire my Tomtom Sat Nav PDA. The fused output feeds into a female socket (Cigar lighter sized) into which the tomtom power adaptor is plugged. All hidden away behind the glove box.
|
|
Tapa-circuit Fuse Tap431 viewsTapa-circuit fuse tap fitted in existing fuseway provides extra fuseway which I have used to hard wire my Tomtom Sat Nav PDA. The fused output feeds into a female socket (Cigar lighter sized) into which the tomtom power adaptor is plugged. All hidden away behind the glove box.
|
|
Hard wired tomtom493 viewsThe fused output from a tapa-circuit feeds into a female socket (Cigar lighter sized) into which the tomtom power adaptor is plugged. All hidden away behind the glove box.
|
|
93 viewsWasn't sure I'd make this one. Had to break out the tape measure to make sure my tire would bridge the gap.
|
|

Defender rear bumper drawing51 viewsLay out for measurements
|
|

Deka Battery Dimension Data613 viewsThe battery size that I installed for my auxiliary was a BCI 40R battery as it was for me the easiest to fit and was also a cranking battery. The case profile was such that no tie down fins were located on either bottom end, (sides yes), and length wise, it was only about 11" (290 mm) long. As such, I did not have to grind the nibs at the front bottom of the plastic surround.
I did however raise the bottom of the battery above the angled nibs as I set the battery on a 1" (25mm) high plastic spacer. The total height, (battery plus spacer), was about 8" (200mm) so the battery top still fit under the Land Rover factory cover.
For the Aux battery, when I replaced the 40R, I installed an Interstate BCI 47 which is similar in size to a DIN H5. I was therefore able to eliminate the vertical spacer as the Group 47/H5 is the same height as the DIN H7/H8 stock LR spec starting battery. As such, the standard battery tie down bolts can be used without modification. The Group 47 battery is 9 11/16" long x 6 7/8" wide x 7 1/2" (190mm) high.
|
|

419-08 Low and High line radio systems components and operation834 viewsThis 15 page pdf displays the radio components including pinouts for both the low and high line head units and the two Harman Kardon amplifiers including the Logic 7 amp. The steering wheel controls for both the radio and phone system are also outlined along with mention of the Sirius satellite radio feature.
|
|

Map-Liwa Tal Magreb, on the edge of the empty quarter, highest duune in the UAE. 24 viewsStaring point and bivouac for the Abu Dhabi Desert Race
|
|

ronaldo transcends tight vest79 viewsThe brazilian football team have requested a new outfit after complaints about tight vests
|
|
ipod detail159 viewsipod mounted without lr´s ipod kit. A cable cames from HK back aux input.
|
|

Video showing TR working to counter wheelspin570 viewsTaken at off road day in Henley In Adren Warwickshire, a good fun day out.
|
|
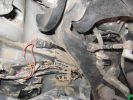
plenty of room once you pull the inner arch back out the way307 views
|
|
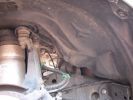
pull out the 3 clips circled in red294 views
|
|
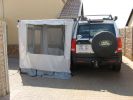
Awning243 viewsI have dual mounted awnings which can convert to tents if required. The outer side walls are an off the shelf purchase, but
the inner ( vehicle side )have to be made to spec.
|
|
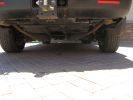
266 viewsHome made long range tank, 4.5 mm ali, welded inside & outside on bottom sections.
|
|
363 viewsHome made console, GPS in clip off mount, 29Mg radio,dual battery moniter,long rang tank gauge & elecric switches.A clip out removable console with no screws.PS also a camera mount.
|
|
Another photo of the D3 & caravan outfit ... this time using the Mitchell Bros towbar and Hayman Reece WDH (May2008)126 views
|
|

Look out here I come!!56 views
|
|
On route to our play-day78 views
|
|
I'm an instructor get me winched out of here133 views
|
|
60 views
|
|
One D3, 2 days old96 viewsOur first trip out ..... Sunday Lunch (well you\'ve got to run it in gently, haven\'t you!).
|
|
Disco3 and Jayco Dove Outback camper161 views
|
|
Stuff that came out of the Disco21 views
|
|

A long way behind Disco3Stu on YouTube86 views
|
|

about 12 miles on the clock!255 views
|
|

Main secondary gear repair bush482 viewsPDF file of engineering drawing of bush turned up to repair the main secondary gear in the EPB gearbox.
Old gear has to be drilled out accurately to the external diameter of the bushing shaft.
|
|
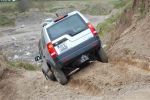
The decent into madness436 viewsDisco on its first day out, the 2nd day I owned it, access to quarry play ground is a little hairy, Ireland Event #8, calendar entry #1
|
|

specification sdv6 tdv642 viewscontains gear ratios and outputs
|
|

Just a bit too much snow130 viewsOut on a drive and didn\'t manage to get through.....
|
|

Disco 3 - Suspension Leveling & drop check worksheet32 viewsUsed to work out how much your disco drops on its suspension and if its outside of the standard tolerances.
If you have any suggestions on how it can be improved please let me know.
|
|
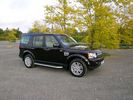
Disco 4 in west Midlands320 viewsDisco 4 (MY10) in Bournville, just out of show room.
|
|

Disco 4259 viewsDisco 4 (MY10) in Bournville. Just out of the show room!
|
|

Donald outside of our holiday cottage, on the Isle of Wight168 viewsWe made the most of the early summer (March) and had a great time on the IoW!
|
|
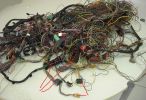
Donar Loom98 viewsThis ball of wires is from a LHD which has been opened and had all audio wires removed, however it is a gold mine for the bits i need. I have pointed out the connectors i know i need for starters near the bottom.
|
|
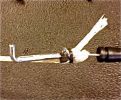
Pull cord as a backup63 viewsI added a pull cord so I would not kept caught with a broken release on the tailgate again. Think about a flat tyre if that happens to you.
|
|
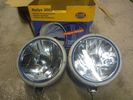
clearout driving lights0 views
|
|
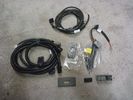
clearout driving light fitting kit4 views
|
|
| 1493 files on 4 page(s) |
 |
1 |  |
 |
 |
|