| Search results - "passenger" |
pdc module in rear passenger side43 views
|
|

pdc module in rear passenger side37 views
|
|
pdc module in rear passenger side38 views
|
|
Passenger side DVD109 views
|
|
Mercedes E320 Passenger's Seat17 views
|
|

Radio location537 viewsMy remote head UHF CB mounted on the front of the ashtray, ham HF/VHF/UHF remote head radio mounted on a block in the coin tray and my GPS on a turned wooden block in the cup holder. Both radios are under tha driver and passenger seat and the antenna for the GPS is suction mounted inside the windscreen.
|
|
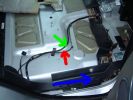
2 ICE Loom - Rear Passenger door63 views
|
|
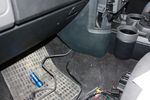
88 viewsCables out into passenger footwell
|
|
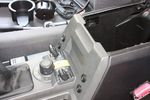
98 viewsAll 4 switches in place.
Driver's side switches are:
. Parking sensors master switch
. Reverse camera off/on/reverse-tiggered
Passenger side switches are:
. CarPC off/on/ignition-triggered
. 12V Regulator off/on/ignition-triggered
|
|

2011 passenger fuse box layout49 views
|
|
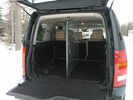
TravAll Dog guard installed and waiting for passengers163 views
|
|
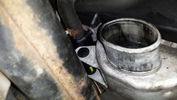
Thread upload122 viewsBottom end Passenger side after original LR hose removed
|
|
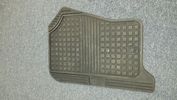
Passenger Mat4 views
|
|
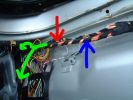
3 ICE Loom - Passenger duct62 views
|
|
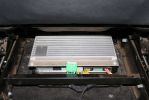
03284 viewsStock amp, underneath passenger front seat. In order to integrate the factory head unit with the V1000 we had to go through the stock amp. This is because of the MOST (fiber optic) connection between the two.
|
|

C2243R72 viewsDescription: Main harness to engine compartment harness Location: Behind passenger compartment fusebox
|
|

9 ICE Loom - routing behind passenger front seat for DVD Nav77 views
|
|
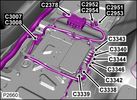
Camera Control Module D451 viewsHarness connection detail, camera module, located beneath L/H passenger side front seat UK D4 spec 2012.
|
|
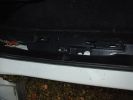
Rear passenger (left) wire harness channel41 views
|
|
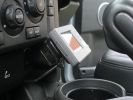
Dash Mounting from passenger side43 views
|
|

74 viewsComing down from the summit seconds before blowing out the front passenger-side tire.
|
|
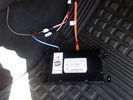
D4 Bluetooth AH42 10F845 AA module connected to 12VDC and MOST1190 viewsThis jpg shows the MOST bus connected to the AH42 10F845 AA module used in the D4 as well as +12VDC power from F58P connected. The power is split with a Y harness as the IHU (radio) for some reason required +12VDC power to the C2115-10 "mute" pin to keep the radio/CD audio from muting all the time.
With power on the pin, the radio audio does mute as it should when the cell phone rings and the hands free connects. The brown conductor feeds to C2115-10 and the blue to the module.
The module tucks up and hides behind the grey plastic section covering the forward portion of the passenger side tranny hump for left hand drive vehicles; for RHD, it would be located on the left side.
The pairing code is 2121 with this setup and not 1234 or 0000.
|
|

Passenger side seat....106 viewsBlack leather stiched in silver...
|
|
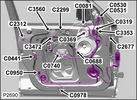
Front passenger side door speakers77 views
|
|
Passenger side Airbag35 viewsAirbag seams cracking
|
|
Passenger view - it will swivel and tilt120 views
|
|
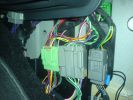
connectors - LHD - passenger footwell159 views
|
|
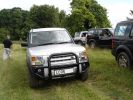
Slimer takes the passenger's seat333 views
|
|
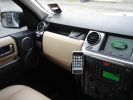
passenger side trim214 views
|
|
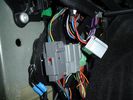
Aux connector in passenger footwell (disconnected)136 views
|
|
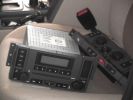
All the bits - don\'t let your wife see them like this!587 viewsHere\'s the stack all dumped on the passenger seat while i run the wires.
|
|
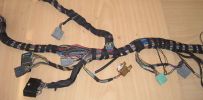
Finished Passenger Kick panel area123 viewsMissing connetor (left most grey) & wiring in, (plastic bracket was broke will use the one in the car) Airbag wires & connector to connector previously cut replaced (on top of grey one to right).
And you can even see the 2 new speaker wires going into the Pass door connector at the very bottom.
|
|

Searching for the correct Aux socket in passenger footwell176 views
|
|
Thread upload27 viewsImage uploaded in thread 163443
|
|
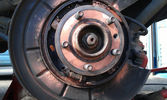
rear wheel hub assembly stripped down passenger side 200575 views
|
|

An extra 12V outlet14 viewsOn the passenger side, I added a 12V outlet which is fed through the fuse box in the rear and adds as such an outlet for whatever charger we don't want to have lingering around around the central console.
The USB charging outlets are visible as well :)
|
|
passenger side122 views
|
|

passenger side cup holder - Blank (SE model and lower)277 views
|
|
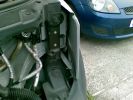
Passenger Side Wing front-edge strip lying lose in wing128 views
|
|
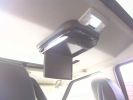
Alpine DVD from rear passenger door203 views
|
|
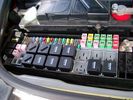
Picture of the engine compartment fuse panel5752 viewsEngine compartment fuse panel located near the battery. This is where F3E, (5 amp), F26E, (20 amp), Fuseable link 10E, (60 amp) and Relay 7E, the now upgraded 70 amp air compressor motor relay, part number YWB500220, (E is for Engine compartment fuse box), are all located. Fuse F35P, (5 amp), is inside the Passenger compartment behind the lower glove box door.
To keep the suspension from going down to the stops when driving, (or parked), it appears that it is only really necessary to remove F26E to depower the exhaust valve and generally keep all the valve block solenoid valves in a closed position trapping whatever air is within the air springs. F3E gets its power thru F26E, so when F26E is removed, the F3E circuit is automatically de-powered. F35P is more interesting in that battery power goes thru the ignition switch and F35P and then into the air suspension control unit. Apparently however, if F26E is removed, removing the F35P is not needed even when the engine is running.
With all fuses still in, if you have a problem, in practice, ideally, the compressor still works and will raise the 3 to an appropriate height. If so, one can then shut the engine off and allow the computers to go to sleep and then you remove the fuse(s). In actual practice, it seems that one need only pull the F26E fuse and can do so with the engine running. All the same, one might consider that the 3 is first a mobile computer, and secondly a 4x4. Computers prefer to go to sleep before the plug is pulled on them, however given that F26E circuit is always alive, then the computer never sleeps. With the fuse(s) pulled, and if you are still up, you can now be a 4x4 instead of a low rider. The whole purpose of the fuse pulling exercise is to depower the one and only system exhaust valve that is physically located within the compressor unit, (to keep it from opening), and secondarily to keep closed the four air spring solenoids within the block valves. This also shuts the air compressor down and stops the air compressor from making air even if the compressor is still good. That is why you initially need the fuse(s) in to allow the compressor to make air if it can.
|
|

View from passenger side with 1 seat down68 views
|
|
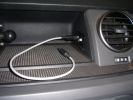
Connectors for Sound out and DC in178 viewsSound out (cable inserted) - connected to Aux connector in passenger footwell.DC in connector is always live
|
|
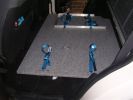
Passengers side - tie downs for hand winch193 views
|
|
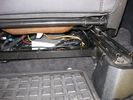
AV switch mounted beneath the front passenger seat62 views
|
|

Passenger side9 views
|
|
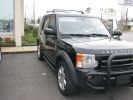
Front Passenger39 viewsI have a gaping hole where the winch that I don\'t have yet should be...
|
|
![Filename=IMG_2183 [1024x768].JPG
Filesize=85KB
Dimensions=1024x768
Date added=27.Nov 2007 IMG_2183 [1024x768].JPG](albums/userpics/12685/thumb_IMG_2183%20%5B1024x768%5D.JPG)
D3 Cargo 6157 viewsPassenger security
|
|

Prevoiuse driver seat in LHD now passenger seat base removed, memory module missing224 views
|
|
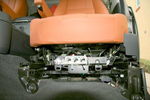
Passenger Seat fitted, 8 way movement via power sockets408 views
|
|
Seat occupation sensor from previouse passenger seat, now driver seat so took it out210 views
|
|

Thread upload6 viewsImage uploaded in new thread
|
|
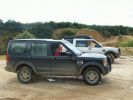
When kids rule the world....177 viewsBoth DG and I were relegated to the passenger seat for about an hour on Sunday whilst our teenagers honed their off-roading skills at Tixover
|
|

LLumar AIR80 Air Blue 78 windscreen film IR reduction metal oxide339 viewsThis pdf summarizes the characteristics of the various types of window glass film available from LLumar. www.llumar.com
I had the Air 80 metal oxide sort of clear film, (windshield film they call it), installed on the front driver and passenger side windows to reduce the Infra Red penetration and hence heating effect on the front occupants. The film is barely visible from either inside or outside, however there is a noticeable reduction in heat penetration when sitting inside. In short, my arm does not get cooked.
Cell phone and GPS etc seem unaffected by the metal oxide film.
I also had the film installed on the three sun roof portions as well.
|
|
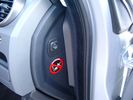
Air Suspension ECU Fuse 35P cut off switch.3802 viewsThis shows the SPST rocker switch mounted in the blank plate installed in lieu of a manual passenger side air bag shut down switch - now automatic via passenger seat pressure switch. Fuse 35P (5 amps) is located in the interior fuse box behind the lower glove box and protects the ignition power supply to the Air Suspension ECU. When the SPST switch is moved to the OFF position, the RAISE /LOWER switch on the centre console is not powered, and hence does not function. As such, some signals from the wheel height sensors and CPU are ignored. By itself however, removing F35P will probably not stop the 3 from self dropping, particularly after the engine is turned off.
Fuse F3E, (5 amps), located in the engine bay fuse box by the starting battery protects the circuit that provides feedback to the Air System ECU indicating that the Compressor Relay has successfully operated and that the Air Compressor is or should be operational, can also be removed, (but is probably not totally necessary), as it gets its power thru F26E. Hence Fuse F26E, (20 amp), also located in the engine compartment fuse box is the fuse that must be removed. This fuse protects the circuit that provides full time battery power to the Air System ECU. When in place, current thru the fuse powers the periodic re-levelling action, (usually lowering a bit with that brief air release noise), that often occurs when the vehicle is parked and the engine is off.
Removing F26E fuse will stop the auto levelling action and also inhibit any other down to the stops signals, (engine running or not). When F26E is removed, no power can flow thru to F3E, hence removing F3E is more for insurance than an absolute requirement. The same with F35P, removing F26E removes primary full time power from the Air Suspension ECU, and hence removing the F35P fuse should not really be required either as long as F26E has been removed.
|
|
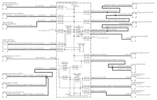
Power Window Circuit centered on Central Junction Box (behind glove box fuse panel)726 viewsRelay 143, the power window relay, and most other relays and FET's as well are built into the back of the passenger side behind the lower glove box fuse panel.
As such, the relays etc are not removable, jump-able, or serviceable.
|
|
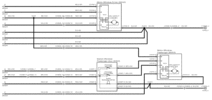
Power Window Circuit Sheet 2 Central Junction Box to Passenger Front Switch361 views
|
|
Thread upload4 viewsImage uploaded in thread 22757
|
|

Horn Wiring Circuit LR3575 viewsThe is the wiring diagram for the dual horn circuit.
The Horn Relay, (R133), is not a big black thing hidden somewhere but instead what is called a FET, (and it is hidden)!
This is a Field Effect Transistor that is built into the circuit board that is mounted to the back of the fuse box that is located behind the lower glove box door on the passenger side of the 3. The related 15 amp fuse, 12P, is mounted in this fuse box and is often called F12P, where F is for fuse, and P is for Passenger compartment.
This is to help differentiate from another fuse and relay box, (the usual kind), that is located beside the starting battery in the Engine compartment. FxxE is often used in the naming of those fuses.
|
|

LR asisst297 viewsIf my D3 breaks down I expect nothing better than this from LR asisst. Passengers stay in the car of course LOL
|
|

LTB00217 - Technical Bulletin - Passenger Compartment Water Ingress85 views
|
|

203 views
|
|

tyre repair b.s.19 views
|
|

Minor_repairs_to_passenger_car_and_light_van_tyres20 views
|
|

Thread upload9 viewsImage uploaded in thread 122403
|
|

Thread upload37 viewsImage uploaded in thread 122752
|
|
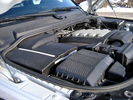
Overview of engine compartment from Main Battery side, (Passenger, LHD), looking across to Aux Battery749 viewsNote labels on main battery cover. The one you cannot read says that an auxiliary battery is installed on the other side. This is to warn service people should they wish to shut off all battery power.
The main starting battery is supposed to be of CaCa separator construction and DIN H8 or BCI Group 49 size. This means Calcium separators Wet Flooded Lead Acid, 13.9" long, 7.5" high and 6.9" wide.
On the Aux battery cover is a label saying to disconnect the blue Anderson single pole connector located under the cover by the brake reservoir. BCI Group 40R battery is small enough that the cover goes back on.
|
|
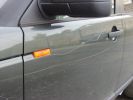
Rash Passenger Side door156 views
|
|
Thread upload2 viewsImage uploaded in thread 157188
|
|
Thread upload0 viewsImage uploaded in thread 123869
|
|

Thread upload2 viewsImage uploaded in thread 157188
|
|

Thread upload1 viewsImage uploaded in thread 183929
|
|
Thread upload11 viewsImage uploaded in new thread
|
|
Thread upload9 viewsImage uploaded in new thread
|
|

Thread upload0 viewsImage uploaded in new thread
|
|

Thread upload2 viewsImage uploaded in new thread
|
|
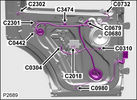
Rear Passenger door speakers57 views
|
|
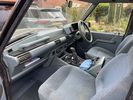
Thread upload1 viewsImage uploaded in thread 207823
|
|

Thread upload32 viewsImage uploaded in thread 102519
|
|
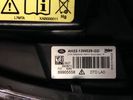
Thread upload27 viewsImage uploaded in new thread
|
|
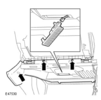
Thread upload17 viewsImage uploaded in thread 102539
|
|
Thread upload1 viewsImage uploaded in thread 207823
|
|

Thread upload1 viewsImage uploaded in new thread
|
|

Thread upload0 viewsImage uploaded in new thread
|
|

Thread upload0 viewsImage uploaded in new thread
|
|
Thread upload2 viewsImage uploaded in thread 156265
|
|

Passenger Side Blend Door Actuator11 views
|
|

Thread upload5 viewsImage uploaded in new thread
|
|

PDC Module25 viewsPDC Module mounted passenger side (RHD) rear door slam
|
|

PDC Module location30 viewsPDC Module located passenger side rear door slam (RHD)
|
|

Connector from passenger footwell62 views
|
|

My passenger seat belt reel opening33 views
|
|
53 views
|
|

Pollen Filter Replacement in HVAC System499 viewsThe attached single page doc includes links to pictures of the procedure to replace the "air" filter behind the passenger side glove box related to the Heater AC system.
Part numbers are provided for both Land Rover and Mann filters, both the activated carbon type and the non charcoal filters.
|
|

Thread upload7 viewsImage uploaded in thread 133103
|
|
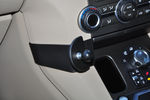
Modified Brodit D4 mount fitted - Passenger's view37 views
|
|

iPad 2 in place: passenger view - entertainment42 views
|
|

Rear29 views
|
|
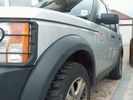
Passenger Guard, Wing and Door Damage64 views
|
|
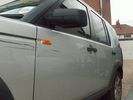
Passenger Wing and Front Door Damage59 views
|
|
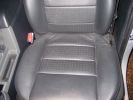
saggy passenger seat213 views
|
|

Passenger seat connector118 views
|
|

Reflections Side Strips Fitted - Passenger Side206 views
|
|

Two children passengers25 views
|
|
![Filename=unione 2 [50].jpg
Filesize=201KB
Dimensions=2745x960
Date added=27.Nov 2007 unione 2 [50].jpg](albums/userpics/12685/thumb_unione%202%20%5B50%5D.jpg)
Rear passenger view167 views
|
|

passenger Seat168 views
|
|

Passenger Seat157 views
|
|
|
|
|