Difference between revisions of "Hidden Menu"
From DISCO3.CO.UK Knowledge Base
m (Hidden Menu (753) moved to Hidden Menu) |
|||
| Line 42: | Line 42: | ||
This can be used to test the 3 video input connectors, or alternatively to watch video being input to them from an external device such as TV, DVD, iPhone/iPad etc. | This can be used to test the 3 video input connectors, or alternatively to watch video being input to them from an external device such as TV, DVD, iPhone/iPad etc. | ||
| − | |||
| − | |||
Adapter cables to connect to the nav screen inputs are available from the site shop: | Adapter cables to connect to the nav screen inputs are available from the site shop: | ||
[http://www.disco3.co.uk/shop/index.php?act=viewProd&productId=434 <span class="button-yellow">Buy from the shop £7.50 + postage</span>] | [http://www.disco3.co.uk/shop/index.php?act=viewProd&productId=434 <span class="button-yellow">Buy from the shop £7.50 + postage</span>] | ||
| + | |||
| + | * Press "Video Inputs Test" button | ||
| + | |||
| + | http://www.disco3.co.uk/gallery/albums/userpics/11468/wiki1_diagnostics%20006.jpg | ||
| + | |||
| + | * You then get the choice of the three inputs. | ||
| + | ** Companion Camera (aka Venture Camera on Range Rover L322) - corresponds to tan connector on the rear of the screen | ||
| + | ** Rear View Camera - brown connector | ||
| + | ** TV/DVD input - green connector | ||
| + | |||
| + | http://www.disco3.co.uk/gallery/albums/userpics/11468/wiki1_reversing%20%20cam%20faultmate%20001.jpg | ||
| + | |||
| + | * Each screen is the same, you have two buttons at the bottom. One switches between PAL and NTSC encoding, the other switches between widescreen display modes. | ||
| + | |||
| + | http://www.disco3.co.uk/gallery/albums/userpics/11468/wiki1_nav%20screen%20010%20%28Small%29.jpg | ||
| + | |||
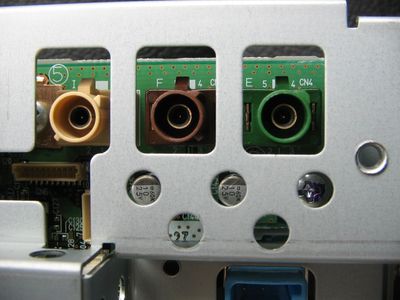
| + | * For reference, these are the connectors (tan, brown and green) for video input. They are on the rear of the screen: | ||
| + | |||
| + | http://www.disco3.co.uk/gallery/albums/userpics/11468/wiki1_disco%20electrics%20017.jpg | ||
Latest revision as of 10:51, 19 August 2013
With huge thanks to Wiggs for the original post and photos: http://www.disco3.co.uk/forum/post174618.html#174618
On Discovery 3 vehicles fitted with sat nav, there is a hidden menu available which allows viewing of vehicles signals, configuration and viewing of the screen's video inputs.
The two main sub menus of interest are Vehicle Signals and Video Inputs Test.
Accessing the Menu
- First get this screen up. You may have more buttons on this screen if you have other options installed - RSE, DVD, TV, 4x4 Info.
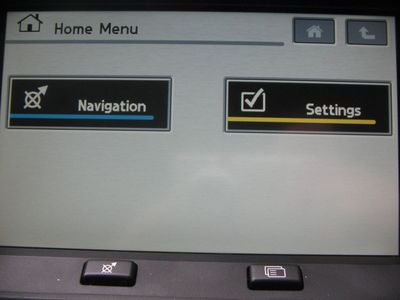
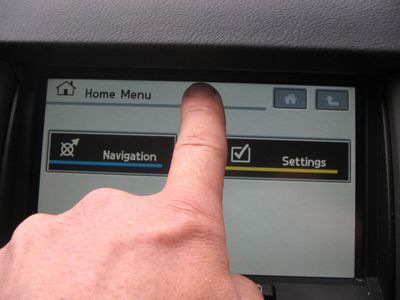
- Press and hold at the middle of the top of the screen for approx 5 - 6 seconds
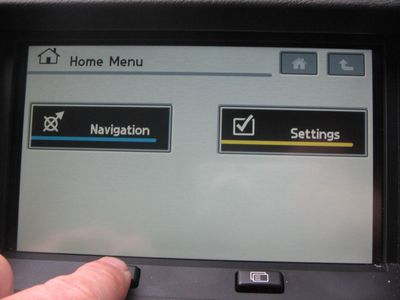
- Release the top of the screen then press the left hand physical button until the keypad shows up
- This is the keypad
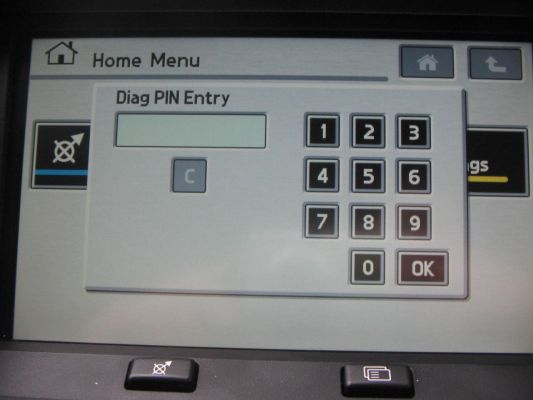
- Then enter 753 then OK and you will get this screen
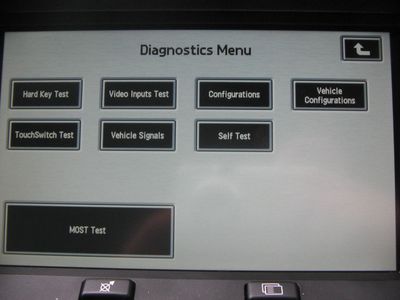
- You are now in the hidden menu! To exit the menu at any time press the left hand physical button just below the screen
Vehicle Signals
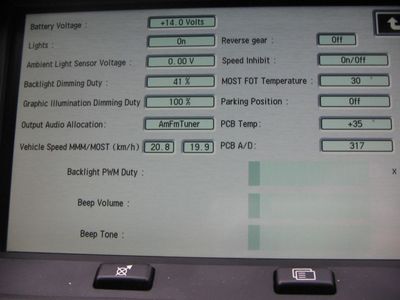
- To get battery voltage, vehicle speed and various other signals/flags press the "Vehicle Signals" button
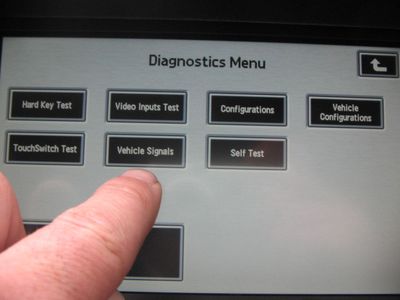
- Signals are then displayed. Press the arrow key in the top right to return to the diagnostics menu
Video Inputs Test
This can be used to test the 3 video input connectors, or alternatively to watch video being input to them from an external device such as TV, DVD, iPhone/iPad etc.
Adapter cables to connect to the nav screen inputs are available from the site shop:
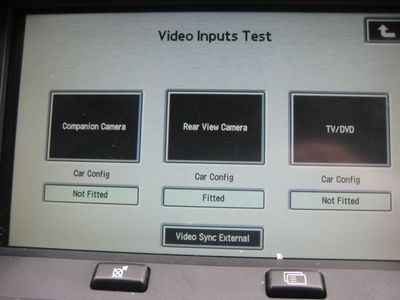
- Press "Video Inputs Test" button

- You then get the choice of the three inputs.
- Companion Camera (aka Venture Camera on Range Rover L322) - corresponds to tan connector on the rear of the screen
- Rear View Camera - brown connector
- TV/DVD input - green connector
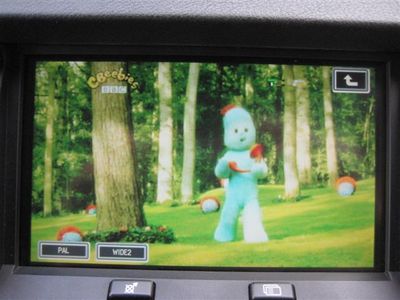
- Each screen is the same, you have two buttons at the bottom. One switches between PAL and NTSC encoding, the other switches between widescreen display modes.
- For reference, these are the connectors (tan, brown and green) for video input. They are on the rear of the screen:
