| Last additions |

Newest LR recruits NIECES from my little bro125 views26 Jun 2010
|
|

Inside Front 241 views26 Jun 2010
|
|
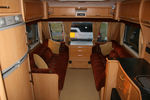
Inside Front45 views26 Jun 2010
|
|
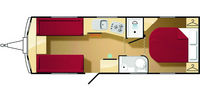
Layout39 views26 Jun 2010
|
|

46 views25 Jun 2010
|
|

46 views25 Jun 2010
|
|

Before and after143 views25 Jun 2010
|
|
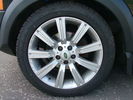
Original D4 Wheel112 views25 Jun 2010
|
|

FFRR 7 Spoke98 views25 Jun 2010
|
|
48 views25 Jun 2010
|
|
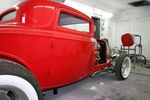
44 views25 Jun 2010
|
|
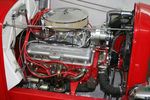
44 views25 Jun 2010
|
|
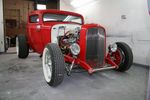
45 views25 Jun 2010
|
|
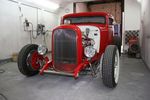
1932 Model B Ford41 views25 Jun 2010
|
|

44 views25 Jun 2010
|
|

Rosen Player38 views25 Jun 2010
|
|

Equippment attateched to player, nothing more30 views25 Jun 2010
|
|

Rosen Player31 views25 Jun 2010
|
|
49 views25 Jun 2010
|
|
38 views25 Jun 2010
|
|

FFRR SC Grill into D3 Frame179 views25 Jun 2010
|
|

46 views25 Jun 2010
|
|
42 views25 Jun 2010
|
|
42 views25 Jun 2010
|
|
41 views25 Jun 2010
|
|
41 views25 Jun 2010
|
|
38 views25 Jun 2010
|
|
37 views25 Jun 2010
|
|
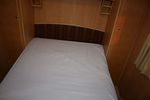
Island Bed39 views25 Jun 2010
|
|
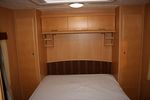
End Bedroom Island Bed and Wardrobes37 views25 Jun 2010
|
|

End Bedroom With Island Bed34 views25 Jun 2010
|
|

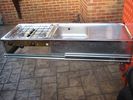
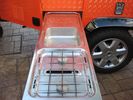
Cooker sink and Hob - Cooker unused39 views25 Jun 2010
|
|

Electric and Gas Heating33 views25 Jun 2010
|
|
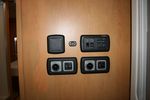
Heating, Power and Water controls32 views25 Jun 2010
|
|

Fridge Freezer36 views25 Jun 2010
|
|

33 views25 Jun 2010
|
|

33 views25 Jun 2010
|
|
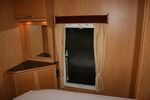
Inside Bedroom33 views25 Jun 2010
|
|
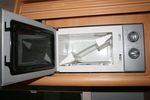
inside Microwave - UNUSED32 views25 Jun 2010
|
|

Inside Cooker - UNUSED32 views25 Jun 2010
|
|
Inside cooker - UNUSED31 views25 Jun 2010
|
|
38 views25 Jun 2010
|
|
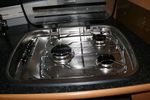
33 views25 Jun 2010
|
|
31 views25 Jun 2010
|
|

19 views25 Jun 2010
|
|

20 views25 Jun 2010
|
|

19 views25 Jun 2010
|
|

17 views25 Jun 2010
|
|

19 views25 Jun 2010
|
|

18 views25 Jun 2010
|
|

19 views25 Jun 2010
|
|

18 views25 Jun 2010
|
|

14 views25 Jun 2010
|
|

radio wiring diagrams83 views24 Jun 2010
|
|
66 views24 Jun 2010
|
|
66 views24 Jun 2010
|
|
73 views24 Jun 2010
|
|
63 views24 Jun 2010
|
|
71 views24 Jun 2010
|
|
77 views24 Jun 2010
|
|
73 views24 Jun 2010
|
|
67 views24 Jun 2010
|
|
69 views24 Jun 2010
|
|
68 views24 Jun 2010
|
|
85 views24 Jun 2010
|
|
70 views24 Jun 2010
|
|
66 views24 Jun 2010
|
|
28 views23 Jun 2010
|
|
32 views23 Jun 2010
|
|
23 views23 Jun 2010
|
|
18 views23 Jun 2010
|
|
24 views23 Jun 2010
|
|
17 views23 Jun 2010
|
|
17 views23 Jun 2010
|
|
18 views23 Jun 2010
|
|

25 views23 Jun 2010
|
|
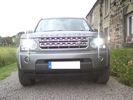
HID Dip47 views23 Jun 2010
|
|
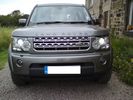
HID Dip51 views23 Jun 2010
|
|
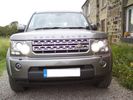
HID Dip, Halogen main47 views23 Jun 2010
|
|
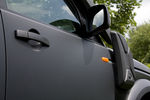
116 viewsMatte Black wrap + Carbon fiber doors23 Jun 2010
|
|
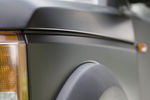
106 viewsMatte Black wrap + Carbon fiber doors23 Jun 2010
|
|

95 viewsMatte Black wrap + Carbon fiber doors23 Jun 2010
|
|

91 viewsMatte Black wrap + Carbon fiber doors23 Jun 2010
|
|
111 views23 Jun 2010
|
|
88 views23 Jun 2010
|
|
86 views23 Jun 2010
|
|

84 views23 Jun 2010
|
|

Watch Topic105 views23 Jun 2010
|
|
numpty66 views23 Jun 2010
|
|

OLD VERSION Please check folder for newer. Bodsy's Brake Bible V1.2a6861 views22 Jun 2010
|
|
171 views22 Jun 2010
|
|
135 views22 Jun 2010
|
|
163 views22 Jun 2010
|
|

136 views22 Jun 2010
|
|

cake90 views22 Jun 2010
|
|
106 views22 Jun 2010
|
|
42 views22 Jun 2010
|
|

41 views22 Jun 2010
|
|

139 views22 Jun 2010
|
|
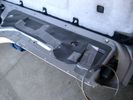
Dust Seal duct taped back together 2260 viewsThis shows the dust seal duct taped back together; also the surplus wire rope exiting from the actuator area prior to being cut to length.
I do not think the sticky plastic membrane is a dust seal, but more of a cable protector to cover up the wiring bundle that is effectively sticking to the underside of the flexible membrane.22 Jun 2010
|
|
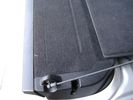
Flexible wire rope fishing leader 0.032" diameter exiting carpet 1934 viewsThis is all you see of the completed mod.
The short little angled "line" about an inch long that looks like a piece of debris and is located a few inches "above" the support cable is actually the wire rope release cable exiting from under the carpeted lift gate cover.
I drilled a very small hole in the carpet and pushed the 0.032" diameter release wire thru and then slipped the loose end under the black plastic.
To release with the lift gate etc closed, from the inside, just pull the loose end free from under the black plastic and gently pull wire about 5mm, (1/4"), and the upper door catch should release. You will have to manually push the upper door out wards to actually effect opening, but you will already be inside the rear cargo area so that part is easy to do.
The assumption is that the lower door latch still works electrically and hence, the lower lift gate half will open as normal by pressing the usual button on the top left of the lower door half. 22 Jun 2010
|
|
Carpeted cover removed showing uncut dust seal and underside of carpeted cover. 1618 viewsNote that there are all sorts of electrical wires sticking to the underside of the dust shield - so be very careful when you cut thru the shield.
I used a box knife very slowly and was surprised at how many conductors there were running just under the shield membrane.22 Jun 2010
|
|

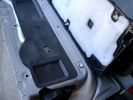
Carpet Panel Removed showing Bass Speaker and Dust Shield 1723 viewsSomething is wrong with the orientation, however this shows what you see when the carpet is removed.
The dust shield, (under which the actuator is located), in the picture is as yet uncut. The white bit is the underside of the plastic lower lift gate carpeted cover panel.
The round thing is the woofer speaker for the Harmon Kardon radio. When the radio is working, one can see the speaker moving, but not much bass sound actually seems to emanate from the speaker.22 Jun 2010
|
|
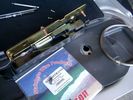
0.032" OD metal fishing leader and lead fishing weight clamped to existing wire rope 2105 viewsI used a size #0 lead fishing weight as a clamp to attach the 0.032" diameter flexible wire rope fishing leader to the release cable.
The pictured weight is the smaller #00 weight, however it did not work very well so reinstalled with the larger #0 size. I clamped to the cable as what breaks is the L retainer that is hidden in the actuator and holds the cable. When the L breaks, it lets go of the cable so you hear the clicking but there is no opening action.
Clamping on to the cable is an attempt to resolve that reality; also if the actuator electrically fails, the release mod should still do the task. Note in the picture the two Torx T15 screws that hold the gold plate to the plastic case and also the two 8mm cap screws that have to be loosened to remove the actuator from inside the door.22 Jun 2010
|
|
Dust seal rolled back showing electrical conductors 1647 viewsNote power conductors just under the dust seal which makes cutting the seal more interesting.
Also shown are the two 8mm nuts located in slots. One must loosen each nut to effect removal of the actuator. This will then reveal two T15 Torx screws that one must completely un-thread to remove the top gold plate from the actuator assembly.22 Jun 2010
|
|
Dust seal cut; note electrical conductors right under dust seal 1616 viewsShows what is underneath when the dust seal is cut. Note the electrical conductors.
I used a box knife to cut the plastic and it was at first easy; then I seemed to hit something and fortunately I stopped - it was the wires - lots of them stuck right to underside of the sticky seal material.
Also shown are the two 8mm nuts in slots that you only have to loosen to release the gold actuator assembly.22 Jun 2010
|
|

131 views21 Jun 2010
|
|

159 views21 Jun 2010
|
|

46 views21 Jun 2010
|
|

48 views21 Jun 2010
|
|

46 views21 Jun 2010
|
|
144 views21 Jun 2010
|
|

What, no rope56 views21 Jun 2010
|
|

PNC team56 views21 Jun 2010
|
|

End of the event47 views21 Jun 2010
|
|

It all packed away so quickly!52 views21 Jun 2010
|
|

Worn out51 views21 Jun 2010
|
|

Must have been a hard day!69 views21 Jun 2010
|
|

Rock step61 views21 Jun 2010
|
|

line up50 views21 Jun 2010
|
|

Winching challenge ;-)50 views21 Jun 2010
|
|

Passing Defner50 views21 Jun 2010
|
|

In search of the bad boy45 views21 Jun 2010
|
|

Pot Noodle found!48 views21 Jun 2010
|
|
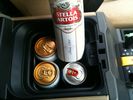
Cant fit anything in169 views21 Jun 2010
|
|
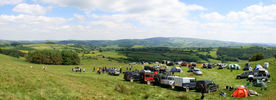
111 views21 Jun 2010
|
|
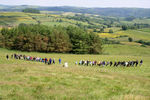
81 views21 Jun 2010
|
|

73 views21 Jun 2010
|
|

114 views21 Jun 2010
|
|

77 views21 Jun 2010
|
|
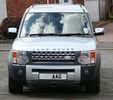
133 views21 Jun 2010
|
|

80 views21 Jun 2010
|
|

42 views21 Jun 2010
|
|

41 views21 Jun 2010
|
|
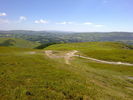
Look what we got up! Not bad in standard spec and 16", mixed, road tyres, I guess!41 views21 Jun 2010
|
|
Mr & Mrs H116 views21 Jun 2010
|
|
38 views21 Jun 2010
|
|
40 views21 Jun 2010
|
|
39 views21 Jun 2010
|
|
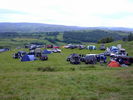
40 views21 Jun 2010
|
|
37 views21 Jun 2010
|
|
43 views21 Jun 2010
|
|

The evening\'s entertainment- 100 points to the winner- some people will do anything to win!44 views21 Jun 2010
|
|
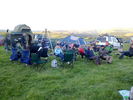
Thr crowd, "frozen" in anticipation...45 views21 Jun 2010
|
|
28 views21 Jun 2010
|
|
28 views21 Jun 2010
|
|

27 views21 Jun 2010
|
|
35 views21 Jun 2010
|
|
Now which route am i on again?40 views21 Jun 2010
|
|
Saturday morning- the challenge ahead37 views21 Jun 2010
|
|
51 views21 Jun 2010
|
|
46 views21 Jun 2010
|
|
44 views21 Jun 2010
|
|
56 views21 Jun 2010
|
|
46 views21 Jun 2010
|
|
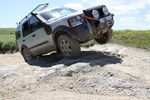
Calendar 2011 entry - MrH in Basic Coil Sprung D3 on 2010 Pot Noodle Challenge Rock Crawl Section477 views21 Jun 2010
|
|
PaganUK 173 views21 Jun 2010
|
|
PaganUK 480 views21 Jun 2010
|
|
PaganUK 375 views21 Jun 2010
|
|
PaganUK 274 views21 Jun 2010
|
|
PaganUK 780 views21 Jun 2010
|
|
PaganUK 677 views21 Jun 2010
|
|
PaganUK 579 views21 Jun 2010
|
|
90 views21 Jun 2010
|
|
70 views21 Jun 2010
|
|

123 views21 Jun 2010
|
|

119 views21 Jun 2010
|
|

88 views21 Jun 2010
|
|

81 views21 Jun 2010
|
|

72 views21 Jun 2010
|
|

76 views21 Jun 2010
|
|
96 views21 Jun 2010
|
|
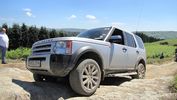
Rock Crawl47 views21 Jun 2010
|
|
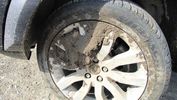
20" Mud Paddles47 viewsWhen road tyres fail - 20" V-spokes seem to add to the traction21 Jun 2010
|
|

TTB causes backlog43 viewsMy generally slow driving caused a few others to get held up - sorry21 Jun 2010
|
|
Twister - start83 views21 Jun 2010
|
|

Twister - Winners92 views21 Jun 2010
|
|

Winners?82 views21 Jun 2010
|
|

Methley gets some encouragement76 views21 Jun 2010
|
|
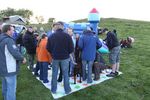
Everyone on...80 views21 Jun 2010
|
|
MrsH getting extra points 183 views21 Jun 2010
|
|

MrsH getting extra points 265 views21 Jun 2010
|
|

MrsH getting extra points 384 views21 Jun 2010
|
|

What the weekend was all about41 views21 Jun 2010
|
|
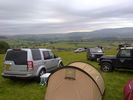
Saturday morning and the view beyond42 views21 Jun 2010
|
|

View from PNC Bedroom71 views21 Jun 2010
|
|
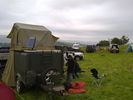
Uncle Ray\'s emporium and boudoir...37 views21 Jun 2010
|
|
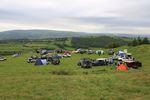
Happy Campers72 views21 Jun 2010
|
|
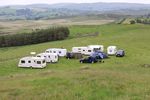
Pikey Corner84 views21 Jun 2010
|
|
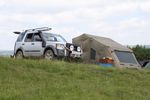
PNC 2010 Home86 views21 Jun 2010
|
|
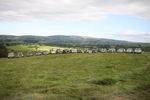
Final Lineup74 views21 Jun 2010
|
|
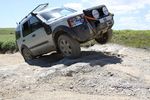
Air98 views21 Jun 2010
|
|
and now for the best bit24 views21 Jun 2010
|
|
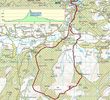
The only way is up ! are you sure about this !26 views21 Jun 2010
|
|

nice view from the top but its getting there that counts25 views21 Jun 2010
|
|

Pot Noodle 201029 views21 Jun 2010
|
|

Pot Noodle 201033 views21 Jun 2010
|
|

33 views21 Jun 2010
|
|
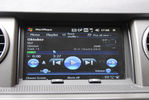
MP3 player to play music on the car system126 viewsUsing an app called mortplayer on the PDA to play mp3 files on the car's ICE system.
It has a nice interface meant for in-car use20 Jun 2010
|
|
86 views20 Jun 2010
|
|
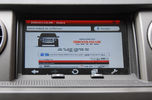
The forum on the center screen122 viewsBrowsing the internet is also possible20 Jun 2010
|
|

71 views20 Jun 2010
|
|
63 views20 Jun 2010
|
|
48 views20 Jun 2010
|
|

117 views20 Jun 2010
|
|

106 views20 Jun 2010
|
|
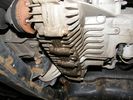
Transfer Box Oil Leak 19.6.201054 views20 Jun 2010
|
|
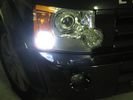
led sidelight or DLR86 views20 Jun 2010
|
|

LED Sidelight Land rover 1101 views20 Jun 2010
|
|
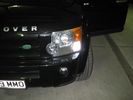
LED Sidelight Land rover92 views20 Jun 2010
|
|
25 views20 Jun 2010
|
|
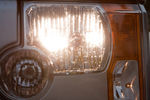
H7R land rover HID Kit78 views20 Jun 2010
|
|
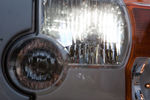
H7R Headlight retrofit H7R HIDS4U notice no light in bottome half of the bowl92 views20 Jun 2010
|
|

Philips D2S bulb62 views20 Jun 2010
|
|
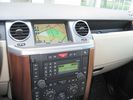
GVIF toggle button looks like oem375 views20 Jun 2010
|
|
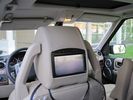
reversing camera image on LCD screen225 views20 Jun 2010
|
|
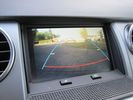
CMOS camera image241 views20 Jun 2010
|
|

73 views19 Jun 2010
|
|
![Filename=IMG_0188[1].jpg
Filesize=118KB
Dimensions=1280x960
Date added=19.Jun 2010 IMG_0188[1].jpg](albums/userpics/15526/thumb_IMG_0188%5B1%5D.jpg)
Brake Sensor143 views19 Jun 2010
|
|
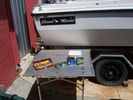
219 viewsTool Kit ready..............19 Jun 2010
|
|

217 views19 Jun 2010
|
|

208 views19 Jun 2010
|
|
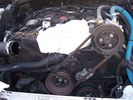
221 viewsRemove the air intake shuttle cut off valve, covering hole with rag19 Jun 2010
|
|
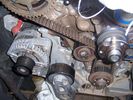
247 viewsThe old belt with rubber crumbs showing19 Jun 2010
|
|
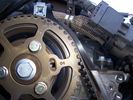
251 viewsLH camshaft after putting new belt on19 Jun 2010
|
|
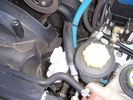
200 viewsRemoval of Intercooler hose, don't forget to plug the hole, don't want anything to fall in there19 Jun 2010
|
|
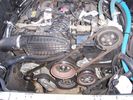
241 viewsWith the viscous fan and other covers removed19 Jun 2010
|
|
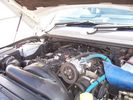
192 viewsWe start...........19 Jun 2010
|
|
84 viewsTool kit ready..............19 Jun 2010
|
|
147 viewsThe real tool kit ready19 Jun 2010
|
|

Xenons for Sale79 views18 Jun 2010
|
|
Spare Battery Bay with unknown box near the dipstick36 views18 Jun 2010
|
|
close up side tints 15% mesh63 views18 Jun 2010
|
|

close up of side tint 15% mesh61 views18 Jun 2010
|
|
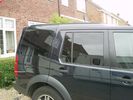
side tints 15%58 views18 Jun 2010
|
|
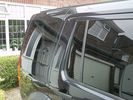
side tints 15%50 views18 Jun 2010
|
|
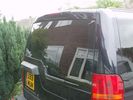
rear tint 15%49 views18 Jun 2010
|
|
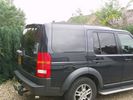
new tints 15%58 views18 Jun 2010
|
|

84 views18 Jun 2010
|
|
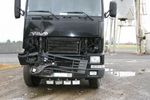
French connection271 viewsThis was the culprit18 Jun 2010
|
|

291 views18 Jun 2010
|
|

286 views18 Jun 2010
|
|

299 views18 Jun 2010
|
|
115 views17 Jun 2010
|
|

121 views17 Jun 2010
|
|

142 views17 Jun 2010
|
|
227 views17 Jun 2010
|
|
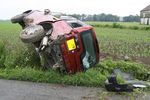
Oops !262 views17 Jun 2010
|
|
![Filename=Technical Service Bulletin SB034 SB036 Vehicle Enhancement Program[1].pdf
Filesize=959KB
Dimensions=0x0
Date added=17.Jun 2010 Technical Service Bulletin SB034 SB036 Vehicle Enhancement Program[1].pdf](images/thumb_pdf.jpg)
Technical Service Bulletin SB034 SB036 Vehicle Enhancement Program2384 viewsOn page 6 and following are the Land Rover service bulletin instructions as to how to install delivery valve and exhaust valve repair kit JPO500010; also a list of previous compressor model numbers as related to the 3. The new delivery valve is easy to install, the exhaust, not so easy. Note that this in not the more recent TSB that reduced the operating pressure of the compressor via a software fix and also recommended replacement of the air compressor 70 amp relay. See the F35 album near the bottom for the relay material.17 Jun 2010
|
|
Pioneer Avic F900BT63 views17 Jun 2010
|
|
Pioneer Avic F900BT59 views17 Jun 2010
|
|
![Filename=P1020659 [1024x768].JPG
Filesize=180KB
Dimensions=1024x577
Date added=16.Jun 2010 P1020659 [1024x768].JPG](albums/userpics/13223/thumb_P1020659%20%5B1024x768%5D.JPG)
309 views16 Jun 2010
|
|
![Filename=P1020657 [1024x768].JPG
Filesize=103KB
Dimensions=1024x577
Date added=16.Jun 2010 P1020657 [1024x768].JPG](albums/userpics/13223/thumb_P1020657%20%5B1024x768%5D.JPG)
299 views16 Jun 2010
|
|
![Filename=P1020665 [1024x768].JPG
Filesize=141KB
Dimensions=540x958
Date added=16.Jun 2010 P1020665 [1024x768].JPG](albums/userpics/13223/thumb_P1020665%20%5B1024x768%5D.JPG)
284 views16 Jun 2010
|
|
![Filename=P1020663 [1024x768].JPG
Filesize=133KB
Dimensions=1024x577
Date added=16.Jun 2010 P1020663 [1024x768].JPG](albums/userpics/13223/thumb_P1020663%20%5B1024x768%5D.JPG)
323 views16 Jun 2010
|
|
![Filename=P1020664 [1024x768].JPG
Filesize=127KB
Dimensions=540x958
Date added=16.Jun 2010 P1020664 [1024x768].JPG](albums/userpics/13223/thumb_P1020664%20%5B1024x768%5D.JPG)
246 views16 Jun 2010
|
|
![Filename=P1020670 [1024x768].JPG
Filesize=179KB
Dimensions=1024x577
Date added=16.Jun 2010 P1020670 [1024x768].JPG](albums/userpics/13223/thumb_P1020670%20%5B1024x768%5D.JPG)
312 views16 Jun 2010
|
|
56 views16 Jun 2010
|
|
53 views16 Jun 2010
|
|
50 views16 Jun 2010
|
|
48 views16 Jun 2010
|
|
silly gate107 views16 Jun 2010
|
|

62 views16 Jun 2010
|
|
Hook links79 views16 Jun 2010
|
|
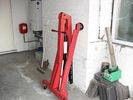
Sealey 1 tonne103 views16 Jun 2010
|
|
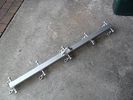
Spreader Bar83 views16 Jun 2010
|
|
93 views16 Jun 2010
|
|
97 views16 Jun 2010
|
|
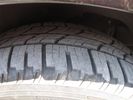
98 views16 Jun 2010
|
|
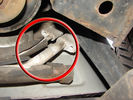
Air Conditioning Pipes (File 1)976 viewsIt\'s the smaller of the 2 pipes that is leaking. Both pipes are encased full length in the foam sleeve. You can see where the support bracket has \'crushed\' the sleeve. The bracket is what holed the small pipe. There is a bracket at each end and one in the middle. You need to remove the suspension reservoir to get to the centre bracket. Be aware that the bolts securing the brackets may be corroded and are likely to shear off on removal!16 Jun 2010
|
|
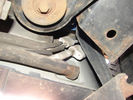
Air Conditioning Pipes (file 2)803 viewsShows location of front-to-rear air con pipes behind NS front wheel. You can just see the Vredestein tyre. The pipe connectors are tucked in behind the wheel arch inner cover. This has to be partially removed for access to bolts holding pipes together.16 Jun 2010
|
|
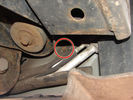
Air Conditioning Pipes186 viewsFront-to-rear aircon HP and LP pipes. The circled bit shows where the bolt securing the support bracket (removed)has sheared off16 Jun 2010
|
|

BBQ\'s!88 views16 Jun 2010
|
|

30 views15 Jun 2010
|
|
111 views15 Jun 2010
|
|
101 views15 Jun 2010
|
|
87 views15 Jun 2010
|
|
105 views15 Jun 2010
|
|
82 views15 Jun 2010
|
|
85 views15 Jun 2010
|
|
141 views15 Jun 2010
|
|
80 views15 Jun 2010
|
|
76 views15 Jun 2010
|
|
108 views15 Jun 2010
|
|
101 views15 Jun 2010
|
|
56 views15 Jun 2010
|
|

44 views15 Jun 2010
|
|

47 views15 Jun 2010
|
|
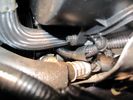
45 views15 Jun 2010
|
|

34 views15 Jun 2010
|
|

33 views15 Jun 2010
|
|

41 viewsHinge inside LR/Thule roof box15 Jun 2010
|
|
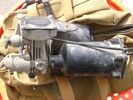
Compressor Air Drier 2042 viewsA view of the air drier - the black round thing to the right of the actual compressor cylinder head.
The general feeling is that the air dryer is responsible for most of the compressor problems now and that replacement of either the assembly or just the beads inside will probably revive one's compressor. In reality, the beads may have for the most part broken down and turned to dust plugging the internal filters. Hence replacement of the complete dryer unit has some merit.
The part number for the dryer assemble complete with the desiccant is VUB504700.15 Jun 2010
|
|
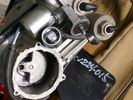
Compressor Exhaust and Inlet 1532 viewsThe two temporary black plugs cover off the 8mm and 10mm push fit lines to the air inlet and exhaust lines. Also visible is the worn threaded stud that I think was the initial failure mode.
15 Jun 2010
|
|
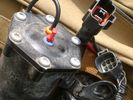
Compressor Electrical Plugs 1402 viewsThis shows the two electrical connectors; the two pronger is the power to the compressor, and the multi-pin connector carries control signals. Also the temporary red plug is where the 6 mm tubing from the centre valve block connects. This line carries both the compressor and exhaust air to and from the springs.15 Jun 2010
|
|
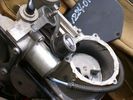
Compressor Con Rod Stud 1339 viewsVisible in the expanded view of this picture is the worn rounded threaded screw that tied the con rod bearing to the electric motor eccentric. I think the stud unscrewed itself and pulled out; then the piston jammed and the con rod broke.15 Jun 2010
|
|
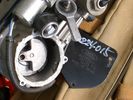
Compressor Con Rod Broken 1745 viewsThe model number of this compressor is RQG500060; the model number of my replacement compressor was LR015303, the unit that was apparently being installed on the D4 vehicles as of Spring 2010. As of Fall 2011, the new replacement part number is LR023964, the same as in the 4's.
Note the number hand written on the black plate. All the compressors seem to have some number hand written on them - hand built I presume, and every unit perhaps evolving a bit differently as LR struggles to build a compressor that will last. I guess Hitachi, (the manufacturer), should be given credit for that.15 Jun 2010
|
|
97 views14 Jun 2010
|
|

not in a good place....73 views14 Jun 2010
|
|

Dirrrrty79 views14 Jun 2010
|
|

tensioner pulley loosening to remove belt79 views14 Jun 2010
|
|
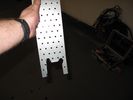
special tool for holding waterpump pulley :)72 views14 Jun 2010
|
|
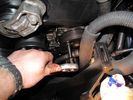
loosening screws via holes in pulley60 views14 Jun 2010
|
|
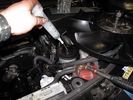
removing ps fluid from reservoir59 views14 Jun 2010
|
|
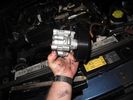
replacement pump68 views14 Jun 2010
|
|
Always start with removing the dog from the engine compartment51 views14 Jun 2010
|
|

45 views14 Jun 2010
|
|
51 views14 Jun 2010
|
|

34 views14 Jun 2010
|
|
58 views14 Jun 2010
|
|
Pressure hose from psp53 views14 Jun 2010
|
|

21 views14 Jun 2010
|
|

19 views14 Jun 2010
|
|

19 views14 Jun 2010
|
|
74 views14 Jun 2010
|
|
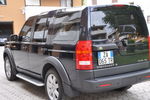
62 views14 Jun 2010
|
|
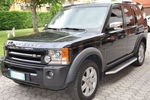
78 views14 Jun 2010
|
|
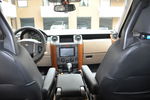
98 views14 Jun 2010
|
|
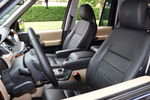
76 views14 Jun 2010
|
|
74 views14 Jun 2010
|
|
63 views14 Jun 2010
|
|
83 views14 Jun 2010
|
|
62 views14 Jun 2010
|
|

26 viewsCalendar 201114 Jun 2010
|
|

29 views14 Jun 2010
|
|
27 views14 Jun 2010
|
|

30 views14 Jun 2010
|
|

NZ, Rees Valley22 views14 Jun 2010
|
|

Rees Valley NZ27 views14 Jun 2010
|
|
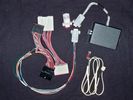
Electronic height controller trial kit245 viewsElectronic height controller kit incl trial extension looms & dummy plug14 Jun 2010
|
|
134 views13 Jun 2010
|
|
122 views13 Jun 2010
|
|
115 views13 Jun 2010
|
|
95 views13 Jun 2010
|
|

Kenwood Protalk72 views13 Jun 2010
|
|
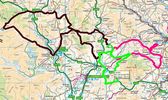
Routes114 views13 Jun 2010
|
|

Forest of Dean Wild Boar at Blakeney Straits / Wenchford Picnic Site68 views13 Jun 2010
|
|
RLD Spare Wheel Carrier55 views13 Jun 2010
|
|
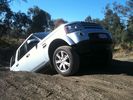
110 views13 Jun 2010
|
|
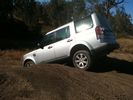
93 views13 Jun 2010
|
|
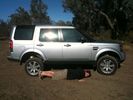
160 viewssuspension extension mode... 6\'3" son could have crawled under the vehicle easily.13 Jun 2010
|
|
89 views12 Jun 2010
|
|
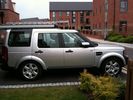
90 views12 Jun 2010
|
|

79 views12 Jun 2010
|
|

87 views12 Jun 2010
|
|
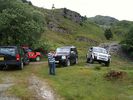
86 views12 Jun 2010
|
|
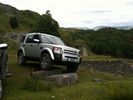
94 views12 Jun 2010
|
|

88 views12 Jun 2010
|
|

100 views12 Jun 2010
|
|

96 views12 Jun 2010
|
|

84 views12 Jun 2010
|
|

78 views12 Jun 2010
|
|

70 views12 Jun 2010
|
|
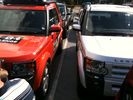
76 views12 Jun 2010
|
|

76 views12 Jun 2010
|
|

65 views12 Jun 2010
|
|
89 views12 Jun 2010
|
|
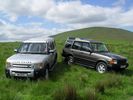
Disco 1 & 3 Pendle Hill309 views12 Jun 2010
|
|
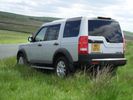
Pendle 563 views12 Jun 2010
|
|
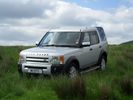
pendle 468 views12 Jun 2010
|
|
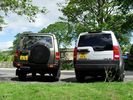
Roughlee 275 views12 Jun 2010
|
|
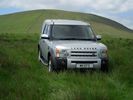
Pendle Hill 369 views12 Jun 2010
|
|
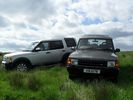
Pendle 271 views12 Jun 2010
|
|
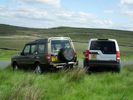
Pendle 72 views12 Jun 2010
|
|
Pendle Hill 264 views12 Jun 2010
|
|
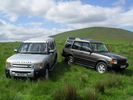
Pendle Hill77 views12 Jun 2010
|
|
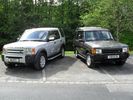
My Disco 3 &My Wife's Disco 177 views12 Jun 2010
|
|

fattura disco 3-165 views12 Jun 2010
|
|

fattura disco 3-255 views12 Jun 2010
|
|

fattura disco 3-356 views12 Jun 2010
|
|

134 views12 Jun 2010
|
|
94 views12 Jun 2010
|
|
131 views11 Jun 2010
|
|
96 views11 Jun 2010
|
|
85 views11 Jun 2010
|
|
93 views11 Jun 2010
|
|
98 views11 Jun 2010
|
|
93 views11 Jun 2010
|
|
87 views11 Jun 2010
|
|
70 views11 Jun 2010
|
|
84 views11 Jun 2010
|
|
77 views11 Jun 2010
|
|
235 views11 Jun 2010
|
|
193 views11 Jun 2010
|
|
134 views11 Jun 2010
|
|
143 views11 Jun 2010
|
|
87 views11 Jun 2010
|
|
59 views11 Jun 2010
|
|
374 views11 Jun 2010
|
|
42 views11 Jun 2010
|
|
34 views11 Jun 2010
|
|
71 views11 Jun 2010
|
|
119 views11 Jun 2010
|
|
181 views10 Jun 2010
|
|
![Filename=DSC07237 [1600x1200].JPG
Filesize=114KB
Dimensions=1280x960
Date added=10.Jun 2010 DSC07237 [1600x1200].JPG](albums/userpics/11603/thumb_DSC07237%20%5B1600x1200%5D.JPG)
126 views10 Jun 2010
|
|
![Filename=DSC07238 [1600x1200].JPG
Filesize=89KB
Dimensions=720x960
Date added=10.Jun 2010 DSC07238 [1600x1200].JPG](albums/userpics/11603/thumb_DSC07238%20%5B1600x1200%5D.JPG)
125 views10 Jun 2010
|
|
![Filename=DSC07232 [1600x1200].JPG
Filesize=272KB
Dimensions=1280x960
Date added=10.Jun 2010 DSC07232 [1600x1200].JPG](albums/userpics/11603/thumb_DSC07232%20%5B1600x1200%5D.JPG)
157 views10 Jun 2010
|
|
![Filename=DSC07233 [1600x1200].JPG
Filesize=233KB
Dimensions=1280x960
Date added=10.Jun 2010 DSC07233 [1600x1200].JPG](albums/userpics/11603/thumb_DSC07233%20%5B1600x1200%5D.JPG)
144 views10 Jun 2010
|
|
![Filename=DSC07234 [1600x1200].JPG
Filesize=274KB
Dimensions=1280x960
Date added=10.Jun 2010 DSC07234 [1600x1200].JPG](albums/userpics/11603/thumb_DSC07234%20%5B1600x1200%5D.JPG)
142 views10 Jun 2010
|
|
![Filename=DSC07235 [1600x1200].JPG
Filesize=201KB
Dimensions=1280x960
Date added=10.Jun 2010 DSC07235 [1600x1200].JPG](albums/userpics/11603/thumb_DSC07235%20%5B1600x1200%5D.JPG)
150 views10 Jun 2010
|
|
| 233746 files on 585 page(s) |
 |
 |
 |
 |
 |
 |
 |
505 |  |
 |
 |
 |
 |
|