| Last additions - Albourneboy |

Thread upload168 viewsImage uploaded in new thread27 Mar 2014
|
|

Thread upload240 viewsImage uploaded in new thread27 Mar 2014
|
|
Thread upload295 viewsImage uploaded in new thread27 Mar 2014
|
|
Thread upload205 viewsImage uploaded in new thread27 Mar 2014
|
|

Thread upload188 viewsImage uploaded in new thread27 Mar 2014
|
|
Thread upload176 viewsImage uploaded in new thread27 Mar 2014
|
|

Thread upload167 viewsImage uploaded in new thread27 Mar 2014
|
|
Thread upload159 viewsImage uploaded in new thread27 Mar 2014
|
|

Thread upload110 viewsImage uploaded in new thread27 Mar 2014
|
|

125 views23 Feb 2013
|
|
126 views22 Feb 2013
|
|

114 views22 Feb 2013
|
|

113 views19 Feb 2013
|
|

DVD player127 views23 Apr 2012
|
|

DVD player set129 views23 Apr 2012
|
|

Pegasus 2131 viewsDamage caused to our Bailey Pegasus 514 by the front towing protector upper securing sucker16 Feb 2012
|
|

Pegasus 1129 viewsDamage caused to our Bailey Pegasus 514 by the front towing protector upper securing sucker16 Feb 2012
|
|
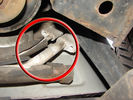
Air Conditioning Pipes (File 1)976 viewsIt\'s the smaller of the 2 pipes that is leaking. Both pipes are encased full length in the foam sleeve. You can see where the support bracket has \'crushed\' the sleeve. The bracket is what holed the small pipe. There is a bracket at each end and one in the middle. You need to remove the suspension reservoir to get to the centre bracket. Be aware that the bolts securing the brackets may be corroded and are likely to shear off on removal!16 Jun 2010
|
|
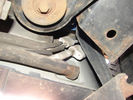
Air Conditioning Pipes (file 2)803 viewsShows location of front-to-rear air con pipes behind NS front wheel. You can just see the Vredestein tyre. The pipe connectors are tucked in behind the wheel arch inner cover. This has to be partially removed for access to bolts holding pipes together.16 Jun 2010
|
|
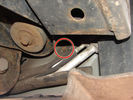
Air Conditioning Pipes186 viewsFront-to-rear aircon HP and LP pipes. The circled bit shows where the bolt securing the support bracket (removed)has sheared off16 Jun 2010
|
|

Twin 7 Pin Socket Towing Electrics Fitting Instructions260 views27 Nov 2009
|
|

13 Pin Socket Towing Electrics Fitting Instructions222 views27 Nov 2009
|
|

Towbar Fitting235 viewsPage from handbook describing how to fit/remove towbar29 Oct 2009
|
|
141 views07 Apr 2009
|
|
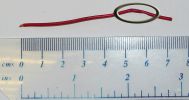
EPB Wire154 viewsThis wire came from somewhere in the EPB circuit and was the cause of my EPB not working. Circled in the picture is the broken part of the wire and just to the right of the break (also within the circle) you can just see a slightly thinner part where the wire has chaffed, removing the insulation.23 Mar 2009
|
|

Blanking Kit Fitting Procedure2440 viewsHow I fitted the kit to my D3.18 Feb 2009
|
|

EGR Stub Pipe858 viewsThis is one of the stub pipes that are fitted to the butterfly valve housing. When both are fitted, they meet in the middle of the housing and must present quite an obstruction to the flow of air to the engine inlet valves! Look how cruddy it is. All that muck is being fed to your engine. Ugh!18 Feb 2009
|
|
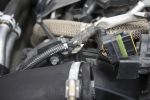
EGR Actuator Cable868 viewsThe cable is tie-wrapped to the EGR pipe bracket so I had to cut the tie-wraps. The bracket is part of the pipe.18 Feb 2009
|
|
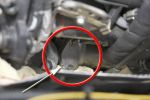
EGR Valve Blank1076 viewsHere is one of the blanks fitted to the EGR valve.18 Feb 2009
|
|
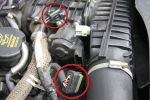
EGR Butterfly Valve Actuator and Air Box Connectors926 viewsRemove the 2 circled plugs.18 Feb 2009
|
|
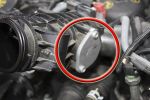
Stub Pipe Blank Fitted948 viewsRemember to fit 2 O-rings from the kit to each one!18 Feb 2009
|
|
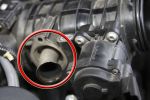
Stub Pipe833 viewsRemove these and fit the blanking plates. Make sure the seal comes out too!18 Feb 2009
|
|
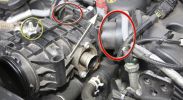
Lifting the EGR Butterfly Housing1008 viewsRemove the bolt circled in yellow. The housing can then be lifted carefully from the front. The \'Y\' shaped duct at the back will swivel at the points circled in red. Be careful of the connector at the back (arrowed) - I snapped the lugs that held it to something back there by pulling the housing up too far!18 Feb 2009
|
|

Redundant Parts972 viewsThese are what you are left with once the EGR blanking kit is installed. Best to hang onto them in case you need them again!18 Feb 2009
|
|
Tie-Wraps769 viewsWhen the EGR pipes are removed, you lose the brackets these cables are normally secured to because the brackets are part of the pipes. This is my solution to the problem - refit the bolts with an almost closed tie-wrap around them, then slip a new tie-wrap through the loop on that one and around the cable. 18 Feb 2009
|
|
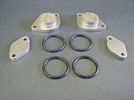
Contents of the BAS EGR Blanking Kit846 viewsThe O-ring seals are fitted to the 2 larger blanks at the top of the picture. You need to fit 2 O-rings to each blank.18 Feb 2009
|
|
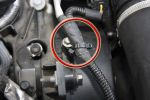
EGR Pipe Clips820 viewsRemove the 2 circled clips to disconnect upper ends of EGR pipes from the stub pipes fitted to the EGR butterfly valve housing.18 Feb 2009
|
|
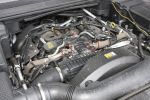
Engine Cover Removed895 viewsView of the engine before blanking off the EGRs. The inset sort of shows one of the EGR valve/pipe flange securing bolts. The EGR valves are not easy to get at!18 Feb 2009
|
|
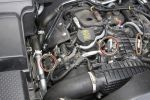
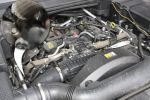
EGR Blanking Kit Fitted.935 viewsLook, no EGR pipes. The circled bits are the new blanks.18 Feb 2009
|
|
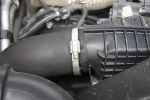
Air Box Jubilee Clip730 viewsLoosen to allow air inlet pipe to be removed from the air box18 Feb 2009
|
|
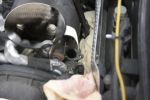
EGR Valve/Pipe Flange888 viewsThe bolts in the inset are the ones to be removed. Note the rag stuffed down beside the EGR to prevent dropped bolts or gaskets disappearing for ever. Don\'t forget to take the rag out if you don\'t want your D3 to go up in flames next time you use it!18 Feb 2009
|
|
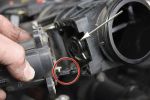
Removing the EGR Butterfly Valve Actuator1522 viewsRemove the 4 TORX screws to remove the actuator. The small black link (circled) connects the actuator drive arm with the butterfly valve spindle (arrowed). The spindle can now be very carefully levered out using a screwdriver inserted beneath the arrowed bit in the photo. A bit scary to do as it takes a fair bit of pressure before the spindle will free itself from the butterfly. Once it starts moving though, it gets easier to pull out.18 Feb 2009
|
|
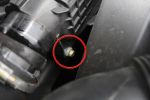
Air Box Lower Securing Bolt1063 viewsThis bolt must be undone in order to remove the air box. It is long and tricky to get out and could be dropped easily.18 Feb 2009
|
|
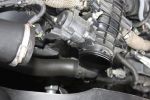
Air Box Removed1052 viewsView showing air box removed from front of EGR butterfly valve housing18 Feb 2009
|
|
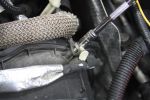
EGR Pipe Bracket 888 viewsRemoving EGR pipe bracket securing bolt18 Feb 2009
|
|
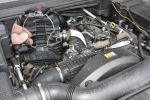
Remove Clip944 viewsRemoving the air box/EGR butterfly housing securing clip18 Feb 2009
|
|
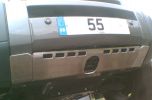
Mantec Plate Fitted263 viewsPlate fitted, Friday 20th July 200720 Jul 2007
|
|
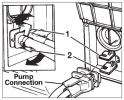
Water Filter Location261 viewsThe water filter (if youy have one) might be fitted adjacent to the water pump connection15 Aug 2006
|
|
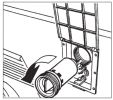
Water Filter252 viewsWater filter removal15 Aug 2006
|
|
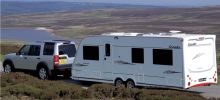
Elddis Crusader Storm254 viewsNot our actual caravan (or car) but very similar! We have a Superstorm which doesn\'t have a fixed bed at the rear like this one does.15 Aug 2006
|
|

280 viewsCradle in place. Press marked lever down to release the cradle.22 Jun 2006
|
|

265 viewsAlign cradle and receiver connectors22 Jun 2006
|
|
|
|