| Search results - "actuator" |
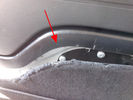
Rimozione pannello dalla sponda - Tailgate panel removing43 viewsPer togliere il pannello moquettato dalla sponda ho fatto leva con un cacciavite abbastanza grosso nel punto indicato, è stato veloce e non ho rovinato niente.
To remove the carpeted panel away from the tailgate I used a big enought screwdriver at the point indicated, it was fast and I have not ruined anything.
|
|
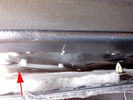
Riparazione attuatore sponda posteriore - Tailgate actuator repair37 viewsL'attuatore si trova dietro la pellicola nera incollata alla carrozzeria che va strappata.
The actuator is located behind the black film glued to the body must be torn.
|
|

Morsetto - Clamp34 viewsPer la riparazione ho utilizzato un morsetto per fili elettrici.
To repair I used a clamp for electrical wires.
|
|
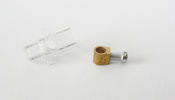
Morsetto - Clamp33 viewsHo smontato il morsetto, il diametro del foro è esattamente quello di quello che rimane del particolare che si è rotto.
I removed the clamp, the hole diameter it's the same of the detail that is broken.
|
|

Morsetto - Clamp41 viewsIl morsetto è della misura esatta della sede dell'attuatore.
The clamp is the same size of the actuator slot.
|
|

Morsetto - Clamp35 views
|
|
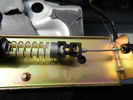
Cavo nel morsetto - Cable in clamp47 viewsHo inserito il terminale rotto nel morsetto: bisogna sforzarlo molto e ho praticato una cava attraverso il foro della vite con una punta in modo che il terminale non possa scivolare.
I entered the terminal broke into the clamp: you have to force it a lot, and I practiced a quarry through the screw hole with a bit so that the terminal can not slip.
|
|
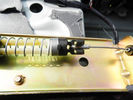
Lavoro finito - Finished work38 viewsEcco come appare a lavoro finito
Here is how it looks, finished the job
|
|
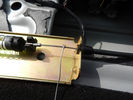
In caso di emergenza - For emergency48 viewsNel caso dovesse succedere nuovamente ho predisposto un cavetto da tirare.
If it were to happen again I have set up a cable to pull.
|
|

Attuatore rimontato - Actuator reassembled40 viewsAttuatore rimontato col cavo di emergenza.
Actuator riassemble with emergency cable.
|
|
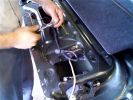
Putting all the bits back in52 viewsNotice the rope (Kevlar) coming out of the actuator box on the right side.
|
|
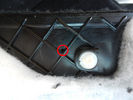
Foro pannello - Panel hole40 viewsHo forato il pannello moquettato per far passare il cavo di emergenza.
I drilled the carpeted panel to drive the emergency cable.
|
|

Finito - At the end47 viewsEcco come appare la sponda a lavoro finito.
Here is how is the job ended.
|
|
10 views
|
|
9 views
|
|
Thread upload10 viewsImage uploaded in thread 97892
|
|

14 views
|
|
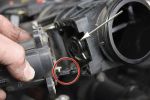
Removing the EGR Butterfly Valve Actuator1522 viewsRemove the 4 TORX screws to remove the actuator. The small black link (circled) connects the actuator drive arm with the butterfly valve spindle (arrowed). The spindle can now be very carefully levered out using a screwdriver inserted beneath the arrowed bit in the photo. A bit scary to do as it takes a fair bit of pressure before the spindle will free itself from the butterfly. Once it starts moving though, it gets easier to pull out.
|
|
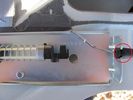
Thread upload5 viewsImage uploaded in thread 120954
|
|
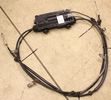
Thread upload4 viewsImage uploaded in new thread
|
|
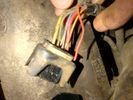
Broken wire Transfer box actuator motor harness 2 - temp sensor wire23 viewsBroken wire Transfer box actuator motor harness 2 - temp sensor wire
|
|
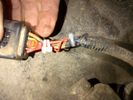
Repaired Transfer box actuator motor harness 2 - temp sensor wire22 viewsRepaired Transfer box actuator motor harness 2 - temp sensor wire
|
|
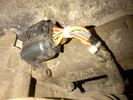
Repaired Transfer box actuator motor harness 3 - temp sensor wire23 viewsRepaired Transfer box actuator motor harness 3 - temp sensor wire
|
|
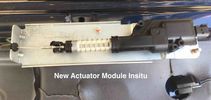
Thread upload2 viewsImage uploaded in thread 187641
|
|

Thread upload4 viewsImage uploaded in new thread
|
|
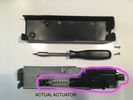
Thread upload2 viewsImage uploaded in thread 187641
|
|
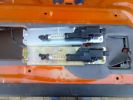
upper tailgate actuators140 views
|
|

14 views
|
|
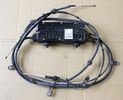
CSOV_actuator_116 views
|
|
Thread upload5 viewsImage uploaded in new thread
|
|

Thread upload4 viewsImage uploaded in new thread
|
|

27 viewsShort clip of turbo actuator rod moving after key turned to position2/3
|
|

Defrost Vent-Register Blend Door Actuator37 views
|
|

D3 reqar diff lock181 viewsView from right rear tyre well, left rear tire/rim visible on other side. Actuator motor visible
|
|

D3 HEVAC Actuator Replacement22 views
|
|
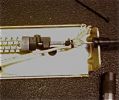
Actuator box underside 62 viewsUsed a clove hitch with plastic zip tie with 1/8" Kevlar rope
|
|

Driver's Side Temperature Blend Door Actuator11 views
|
|
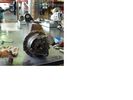
removing e-diff actuator904 views
|
|
looking at gear through actuator hole820 views
|
|

Thread upload1 viewsImage uploaded in thread 198980
|
|
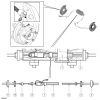
350 views
|
|

198 views
|
|
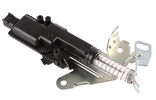
Thread upload3 viewsImage uploaded in thread 187641
|
|
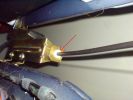
98 views
|
|
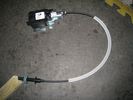
Fuel Flap Actuator73 views
|
|
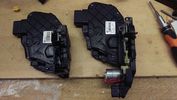
6 views
standard to keyless door lock actuators
|
|
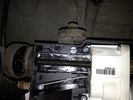
EPB Actuator 97 viewsEPB Actuator
|
|

Boot Lock actuator19 viewsBoot lock actuator
|
|

EPB Actuator plug27 views
|
|
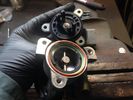
EGR replacement18 viewsOpening the actuator for inspection.
|
|
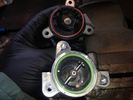
EGR replacement18 viewsOpening up the actuator reveals that all was OK. Even the ball races are OK
|
|
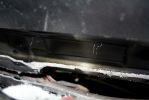
View of tailgate actuator with cable going into it93 views
|
|

Instrument Panel Blend Door Actuator14 views
|
|
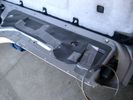
Dust Seal duct taped back together 2259 viewsThis shows the dust seal duct taped back together; also the surplus wire rope exiting from the actuator area prior to being cut to length.
I do not think the sticky plastic membrane is a dust seal, but more of a cable protector to cover up the wiring bundle that is effectively sticking to the underside of the flexible membrane.
|
|

Carpet Panel Removed showing Bass Speaker and Dust Shield 1723 viewsSomething is wrong with the orientation, however this shows what you see when the carpet is removed.
The dust shield, (under which the actuator is located), in the picture is as yet uncut. The white bit is the underside of the plastic lower lift gate carpeted cover panel.
The round thing is the woofer speaker for the Harmon Kardon radio. When the radio is working, one can see the speaker moving, but not much bass sound actually seems to emanate from the speaker.
|
|
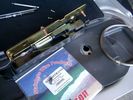
0.032" OD metal fishing leader and lead fishing weight clamped to existing wire rope 2105 viewsI used a size #0 lead fishing weight as a clamp to attach the 0.032" diameter flexible wire rope fishing leader to the release cable.
The pictured weight is the smaller #00 weight, however it did not work very well so reinstalled with the larger #0 size. I clamped to the cable as what breaks is the L retainer that is hidden in the actuator and holds the cable. When the L breaks, it lets go of the cable so you hear the clicking but there is no opening action.
Clamping on to the cable is an attempt to resolve that reality; also if the actuator electrically fails, the release mod should still do the task. Note in the picture the two Torx T15 screws that hold the gold plate to the plastic case and also the two 8mm cap screws that have to be loosened to remove the actuator from inside the door.
|
|
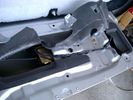
Dust seal cut; note electrical conductors right under dust seal 1616 viewsShows what is underneath when the dust seal is cut. Note the electrical conductors.
I used a box knife to cut the plastic and it was at first easy; then I seemed to hit something and fortunately I stopped - it was the wires - lots of them stuck right to underside of the sticky seal material.
Also shown are the two 8mm nuts in slots that you only have to loosen to release the gold actuator assembly.
|
|
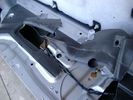
Dust seal rolled back showing electrical conductors 1647 viewsNote power conductors just under the dust seal which makes cutting the seal more interesting.
Also shown are the two 8mm nuts located in slots. One must loosen each nut to effect removal of the actuator. This will then reveal two T15 Torx screws that one must completely un-thread to remove the top gold plate from the actuator assembly.
|
|

LTB00189 - Technical Bulletin - Remove and Install Parking Brake Actuator101 views
|
|
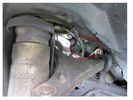
Front nearside wheel - heatshield removed and location of turn actuator rod17 views
|
|

Passenger Side Blend Door Actuator11 views
|
|

door lock actuator0 views
|
|

door lock actuator1 views
|
|

door lock actuator1 views
|
|

door lock actuator1 views
|
|

door lock actuator2 views
|
|
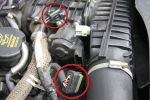
EGR Butterfly Valve Actuator and Air Box Connectors926 viewsRemove the 2 circled plugs.
|
|

454 views
|
|
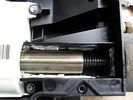
Now we are getting to it...439 views... the threaded (or DREADED) actuator - externally splined internally threaded element (centre of pic) rotated by gearbox (on left of pic) to pull cable end (externally threaded, on the right)
|
|

Tailgate Actuator7 views
|
|

Tailgate Actuator DIY.98 viewsIf your stuck with the problem of the boot not opening and can't wait for the replacement, here's the DIY.
|
|
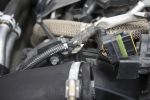
EGR Actuator Cable868 viewsThe cable is tie-wrapped to the EGR pipe bracket so I had to cut the tie-wraps. The bracket is part of the pipe.
|
|
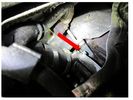
Turbo actuator rod seen from front nearside wheel24 views
|
|
|
|
|
|
|