| Search results - "bit" |
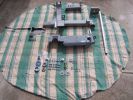
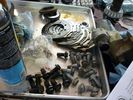
The full complement of bits and pieces, major parts back from the powder coaters, all bolts nuts washers replaced with stainless steel240 views
|
|
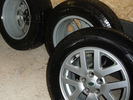
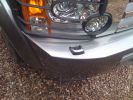
a bit of curbing?34 views
|
|

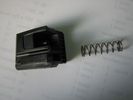
Bit fell off111 views
|
|
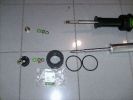
366 views
|
|
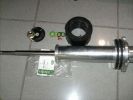
368 views
|
|
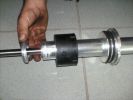
366 views
|
|
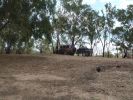
02 Last Photo before the little wheel problem saga221 viewsThis is my D3 with trailer on the banks of the Darling River, literally "back of Bourke" (the regional definition of the start of the Australian Outback). We were the first vehicle in a week to try and drive this route from Bourke to Wilcannia on the account of floods (first water in 7 years). Little did we know that 3 hours later there\'d be a bit of a wheel and tyre problem appearing...
|
|
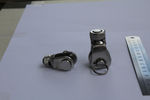
114 viewsboth adapter the larger one needed a bit chopped off the botom and the washers to fit
|
|
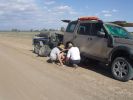
03 First bit of tyre/wheel trouble243 viewsIn the outback a tyre suddenly blew. "No worries" we thought, as we had 3 spares (+ two more if we abandoned the trailer), 150l of water, 3 days of food, and an EPIRB if things got really bad. At the time I didn\'t fully appreciate the fact that my index got a blister from the burning heat of one of the wheel nuts. It was 45 deg C at the time, so everything was hot.
|
|
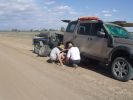
03 The first bit of tyre/wheel problem249 viewsSomewhere in the Australian outback on a 45 deg C day in Jan 08, a D3 had a bit of a flat tyre problem. "No worries, mate" st we had 3 spares (plus 2 more if we abandon the trailer), 150l of water, 4 days of food, and an EPIRB if things really go crook. The first clue that this was not a "normal" flat was when I handled a wheel nut and ended up with a blister from a burning hot nut (the ambient wasn\'t THAT hot).
|
|
135 viewsA bit more commercial....
|
|

07 Back side of failed tyre340 viewsThis is the back of the blown tyre. It looks like any other worn tyre which has run a bit while flat. Note that we were running on wider 19" RRS wheels (have 4 19" MTRs + 1 old A/T on the original 5 wheels). Also have a rear-mount spare tyre holder which is really convenient with the wider rim and the fact that the tyre was still hot (it had some melted rubber on the other side!!)
|
|
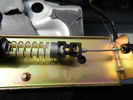
Cavo nel morsetto - Cable in clamp47 viewsHo inserito il terminale rotto nel morsetto: bisogna sforzarlo molto e ho praticato una cava attraverso il foro della vite con una punta in modo che il terminale non possa scivolare.
I entered the terminal broke into the clamp: you have to force it a lot, and I practiced a quarry through the screw hole with a bit so that the terminal can not slip.
|
|
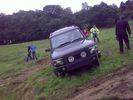
"Hold on lads..., I\'ve got an idea..."53 viewsThis angle tells you some of what could have been a bit of a tumble...
|
|

10 Cracked smoking parking brake drum337 viewsNote the crack in the face of the brake. This showed mangled parking brake springs and other bits. Also a bit of melted rubber was drooling out of the crack. Started to remove the brake caliper and enjoying the flies in 45 deg C heat. Ah, the wonderful Aussie climate in January.
|
|
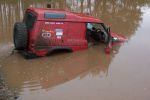
bit of water69 viewsdidnt think it was so deep. I got my feet a little wet. Car is still running and it also survived this and is still in use now. Bet a Disco 3/4 wouldn't work after this.
|
|
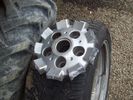
What was left24 viewsThe bitty which was left attached to the hub when the wheel failed whilst driving
|
|
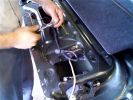
Putting all the bits back in52 viewsNotice the rope (Kevlar) coming out of the actuator box on the right side.
|
|

12 Half way through removing a jammed disk brake in the Outback296 viewsThis was just before breaking the sledge hammer. Note we luckily carried a spare hammer. Ended up using (or breaking) every tool we had on this little repair job. Bed sheets are a good way of gathering the bits to show for the inevitable warranty claim.
|
|
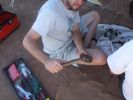
13 How to care for tools302 viewsWhat happened to the sledge hammer after 2 hours of beating my seized and cracked disk/park brake assembly to bits. Now down to 1 hammer remaining. At least by this time it was getting cooler (down to 40 deg C)
|
|
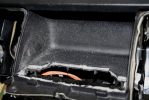
13265 viewsHad to cut the dash a bit in order for the video screen to fit nicely in the spot...ouch.
|
|
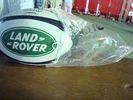
Rugby ball prize13 viewsWon this at the Dubai 7's in 2010. The LR stand had a competition. You had to push a LR4 over a something like an uphill speedbump. A modified bullbar resembling a scrumming machine allowed 3 people to touch, engage and push the beast over the bump. Me and my 2 kids - with a little bit of help, managed it and for our trouble got this ball !!!
|
|

15 First sign of bits of parking brake failure335 viewsNote the complete lack of pad from the parking brake. Not only was there no composite brake material left, but the drum was somewhat twisted and connecting bits all smashed. Also a small drip of melted rubber from wheel bearing parts....
|
|
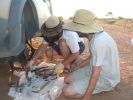
16 All the remains of a D3\'s parking brake371 viewsAfter 4 hours of hammering, finally removed the disk/park brake drum, and nearly all the parking brake bits fell to the ground. Cut rhe remaining brake cable loose as it was wrapped around the hub and a bit melted. Also having 2 jacks + 2 jack stands will support 4 hrs of hammering on the side of my D3.
|
|

My 2 Dogs and the b**ch128 viewsOur 2 dogs and SWMBO is not really a bitch.
|
|

91 viewsBattery clamp needs to be modified due to the mouldings on the battery top to the side terminals. All that is needed is to cut off the bit as seen.
|
|
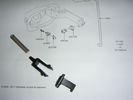
New bits16 views
|
|

ER after snake bite85 views
|
|
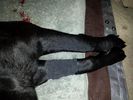
30 Hours post bite92 views
|
|
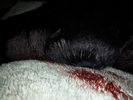
30 Hours post bite93 views
|
|
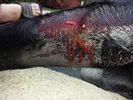
93 views48 Hours Post Bite
|
|

85 views48 Hours Post Bite
|
|
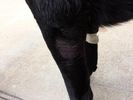
88 views72 hours post bite, 24 hours after treatment with laser therapy.
|
|
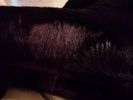
91 views72 hours post bite, 24 hours after treatment with laser therapy.
|
|
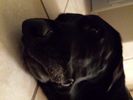
85 viewsresting 72 hrs post bite
|
|

87 views72 hrs poste bite, not neck swelling
|
|
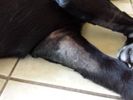
91 views5 days post bite, resting
|
|
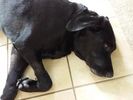
98 views5 days post bite, resting
|
|
93 views6 days post bite
|
|

105 views6 days post bite
|
|
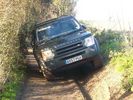
Bit of polishing required, but good day out!127 views
|
|
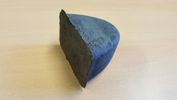
Is this a Disco bit?4 views
|
|
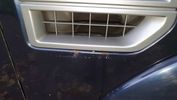
Bad bits 711 views
|
|
Bad bits 612 views
|
|

Bad bits 511 views
|
|
Bad bits 110 views
|
|
Bad bits 211 views
|
|
Bad bits 310 views
|
|

Bad bits 413 views
|
|
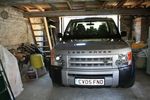
Using Mums garage to keep sun off sleeping daughter.... fit wise a bit tight 65 views
|
|
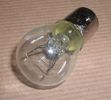
Land Rover Stop Tail Light dual filament bulb nominal 12 volt 21 / 5 watt filaments1412 viewsThis is the Land Rover part number 264590 dual filament bulb, (P21/5), that inserts into the upper two tail lamp receptacles. In the upper one, both filaments function, in the lower one, only the 5 watt tail light filament functions.
I regard it as not a good practice to routinely switch bulbs when the tail light filament, (5 watt), burns out on the lower bulb. The broken filament can jiggle over onto the brake light filament, (21 watt), and short the circuit to ground or something else not predicable.
There are also arguments to say that quality control is better on the Land Rover marketed bulbs than say far east sourced bulbs. Filament construction, and hence resistance can vary and mislead the current sensing circuits monitoring the signal light systems. Also when the bulbs are properly installed, all filaments should be standing vertically and not at any slope.
These are the sort of obscure circumstances that can lead to false trouble messages on the display, dropping to the stops, and subsequent concerns - all over a tail/signal light bulb.
For example, the filament life of both the tail light and the brake light filaments in the P21/5 bulb is significantly less than the USA common 1157 dual filament bulb, (1000/250 vs 5000/1200 hours); brightness in the P21/5 is a bit more, (3cp/35cp vs 3cp/32cp where cp is candle power), but current consumption is oddly less, (0.44a/1.86a vs 0.59a/2.10a where a is amps). It is the quest for efficiency vs maintenance trade off.
|
|
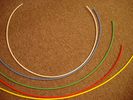
6mm Heat Shrink colours 362 viewsI decided to colour code the tubing so I used 6mm electrical heat shrink.
As there is no apparent colour coding re the 3, I tried to emulate the P38 coding; #1 LR red, #2 RR blue, #3 LF yellow, and #4 RF green. This was not doable as both left side air springs have green coloured tubing coming off the top of the front and rear air springs. I therefore arbitrarily chose the Left Rear to be red; Left Front green; Right Front yellow; Right Rear blue; and for the air compressor supply line, White coloured heat shrink. Since two new lines tie into each air spring line, I made the line between the air spring and the FASKIT, a single solid colour, and the line from the FASKIT to the valve block, White, plus the related appropriate solid colour.
|
|

Thread upload1 viewsImage uploaded in thread 195046
|
|
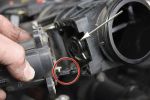
Removing the EGR Butterfly Valve Actuator1521 viewsRemove the 4 TORX screws to remove the actuator. The small black link (circled) connects the actuator drive arm with the butterfly valve spindle (arrowed). The spindle can now be very carefully levered out using a screwdriver inserted beneath the arrowed bit in the photo. A bit scary to do as it takes a fair bit of pressure before the spindle will free itself from the butterfly. Once it starts moving though, it gets easier to pull out.
|
|

Land Rover Aerial Fin images for both Glass and Metal Roof Disco3 / LR3850 viewsAs well as the two different fins, this pdf also shows the plastic blanking plate for glass roof vehicles where no fin is installed.
The glass roof fin is secured by two security screws from the top into a plastic frangible glue on gasket. The hope is that when struck, the fin will shear off and not crack the glass roof. Re the metal roof design, the fin is secured from underneath via two nuts.
The pdf also shows the various electrical bits related to the antennas. In the UK, the fin would house not only a cell phone antenna but the TV and satellite radio antenna electronics as well; in the States, the Sirius sat radio antenna and a G type cell phone antenna if the phone kit was installed would reside within the fin. The SAT NAV GPS antenna is located within the High Mount Brake Light plastic mounted to the upper rear hatch.
|
|
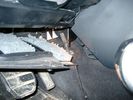
Air Conditioner Drain Hose on Drivers Side (LHD)2256 viewsThe corrugated rubber bit above and to the right of the gas pedal is the drain hose that goes down thru the carpet and floor sheet metal.
While it is bit hard to figure out from the jpg above, there is a rubber "strap" attached to the top of the corrugated hose that one uses to pull on to drag the hose up back around the black plastic heater "pan" drain. The same drain hose arrangement is on the other side as well.
One could I suppose run a plastic snap tie around the vertical pull strap if one was concerned about the hose slipping off again. See also the other jpg sketch which is from the Land Rover manual.
|
|
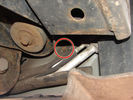
Air Conditioning Pipes186 viewsFront-to-rear aircon HP and LP pipes. The circled bit shows where the bolt securing the support bracket (removed)has sheared off
|
|

Thread upload5 viewsImage uploaded in thread 123822
|
|
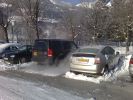
-21 deg and doing my bit for global warming.......... dont think the tree hugging Toyota next to me was too impressed193 views
|
|
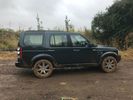
Thread upload9 viewsImage uploaded in thread 173049
|
|
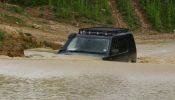
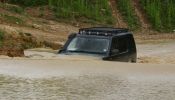
BFG used a bit56 viewsThis is more like it...
|
|
Mud at Last201 views
|
|
193 views
|
|
281 views
|
|
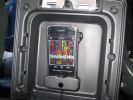
379 views
|
|
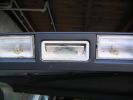
upper tailgate switch without rubber117 views
|
|
Thread upload4 viewsImage uploaded in thread 165328
|
|

Thread upload11 viewsImage uploaded in new thread
|
|

Thread upload11 viewsImage uploaded in new thread
|
|
Thread upload5 viewsImage uploaded in thread 165328
|
|

Thread upload11 viewsImage uploaded in new thread
|
|
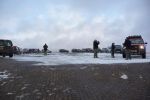
Crazy Paving67 viewsThe last place you would expect to find a nice bit of block paving. The 513m summit of Monkside on the DISCO3.CO.UK Kielder day 2009.
|
|
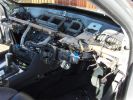
where this bit go155 viewsproject 5ser heater blower..... joy
|
|
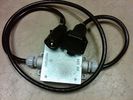
Box Closed with 7 Blade NAS connectors576 viewsBox closed up and ready for use. The box and cable connectors are reasonably weather tight and hence can be submerged for a bit while doing a creek crossing but as with the 3, do not use the creek bed as a parking stall. Similarly, the connector recessed into the bumper will probably remain somewhat dry as long as you keep moving but if you get stopped, well that is another story.
As such, I put a vial of desiccant in the metal box prior to closing it up to reduce corrosion due to moisture build up.
|
|
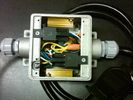
Box open showing Hella Relays and Putco Load Resistors733 viewsInterior of the box - note the two gold coloured 6 ohm 50 watt load resistors are a bit distant from the other items so as to provide some separation for dissipation of the heat generated.
Rather than a moulded plastic weather resistant box which I would have preferred, I used a bulky and much heavier metal weather tight style electrical box so the metal can act as a heat sink.
|
|
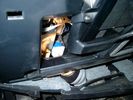
Brake Switch Visible thru Opening4933 viewsThe blue and white bit is the switch; the sort of gold appearing box,(it is really black), you will not see in your 3 as it is a Smooth Talker brand amplifier for my Blackberry phone antenna. This install is detailed in the SmoothTalker phone antenna section of my gallery.
One way to remove and install the switch is to lower the "horizontal" panel above the brake pedal as shown where the flashlight head is located. To actually remove the switch, you slide your hand thru the gap and rotate the switch clockwise 1/4 turn while watching thru the rectangular opening. Installation of the new switch is the reverse of above - 1/4 turn counterclockwise.
Before you remove the switch, note its orientation - horizontal with electrical wires to the left. That is the way it should look after replacement as well.
The second time I replaced the switch, I did it all thru the rectangular opening and did not remove the horizontal panel - that is experience helping out.
The knee kick you have to remove regardless. It is sort of hinged at the bottom so you just pull at the top and sort of rotate the knee panel and then pull upwards for two plastic "fingers" to clear the slots they reside in.
|
|
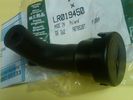
Breather Cap part # LR0194501509 viewsThis is the replacement breather cap as manufactured by the Gore Tex people, (Gore), for the engine compartment end of the front differential breather line.
You can with some difficulty, both blow and suck thru the breather filter material. The Gore Tex filter material has what are called hydrophobic and oleophobic properties. This means the filter material keeps oil in and water out, while at the same time, allowing air pressure to slowly equalize, (air permeable). Additionally, the transfer of dust, salt, and road debris is inhibited.
|
|
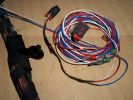
Burnt Bit94 viewsThis bit of wiring going to the connector was so close to bulkhead it got a bit burnt, Its for the clutch switch on a manual used for EPB, It will be replaced connector to pin with the wiring shown.
|
|
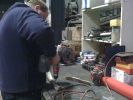
D3 Side Step Repairs146 viewsCarefully drill out the old rivet ends. Some were a bit stubborn and I used a small chisel and drift to punch them, out.
|
|

156 viewsKey fob in bits
|
|

Various Clips285 viewsBits and Bobs stitched together
|
|
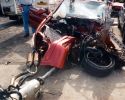
MERC CLK AMG - bit bent148 viewsThis is the short version. A bit of a head on bump did some major restyling.
|
|
Thread upload24 viewsImage uploaded in thread 106191
|
|

Thread upload6 viewsImage uploaded in thread 106191
|
|

COOPER ST, standard size.458 viewsPretty good all around. A bit noisy compared to stock tyres but nothing compared to a Defender or a Disco 2 !
|
|

Oops. Bit of off-road damage?471 views
|
|
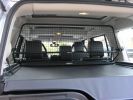
Just in case the D3 scrabbles about a bit!114 views
|
|
177 views
|
|
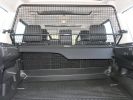
201 views
|
|
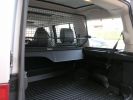
180 views
|
|
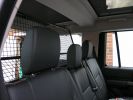
173 views
|
|
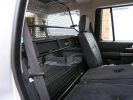
198 views
|
|
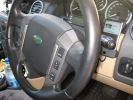
Steering wheel audio controls and iPod dock120 viewsFollowing the instructions I found on Disco3.com.uk it was a breeze the fit the steering wheel audio controls. The iPod dock was a bit more fiddly (took me several hours). Works a treat!
|
|
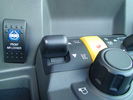
ARB Front Locker in Disco3111 viewsA bit of a challenge for the installer since it was the first they had done but all done and nice and tidy.
|
|
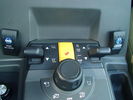
ARB Front Locker in Disco3117 viewsA bit of a challenge for the installer since it was the first they had done but all done and nice and tidy.
|
|
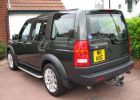
needs a bit more polish methinks475 views
|
|

Instructions on the NEW black badge bits in PDF format392 views
|
|

Lower Seat Cover and T40 Torx bit for seat base removal45 views
|
|
66 views
|
|
54 views
|
|
52 views
|
|
49 views
|
|
51 views
|
|
53 views
|
|
51 views
|
|
48 views
|
|
47 views
|
|
59 views
|
|
60 views
|
|
60 views
|
|
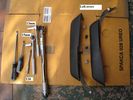
D4 Mantec Fitting Tools Required and bits left over at the end226 views
|
|
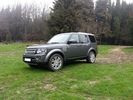
D4 woods Parnitha139 viewsOut on 01-03-2013 at Parnitha forest with a bit of fog and rain - pic 1.
|
|
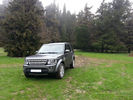
D4 Woods Parnitha 239 viewsOut on 01-03-2013 at Parnitha forest with a bit of fog and rain - pic 2.
|
|

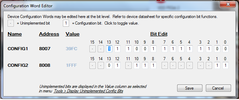
D4 128bit RSA chq sum calculation in WinOls tuing software.105 views
|
|
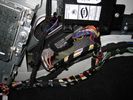
position of timed climate reciever 231 views
|
|
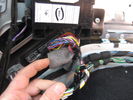
connector for timed climate reciever behind this foam 210 views
|
|
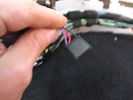
connector for timed climate reciever 185 views
|
|
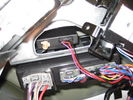
timed climate reciever fitted 225 views
|
|
82 views
|
|
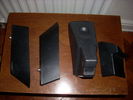
252 viewsthe bit in question
|
|
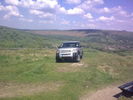
113 viewsbit of off raoding near castleton
|
|

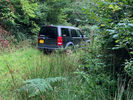
Just a bit too much snow130 viewsOut on a drive and didn\'t manage to get through.....
|
|
42 views
|
|
Thread upload1 viewsImage uploaded in thread 201858
|
|

new bitch15 views
|
|

Thread upload10 viewsImage uploaded in new thread
|
|
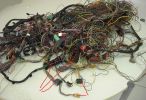
Donar Loom98 viewsThis ball of wires is from a LHD which has been opened and had all audio wires removed, however it is a gold mine for the bits i need. I have pointed out the connectors i know i need for starters near the bottom.
|
|
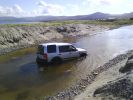
disco 3 wading80 viewsa nice river crossing, the ground was mostly sand and a bit of silt. just remember to turn off dsc. and its salt water. ekkkk
|
|
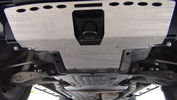
GOE Bash Plates117 viewsGreen Oval Experience Bash Plates. Front, Transmission and Compressor.
Might have to mod the front one a bit to let air into the trans cooler, it sits over the outside of the ARB bar which has vents for the cooler. If I cut slots in the Allow Plate to match those might do the trick.
I added a rear bolt to the Compressor Plate as it looked like it could get hooked on something and tear off. Two bolts onto the slider and two up onto the chassis now.
|
|
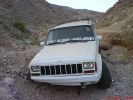
Perhaps this guy shoulf have had a bit of kip before tackling the hills111 views
|
|
Side Steps...bit missing!!122 views
|
|

59 viewsYou can see how the spot to mount the control box has the long flat section to the left - so I mounted the box upside down to allow the 2-sided tape to stick to this bit.
|
|
Engine834 viewsand other bits of plastic
|
|

Kingsley with Sr. Pedro, the chief of police at Foz Do Cunene, Angola.167 viewsSr. Pedro was initially a bit wary of us, but once King had explained his mission, Sr. Pedro and his team couldn't do enough to help. He even brought us sinkers to fish with and beer when we ran out! Kinsley took him to meet his neighbours from Namibia
|
|

A bit of fun in the sun139 views
|
|
The "alternative route"156 viewsThis was the start of the rocky bit that cut out the snotty slopes. Wasn\'t the way to go unless you quit
|
|
Smoked stripe on the windscreen438 views Installed 5 % foil into windscreen to hide the rear mirror tft lcd display a bit from the possible thiefs.
|
|
Just pull on the right bit of string and the roof will go on60 views
|
|

It was a bit rough here at Chapel Porth today298 views
|
|
Lots of bits20 views
|
|
bits22 views
|
|
One of the wider bits of Happy Valley - Protrax Wild Wales317 views
|
|
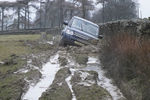
A bit too deep40 views
|
|
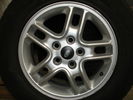
17" rim170 views1x with some kerbing, see close up photo for worst bit.
|
|
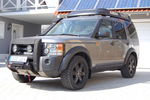
Some bits added47 views
|
|
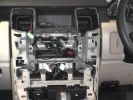
Everything out \'cept the sockets at the bottom \'cos they\'re a bitch580 views
|
|
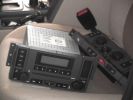
All the bits - don\'t let your wife see them like this!587 viewsHere\'s the stack all dumped on the passenger seat while i run the wires.
|
|

Thread upload1 viewsImage uploaded in new thread
|
|
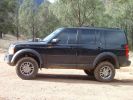
134 viewsMy car in "Extended" mode, due to bottoming a bit on an obstacle
|
|
80 views
|
|
Thread upload0 viewsImage uploaded in new thread
|
|
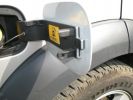
Filler Cap49 viewsNotice missing bit...
|
|

126 views
|
|
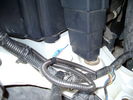
Front coupler pad to right front under air filter housing 158 viewsCoupler Pad is attached to the flat metal surface just behind the rectangular drain off of the air filter housing. The last 3 inches (75mm) of the 1/4" (5mm) black flex wiring loom was then threaded over the last bit of wiring. One of the other jpg's is less washed out and shows the coupler pad a bit better.
|
|

Land Rover TSB LTB00245 install instructions1897 viewsThis is the Land Rover Technical Service Bulletin showing how to install the new breather cap. The instructions are a bit vague re cutting the existing air vent tubing on a 45 degree angle with the cut facing to the rear.
|
|

Fuel flap locking system missing bit19 views
|
|
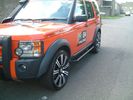
Tigger with a bit of RRS Bling83 views
|
|

GT in bits 60 views
|
|
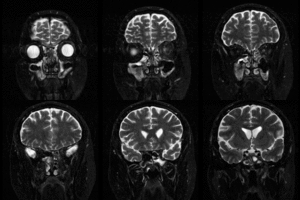
HeadShot29 views
|
|

150 views
|
|

Bit foggy outside, so got out the Laptop to get a place fix139 views
|
|
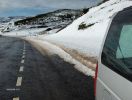
Loads of melting snow.. Bit slippy ...156 views
|
|

A Bit \'2001\' ????148 views
|
|

Bit of info145 views
|
|
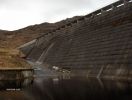
Bit of a leak ??158 views
|
|
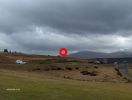
One of 2 fast jets playing tag ( zoom in to the Red bit ). Think its a Harrier ??215 views
|
|

Close up - key removed14 viewsIn the center is the added switch with removable key.
Here the key is removed.
This is to add an additional 'protection' from discharging the auxiliary battery in case other people are working on the car and accidentally switches on any electrical bit :)
|
|

33 viewsThe facia had some bits sticking out which fit quite nicely with the supplied double DIN support. As I was going to use the DIN supports supplied with either the radio and the CB, I needed to remove those bits sticking out. They made the DIN support bend as well.
|
|
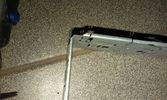
45 viewsI still needed to cut some small bits away from the DIN in order to have the facia cover fit nicely.
|
|

60 viewsFinal setup, everything in place after about one full day of work, which included removing quite some bits I had installed before.
|
|
Disco owners garage full of (currently) redundant bits93 views
|
|
All bits off - low riding after Formula 1 wheel change102 views
|
|

109\'s delivering bits for Dubai Power Station57 views
|
|
and now for the best bit24 views
|
|

A bit breezy27 views
|
|

The discarded bits. 5th June 2016 @71,648 miles / 10.5 yrs old.78 views
|
|
Missing bit179 viewsNot sure if I\'m missing a bit on the left, like there is on the right ?
|
|

2035 viewsEverything pulled to bit\'s in order to get cables in for PC Screen etc.
Note the panel with USB and LAN connectors on, this replaces the LR panel with the ash tray in.
|
|
1607 viewsThese plastic bit\'s need to go as well
|
|

The finnished box, With bit's in768 views
|
|

Switch is blue colour thing thru the rectangular opening.3149 viewsThe blue coloured plastic bit thru the rectangular opening is the brake light switch. The fist time, I found it easier remove the switch by dropping the horizontal plastic panel, (two screws), and then slipping my hand in and rotating the switch clockwise 1/4 turn. The second time, I was able to remove the switch thru the rectangular opening and did not need to remove the horizontal lower panel. Obviously, I had to remove the sloping knee pad panel, (note sort of hinged at the bottom so pull back from the top.)
Regardless, do not touch the brake pedal - just let it sit where it wants to. One has to first remove the angled knee pad panel that sits under the steering wheel. It can be pulled from the top corner at the door side. Pulling releases a pair of those U shaped metal clips that LR loves so dearly. You have to pull quite hard. The bottom is held by a couple of plastic fingers in a couple of slots so you pull at the top till the two clips release and then rotate the panel and pull upwards a bit.
To remove the switch, you rotate it clockwise and pull outwards. Rotating the switch clockwise automatically retracts the plunger back into the switch body away from the brake pedal arm.
Similarly when you install the new switch, the required 1/4 turn anti clockwise rotation action releases the plunger so it lays up against the brake pedal arm and at the same time, secures the switch in place.
To remove the electrical wires, the switch will drop below the horizontal pad and hang from the wires so unclipping the electrical connector plug is fairly easy to do.
|
|

Still a bit dark ...94 views
|
|
Flinders Ranges Low Range no HDC141 viewsThis was a good bit of track
|
|
Laser frost bitting (sailing) Rhode Island, USA50 views
|
|
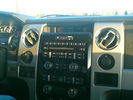
F150 dash bits remind me of my old D386 views
|
|

Above Glashan53 viewsTypical muddy bit in forest
|
|
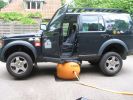
Bushranger test @ home179 viewsThe third trial proved succesful, but I still should have placed it a bit more underneath the car itself
|
|

Matt Black Porsche seen in Vienna41 viewsnote the body kit and the paint but the best bit is the cable tie keeping the number plate on.
|
|

Yes, its a bit of a mess, but it still goes!26 views
|
|
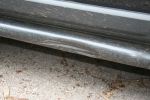
309 viewsSide bars a bit dented 24 hrs after fitting, oops!
|
|
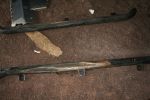
LR Side Protection Tubes after a bit of off roading.282 views
|
|
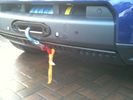
Recessed Hawse 143 viewsI had the hawse powder coated black which was not necessary in the end as it is normally hidden behind the number plate. The cutout of the hole in the bumper cover could have been a bit tidier, but again, it is usually hidden when winch not in use. Note the two clip receivers which hold redg plate mounting in situe.
|
|
Just needs a few chrome bits93 views
|
|
339 viewsAnd after cleaning, like new! Still smells a bit inside though.
|
|

Dog guard bits29 views
|
|
Flappy bit of rubber139 views
|
|
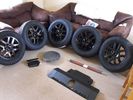
Wheels and other bits for sale19 views
|
|

Managed to hold the rubber bit with an old spanner23 views
|
|
The bit that goes boing28 viewsParcel shelf
|
|
The bit before it goes boing30 viewsParcel shelf
|
|
The bit about to go boing33 viewsParcel shelf
|
|

A bit of hill climbing284 views
|
|
Draining the last bit out of the sump14 views
|
|

Freelander 2 SD4 HSE15 viewsThe missis chose it and was a bit upset when I traded it in for the Disco, she's ok with it now the Disco is growing on her!
|
|
Calender Entry - Salisbury night run Aug 2008461 viewsbit late but here\'s my entry!
|
|
Subwoofer Install269 viewsMoved things around a bit in the "component compartment" to house the amp addition.
|
|
855 views
|
|
719 views
|
|
721 views
|
|
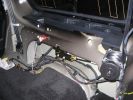
off side rear panel removed958 views
|
|
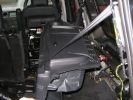
off side rear panel removed879 views
|
|

Auto Bos broken bit88 views
|
|

CALENDAR ENTRY - Islay 2008504 viewsSame as description for previous photo, with a bit more of a background. Looking towards Port Charlotte lighthouse. Sorry, number plate not visible, so probably inadmissible.
|
|
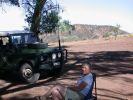
Defender 200 Tdi219 views Annie is waiting for it to cool down a bit. Note the Codan HF autotune antenna.
|
|
EGR Blanking Kit Fitted.933 viewsLook, no EGR pipes. The circled bits are the new blanks.
|
|

Missing Lampguard Fixings77 viewsI\'m missing these bits from my used lamp guards!
|
|
Shiny bits!1125 views
|
|
5 views
|
|
3 views
|
|
8 views
|
|
6 views
|
|
5 views
|
|
132 views
|
|
124 views
|
|

LED trailer lights adapter for LR3831 viewsThis doc includes a partial list of materials and the instructions/links required to construct an adapter to prevent LED trailer lights from pulsing due to the 3's diagnostic circuits interrogating the signal light circuit.
Using the adapter also facilitates the green flashing of the dash located trailer indicator when the signal lights operate plus inhibits operation of various systems such as the backup sensors, etc.
|
|

Left Overs97 viewsMy donar loom is a bit smaller, and of course there is now a small pile of removed wires.
|
|
84 views
|
|
90 views
|
|

99 views
|
|
88 views
|
|
76 views
|
|

87 views
|
|
92 views
|
|
116 views
|
|
88 views
|
|
92 views
|
|
128 views
|
|
128 views
|
|
100 views
|
|

101 views
|
|
89 views
|
|

157 views
|
|
111 views
|
|

121 views
|
|

133 views
|
|
114 views
|
|
112 views
|
|
103 views
|
|
97 views
|
|
light in bits7 views
|
|
208 views
|
|

LLumar "windscreen" clear Infra Red reduction side window film920 viewsThis is a data sheet on the LLumar brand of what they call Windscreen Film; It is almost clear, (has a bit of a blue tint), and reduces both the Ultra Violet fading and sun burn rays which most all films do as that is easy, plus more significantly, the Infra Red heat rays. That is rare as it is not so easy or cheap to do.
AIR80BLSRHPR (blue) is what the IR rejection film is listed as in the brochure that I used. http://www.llumar.com/en/AutoWindscreen.aspx
I had it applied to the front side windows as well as the front sun roof. One can feel the difference when the sun is low and streaming thru the side glass or high and coming thru the sun roof. Rolling a side window down is the simplest test of effectiveness re the rejection of the heat energy.
|
|
125 views
|
|
Air Suspension ECU Fuse 35P cut off switch.3802 viewsThis shows the SPST rocker switch mounted in the blank plate installed in lieu of a manual passenger side air bag shut down switch - now automatic via passenger seat pressure switch. Fuse 35P (5 amps) is located in the interior fuse box behind the lower glove box and protects the ignition power supply to the Air Suspension ECU. When the SPST switch is moved to the OFF position, the RAISE /LOWER switch on the centre console is not powered, and hence does not function. As such, some signals from the wheel height sensors and CPU are ignored. By itself however, removing F35P will probably not stop the 3 from self dropping, particularly after the engine is turned off.
Fuse F3E, (5 amps), located in the engine bay fuse box by the starting battery protects the circuit that provides feedback to the Air System ECU indicating that the Compressor Relay has successfully operated and that the Air Compressor is or should be operational, can also be removed, (but is probably not totally necessary), as it gets its power thru F26E. Hence Fuse F26E, (20 amp), also located in the engine compartment fuse box is the fuse that must be removed. This fuse protects the circuit that provides full time battery power to the Air System ECU. When in place, current thru the fuse powers the periodic re-levelling action, (usually lowering a bit with that brief air release noise), that often occurs when the vehicle is parked and the engine is off.
Removing F26E fuse will stop the auto levelling action and also inhibit any other down to the stops signals, (engine running or not). When F26E is removed, no power can flow thru to F3E, hence removing F3E is more for insurance than an absolute requirement. The same with F35P, removing F26E removes primary full time power from the Air Suspension ECU, and hence removing the F35P fuse should not really be required either as long as F26E has been removed.
|
|
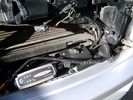
Battery Maintainer switching box plug and CTEK Multi US 3300 charger. 703 viewsThe CTEK Multi US 3300 maintainer is just sitting there for the picture. In addition to topping up both batteries, the CTEK can provide power such that if the batteries were completely dead, there would be power to the door locks and hence, one could most likely still gain access via the remote once the starting battery charged up a bit.
The Land Rover recommended method is via the hidden key hole which is mechanical, however that presumes the mechanism is not frozen from lack of use. As such, the manual lock should be exercised at least once a year to ensure that it still functions.
The blanking plug sitting on top of the plastic box is of the GM Weather Pack series. That is what I like to use for vehicle wiring that is subject to moisture, (or not).
|
|
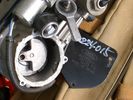
Compressor Con Rod Broken 1744 viewsThe model number of this compressor is RQG500060; the model number of my replacement compressor was LR015303, the unit that was apparently being installed on the D4 vehicles as of Spring 2010. As of Fall 2011, the new replacement part number is LR023964, the same as in the 4's.
Note the number hand written on the black plate. All the compressors seem to have some number hand written on them - hand built I presume, and every unit perhaps evolving a bit differently as LR struggles to build a compressor that will last. I guess Hitachi, (the manufacturer), should be given credit for that.
|
|

Carpet Panel Removed showing Bass Speaker and Dust Shield 1722 viewsSomething is wrong with the orientation, however this shows what you see when the carpet is removed.
The dust shield, (under which the actuator is located), in the picture is as yet uncut. The white bit is the underside of the plastic lower lift gate carpeted cover panel.
The round thing is the woofer speaker for the Harmon Kardon radio. When the radio is working, one can see the speaker moving, but not much bass sound actually seems to emanate from the speaker.
|
|

LR3 Electrochromatic Interior Rear View Mirror wiring diagram.847 viewsIt seems that there are two fuses, F69P and F5P that provide power for the interior rear view mirror. Ten amp F5P is a feed off the reverse gear relay and inhibits auto dimming when reverse is selected. Five amp F69P provides power to the auto dimming circuits and the garage door opener function if optioned.
The pdf can be downloaded and printed out. For on screen viewing, right click on the pdf and select the Rotate Clockwise button.
|
|

lr3-kaymar-closed with 20"402 viewsthe kaymar carrier, designed to allow two tires, sets them both a bit outboard, thus blocking the lamp. that\'s when I realized why they put the fully functional lamps in the bumper (functions: running, brakes, signals, hazard)
I plan to re-weld the locating section more towards the middle of the rear similar to Disco II orrientation.
|
|
22 viewsa bit chilly
|
|
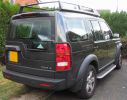
My D3 - Rear view with LR Expedition Roof Rack584 viewsThe Grey DISCO3.CO.UK Sticker is almost a bit too subtle.
|
|
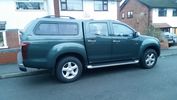
My Isuzu DMAX with Truckman Max Canopy25 viewsFinally got all the bits I paid for from the dealer - a Truckman Max Canopy and a spare wheel - unbelievably the default option on these is a can of foam and a compressor - thick end of £290 to get a full sized spare and the hoist to sling it underneath (much the same as a Disco, which means equally as stealable, might need to acquire a 17" spare protector of Uncle Ray)
|
|

Thread upload11 viewsImage uploaded in thread 124046
|
|

Thread upload0 viewsImage uploaded in thread 197968
|
|
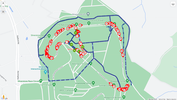
Thread upload4 viewsImage uploaded in thread 201733
|
|

Thread upload0 viewsImage uploaded in thread 197968
|
|
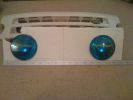
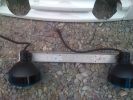
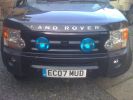
Bits as fitted in previous life140 viewsA bar, spots & RAI
|
|

Thread upload9 viewsImage uploaded in thread 127987
|
|

Thread upload18 viewsImage uploaded in thread 114119
|
|
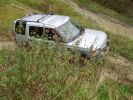
Andy stuck143 viewsPicture is a bit deceptive here - the ruts are so deep that the D3 is bottoming out.
|
|

Kibbles and Bits100 viewsDrake retrieving
|
|

Kibbles and Bits97 viewsDrake retrieving
|
|
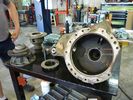
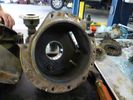
Housing and Bits1273 viewsHousing of DIII/LR3 locking differential
|
|
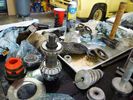
clutch in bits1252 viewssome clutch bits, pinion, etc.
|
|
more clutch bits1184 viewsmore bits, bolts and pieces
|
|
Housing and Bits1174 viewshalf of the housing
|
|
Sir Tiffy P G Pearce-Smith UK 201 viewsThe League of Venturers Search and Rescue is a charitable group from the UK that works with youth in the UK to give them rescue training, and life experiences. Read more or sponsor them at the link to their web site below.
They go on overseas expeditions, and practice daily breakdown training (grin). Spotted in Marble Falls Texas, USA.
http://www.vsar.org.uk/content/Activities/content/Overseas_Exhibitions.html
|
|
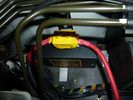
traxide796 viewsThis would be an ideal location for the traxide 80 kit, there are pre threaded holes available here.. would take a bit of fitting, and extending the cable to the primary battery would need to be extended.
|
|
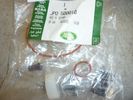
JPO500010 KIT - COMPRESSOR 1428 viewsThere are 4 main parts you can get besides a whole compressor. This is the one with more bits.
YWB500220 electrical, fuse & relay, relay ENGINE COMPARTMENT, 70 amp 1
LR020590 KIT - COMPRESSOR 1
JPO500010 KIT - COMPRESSOR 1
VUB504700 - Dehydrator PARTS
|
|

Ballina Motel Adornment112 viewsDidn't quite know what to make of this bit of ornament in motel at Ballina. However we were glad to listen to very heavy rain - shame I didn't want to take the car out from under cover to wash off the mud from the last week of 4WDing.
|
|
The oily bits. PTO unit on back of transfer box. Exhaust had to be \'modified\' to fit.158 views
|
|
For sale - third row seats15 viewsThis picture shows the scuffing to the carpet on the back of the seat. Easy to tidy up with a bit of glue if required.
|
|

Thread upload3 viewsImage uploaded in thread 194608
|
|
268 viewslooks almost like new. still waiting for a few bits of of plastic that still have not arrived after 8 months. good job they are not mission critical
|
|
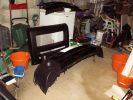
I\'d get a fair bit for this lot on ebay436 views
|
|

Lots of Disco bits in the garage341 views
|
|
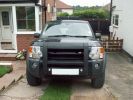
Nudge Bar in place and all bits fitted back on again472 views
|
|

Well, it looks a bit gloopy58 views
|
|
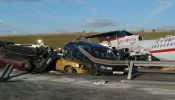
now thats what I call a bit of a bump443 views
|
|

52 views
|
|

new engine with most of new bits bolted back on 8 views
|
|

Thread upload14 viewsImage uploaded in thread 159579
|
|
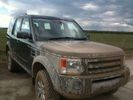
A bit of muck!48 views
|
|

Transpo Regulator IN6349 Pin Assignment710 viewsThis pdf shows the Land Rover and Ford pin naming for the 3 pins in the receptacle of the Transpo IN6349 regulator that accepts PWM signals. This jpg is as if you are looking into the receptacle located on the alternator.
Also provided are the Transpo pin names that are in common use and that some may be more familiar with plus some comments re testing.
The IN6349 regulator is used in the newer LR part # YLE500390 alternator. For the older YLE500190 alternator, the regulator is a Regitar VRH2005-142 unit that is shaped a bit different than the newer IN6349 regulator. Externally, the main difference is that no shiny fins are visible on the rear of the newer YLE500390 alternator. The pin naming and numbering is the same for both and both alternators are interchangeable.
|
|

Pattern for Expo Roof Rack Floor Sheet397 viewsI used a 3mm sheet of Aluminium - with 150mm wide Grip Tape to do the Chevron Patter to make it a bit safer. Note the sheet is 1610mm long, 1100mm wide at the front and 1060mm wide at the back. I drilled 3 rows of 5x 12mm holes - one row down the centre and one either side 30mm in from the edge. The hole centres being at 31mm from the front edge, next 420mm from 1st hole centre, the 375mm from 2nd hole, 372mm from 3rd hole, 375mm from 4th hole, leave 31mm to the back edge. Edited May 2008: I've subsequently cut the sheet in half lengthways to make removal and fitting easier as I found the sheet increasing noise and reduces MPG considerably.
|
|

Rosen A10 Manufacturer Installation Manual759 viewsThis is a 30 page pdf from Rosen that explains how to install the A10 unit. It is Generic in nature and hence carries detail not found in the LR specific install instructions. It also uses words and pictures instead of just pictures, hence can be a bit easier to figure out, particularily if you wish to take advantages of some of the hidden features not described in the LR material.
One of these features is how to hook up to a headrest display or I suppose even to the NAV in front.
|
|
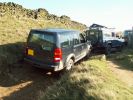
My D3 safely at the top of Roych Steps221 viewsWhistled up with little drama - lost a bit of momentum coming up to the last couple and needed a couple of goes to get up them.
For those there in July - this is a completely different kettle of fish when going up it!
|
|
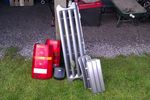
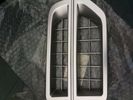
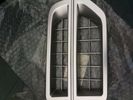
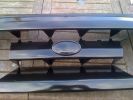
Bits for Sale34 viewsD3 Rear Lights / D3 Air Bag / RR Grill and Side Vents
|
|
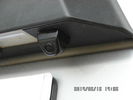
Tailgate Camera located above license plate.594 viewsThis aftermarket camera is mounted on my 2005 LR3 in almost the same location as the factory cameras. The factory units are mounted somewhat more forward closer to the metal of the tail gate and I could have done the same as well.
Note that the camera above is aimed a bit towards the centreline of the vehicle per the factory install.
|
|
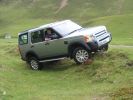
Bit of Fun429 views
|
|
slow headshot29 views
|
|
slow loop headshot28 views
|
|
Snake Pass looking a bit crap67 views
|
|

Thread upload13 viewsImage uploaded in thread 162511
|
|

Foam for holding wheel jack & bits in rear drivers side cubby156 views
|
|

Thread upload12 viewsImage uploaded in thread 147143
|
|

What are these?206 viewsWhat are those green things with long thin pointy bits sticking out of the front?
|
|
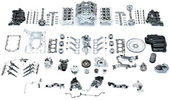
TDV6 in bits89 views
|
|

Terrain Response Dial Explained411 viewsSource - I've forgotten - but still useful as it describes a bit more than the manual.
|
|

50 views
|
|
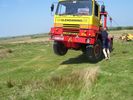
Just a bit too heavy Beford TM 4x424 views
|
|
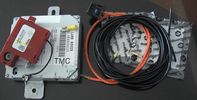
108 views
|
|

Short clip number 2, bit wobbly but my 7 year old was filming!547 views
|
|

Short clip, bit wobbly but my 7 year old was filming!458 views
|
|
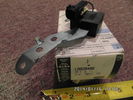
Radio Noise Filter Transmission Electronic Control Unit896 viewsThe jpg shows part number LR020488, a noise suppression capacitor located underneath on a bracket on the right side of the transmission forward of the selector shaft lever. The suppressor is connected to the transmission wiring harness and prevents solenoid operating noise affecting the audio system.
Failure of the capacitor is most often discovered as a result of either black smoke from below and or the blowing of 10 amp fuse F30E located in the engine compartment fuse box. This fuse protects the power circuit to the Transmission Engine Control Unit. When the fuse blows, the engine will still run however you have no gears, hence movement of the 3 is inhibited.
Anything over eight years in service is considered good capacitor life. If the capacitor does fail and fuse 30 blows, a quick fix is just to disconnect the capacitor and replace the fuse.
The capacitor might be missed by the DOT/FCC but the 3 does not seem to mind. With the filter disconnected, solenoid noise might be heard on some radio stations but at least the 3 would be in motion.
|
|

First bit of Sand under foot/tyre :-)121 views
|
|
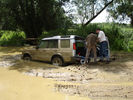
Unmodified D229 viewsIt was quite capable without any bits and bobs, but not enough in this instance...
|
|
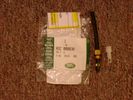
Voss System 203 connector 6 mm for valve blocks 900 viewsThis is Land Rover part number RQC000030, the Voss fitting for the axle valve blocks. I think it is a Voss System 203 6mm fitting, Voss part number 5 2 03 11 01 00.
The parts bag comes with the white plug inserted in the brass threaded bit with what is called the brass cutting ring placed on the tip of the white plastic plug. The idea is that one screws, (M10 x 1 thread), the brass insert into the appropriate hole with the white plug still in the brass insert. Once the brass is tight, (12 mm wrench), then the white plug is pulled from the assembly leaving the cutting ring down inside and under. One then pushes in the 6 mm tube end about 20 mm or so and the tube slides down thru the brass cutting ring, (2 internal sloped one way cutting ridges). When the tube is in far enough, one pulls upwards a bit and the ring cuts into the plastic such that the tube will not pull out. To remove tube, one unscrews the brass nut and all comes out, sort of like I have shown with the short piece of 6mm tubing. The white plug is a throwaway item upon install of the tubing.
|
|

Thread upload8 viewsImage uploaded in thread 161168
|
|
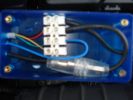
114 viewsConnector block, fuse etc all fits inside. Drilled the holes myself. Should really of used red wire for the +tive, but didnt have any.
|
|

Modified Wiring diagram for the added electrical bits25 viewsI made this wiring diagram during the cleanup I did lately.
I completely removed some 'old' electrical bits I had installed and used the occasion to document every left and new part.
|
|
Thread upload0 viewsImage uploaded in thread 173579
|
|
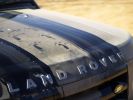
CALENDAR ENTRY546 views$2000 Racing Strips, Plus Bunny Rabbit Decals!
|
|
|
|
|