| Search results - "careful" |
![Filename=012[1].jpg
Filesize=49KB
Dimensions=800x600
Date added=14.Jan 2010 012[1].jpg](albums/userpics/15269/thumb_012%5B1%5D.jpg)
100 viewsIf you look carefully there is a car in there somewhere!!
|
|

Olga, Cash and Simba58 viewsCareful, or I\'ll send the pack around to see you!
|
|
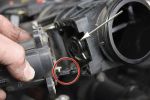
Removing the EGR Butterfly Valve Actuator1522 viewsRemove the 4 TORX screws to remove the actuator. The small black link (circled) connects the actuator drive arm with the butterfly valve spindle (arrowed). The spindle can now be very carefully levered out using a screwdriver inserted beneath the arrowed bit in the photo. A bit scary to do as it takes a fair bit of pressure before the spindle will free itself from the butterfly. Once it starts moving though, it gets easier to pull out.
|
|
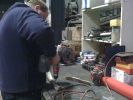
D3 Side Step Repairs146 viewsCarefully drill out the old rivet ends. Some were a bit stubborn and I used a small chisel and drift to punch them, out.
|
|
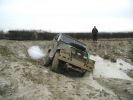
Lightweight At Tixover31 views
|
|

My D3 in Morocco before I bought it!235 viewsOne careful owner, LRE!
|
|

Thread upload13 viewsImage uploaded in new thread
|
|
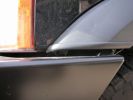
382 viewsFender flare gap, be careful it\'s easy to cut the flare too high and have too large of a gap.
|
|

eye test 121 viewsLook at the picture below very carefully
Have you noticed the girl in the background?
Can you see her bum?
If your answer is YES then go and see an Optician!
What you see is the armpit of the girl taking the picture.
|
|

PC For sale 1 careful owner62 views
|
|
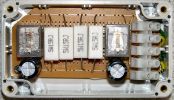
All the components assembled ready for wiring.829 viewsThe 5watt resistors get fairly hot, be careful not to have them touching the relay case or use a larger box for yours.
|
|
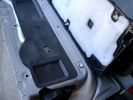
Carpeted cover removed showing uncut dust seal and underside of carpeted cover. 1618 viewsNote that there are all sorts of electrical wires sticking to the underside of the dust shield - so be very careful when you cut thru the shield.
I used a box knife very slowly and was surprised at how many conductors there were running just under the shield membrane.
|
|
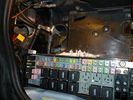
Battery Box Primary178 viewsThis visual is what is next to, behind and under your battery. It is important to note that the negative terminal which is prone to corrosion is in the rear, nearest to everything to maximize damage. The white powder pictured is baking soda. This is carefully used with a damp rag to neutralize any effect of battery acid (hydrochloric acid).
|
|
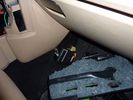
Location of old BT module48 viewsyou can pull out the module carefully
|
|
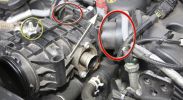
Lifting the EGR Butterfly Housing1008 viewsRemove the bolt circled in yellow. The housing can then be lifted carefully from the front. The \'Y\' shaped duct at the back will swivel at the points circled in red. Be careful of the connector at the back (arrowed) - I snapped the lugs that held it to something back there by pulling the housing up too far!
|
|
|
|
|