| Search results - "dual" |
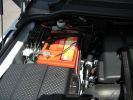
413 viewsDualBattery 80ampH
|
|
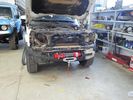
Hidden winch 12000 Disco 4151 viewsHidden winch mounting on a Discovery 4 3.0 TDV6 using Mudtech4x4 plate and 12000xc dual speed ALANWINCH
|
|
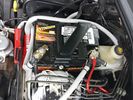
Wiring334 viewsThis is the final wiring configuration. It shows the dual battery wiring, 75A wiring run to the boot, the winch and in the lower right you can see a few turns of coax with a snap on ferrite near the base of a VHF Antenna.
|
|
D3 Tailgate Sub (dual voice coil)43 views
|
|
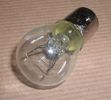
Land Rover Stop Tail Light dual filament bulb nominal 12 volt 21 / 5 watt filaments1412 viewsThis is the Land Rover part number 264590 dual filament bulb, (P21/5), that inserts into the upper two tail lamp receptacles. In the upper one, both filaments function, in the lower one, only the 5 watt tail light filament functions.
I regard it as not a good practice to routinely switch bulbs when the tail light filament, (5 watt), burns out on the lower bulb. The broken filament can jiggle over onto the brake light filament, (21 watt), and short the circuit to ground or something else not predicable.
There are also arguments to say that quality control is better on the Land Rover marketed bulbs than say far east sourced bulbs. Filament construction, and hence resistance can vary and mislead the current sensing circuits monitoring the signal light systems. Also when the bulbs are properly installed, all filaments should be standing vertically and not at any slope.
These are the sort of obscure circumstances that can lead to false trouble messages on the display, dropping to the stops, and subsequent concerns - all over a tail/signal light bulb.
For example, the filament life of both the tail light and the brake light filaments in the P21/5 bulb is significantly less than the USA common 1157 dual filament bulb, (1000/250 vs 5000/1200 hours); brightness in the P21/5 is a bit more, (3cp/35cp vs 3cp/32cp where cp is candle power), but current consumption is oddly less, (0.44a/1.86a vs 0.59a/2.10a where a is amps). It is the quest for efficiency vs maintenance trade off.
|
|

Antenna Mount445 viewsA light dual band VHF/UHF antenna mounted on an 3mm x 25 alloy bracket
|
|
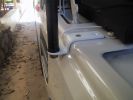
Antenna Bracket388 viewsThis was bent from a piece of 3mm x 25mm alloy flat bar. I used automotive grade double sided tape and two screws to fasten it. I have a dual band VHF/UHF antenna on this bracket
|
|

173 viewsThis photo was "Autostitched" from 7 individual ones.
|
|
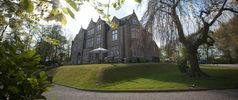
Woodlands Hotel5 viewsGreen Oval Garage would like to say thank you to the Woodlands Hotel in Leeds for allowing us the use of their beautiful grounds for all our future photos shoots.
Woodlands is one of the finest luxury hotels in Leeds. This boutique hotel is set in beautiful landscaped grounds on the outskirts of Leeds city centre, just 2 minutes drive from junction 27 of the M62 motorway, with 23 individually designed bedrooms and an award winning restaurant. Packed with character, this lovingly restored hotel is only three miles from the vibrant, cosmopolitan city of Leeds with superb nightlife and unrivalled shopping.
Woodlands also offers a stylish and contemporary functions venue for all kinds of social and business events. Our three stunning event spaces are suitable for everything from wedding ceremonies and receptions, to corporate meetings and events. The permanent marquee, attached to the hotel, can accommodate up to 150 for dining and 200 for evening parties and receptions, making it one of the most elegant settings for a wedding venue in the Leeds area.
For more information or to make a booking, please contact us on enquire@woodlandsleeds.com or 0113 2381 488
|
|
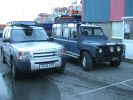
Big Fishes269 viewsThe gradual metamorphosis begins. Sad to be gettinng rid of the 110, but looking forward to abusing the Disco.
|
|

Black Deposits to interior of Brake Light Switch2831 viewsThere are two contacts, one on each side of the vertical plunger under the copper metal. The set of normally open contacts on the left side that carries the power for the brake light filaments, (15 amp fuse F15P), is apparently not heavy enough as the contacts deteriorate and generate the black residue.
The set of normally closed contacts on the other side appear to be sized OK. There is not as much current, (5 amp fuse F66P), flowing thru the contacts to the ABS module, however the contacts are likely adversely affected by the black residue produced by the other deteriorating set of contacts.
One presumes/hopes that the newer replacement switch now has contacts heavy enough to carry the brake light power. It would be ideal if the ABS set of contacts were sealed from the brake light contacts to prevent contamination of the normally closed set of contacts.
|
|

Mvubu in Botswana 2014118 viewsMvubu 2014 Discovery 4 TDV6 XS, Corris Grey.Snorkel, OL Bull Bar, Winch,OME Heavy Duty Coil Springs,Light Guards,17" Black Wheels,Cooper ST max,Dual Battery+Inverter,Drawer Storage,FR Rear Ladder,Hannibal Roof Rack,80L Excel Long Range Fuel Tank,HiLift Jack Points,75L Water Tank.
|
|
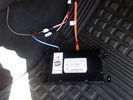
D4 Bluetooth AH42 10F845 AA module connected to 12VDC and MOST1190 viewsThis jpg shows the MOST bus connected to the AH42 10F845 AA module used in the D4 as well as +12VDC power from F58P connected. The power is split with a Y harness as the IHU (radio) for some reason required +12VDC power to the C2115-10 "mute" pin to keep the radio/CD audio from muting all the time.
With power on the pin, the radio audio does mute as it should when the cell phone rings and the hands free connects. The brown conductor feeds to C2115-10 and the blue to the module.
The module tucks up and hides behind the grey plastic section covering the forward portion of the passenger side tranny hump for left hand drive vehicles; for RHD, it would be located on the left side.
The pairing code is 2121 with this setup and not 1234 or 0000.
|
|
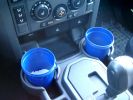
375 ml jam container369 viewsThese are the 375ml Danish Orchard brand jam containers. They fit fairly tightly into the original old style, (2005/6) Land Rover 3 factory cup holders. The extra height provided by the containers can be an advantage. I have a similar assortment of containers in some of the door panel located wine bottle holders to better hold containers of lesser valued products.
|
|
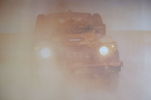
Defender in the Fog, another day on the job.456 viewsThis is another normal work day for a Defender - actually the jpg is from a Land Rover advertising shot, but it may just not be a set up one. I think it is an actual working Defender. Note the visible front tow hook and how the hi lift is just rope tied on; also the normal stock headlights and I guess dual spare tyres - just another day on the job.
|
|
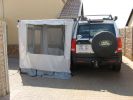
Awning243 viewsI have dual mounted awnings which can convert to tents if required. The outer side walls are an off the shelf purchase, but
the inner ( vehicle side )have to be made to spec.
|
|
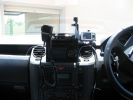
363 viewsHome made console, GPS in clip off mount, 29Mg radio,dual battery moniter,long rang tank gauge & elecric switches.A clip out removable console with no screws.PS also a camera mount.
|
|

Disco Utility22 views
|
|

Thread upload19 viewsImage uploaded in thread 121985
|
|
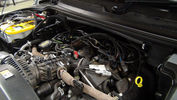
Dual Battery and ECU Chip174 viewsDual Barrery System by Traxide and Optima Yellow Top battey, Plus ECU Chip being fitted
|
|
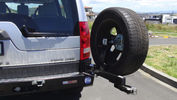
Kaymar Rear Bar Spare Carrier201 viewsOptional Spare tyre carrier for kaymar bar, more ground clearanve and a damned site easier to get the spare out once Dual Drawer System is put in.
|
|
153 views
|
|
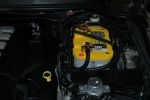
Dual Battery629 viewsOptima Battery and Surepower 1314
|
|
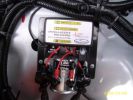
Dual batt54 views
|
|
258 viewslook for the light shining through ...thats were the gromet is
|
|
251 viewslook for the light shining through ...thats were the gromet is
|
|
247 views
|
|
228 views
|
|
235 views
|
|
218 views
|
|
236 views
|
|
218 views
|
|
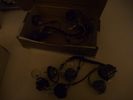
clearout dual brake light looms0 views
|
|
173 views
|
|
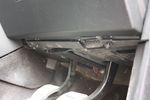
100 viewsRemoving dash undertray
|
|
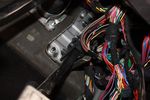
102 viewsLooking for the grommet
|
|
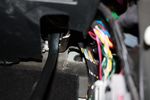
103 viewsGrommet found behind soundproofing
|
|

93 views
|
|
92 views
|
|

106 viewsPower cables passed through grommet
|
|
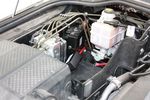
117 viewsCircuit breaker at other end of power cable
|
|
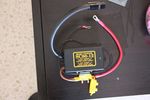
Traxide SC-80 brain145 viewsTraxide SC-80 brain
|
|

Thread upload73 viewsImage uploaded in thread 106179
|
|
Thread upload2 viewsImage uploaded in new thread
|
|
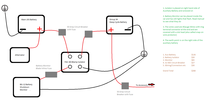
20 views
|
|

Dual Mass Flywheel Checking Procedure14 views
|
|
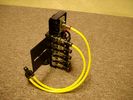
FASKIT on end view 859 viewsEnd and rear view of the FASKIT. Yellow lines are as shipped for hooking to the air supply; one line to valve/filler and other is to gauge. I will modify the arrangement to delete one of the yellow lines such that gauge line plugs into where the second yellow line is right now,(will be only one yellow tube), and then the air source line will plug into the port controlled by the valve, (hidden in this view but visible in other view). When white valve is in the ON position, gauge will read air source pressure, and be available to supply air to any of the selected four air springs. When valve is closed, the gauge will show individual air pressure in each of the air springs when a jumper is run between the gauge Schrader valve and the appropriate air spring Schrader valve.
|
|
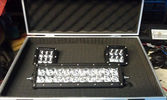
Dually D2s and 10 INCH E Series light bar in a presentation case73 views
|
|

12V to dual USB10 viewsAs the USB cables were running to the booth, I added a 12V to dual USB charger in the booth and connected the USB cables.
|
|
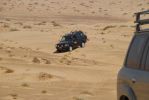
Over the sands96 viewsInitially tried the car with all up weight - full auxiliary (115L)and main (85L) fuel tanks, dual spare wheels, and roof rack. Car had a marked tendency to tail end slide when on side slopes, especially in soft - really soft sand.
|
|
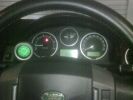
new Autron 12V Dual battery guage114 views
|
|

BD/C82D106 viewsDual Controls 66L, Others
https://www.facebook.com/snomasterusa
|
|

Training Exercise235 viewsVehicle introduced to residual EQ liquefaction silt
|
|
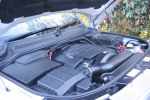
Towing/Dual batttery installation613 views
|
|

Internal heating element fastend with 3M Dual Lock 44 views
|
|

39 viewsRear, switched, always live dual USB charging socket
|
|

Thread upload21 viewsImage uploaded in thread 92518
|
|

Harness that connects inside left rear compartment.435 viewsThis is the harness section that connects behind the left rear interior access panel and exits thru the large grommeted hole to below/behind the left rear tail light.
Note the two rubber grommets on the harness as there is both an interior metal skin and an exterior metal skin behind the left tail light assembly.
The two light grey connectors plug into two existing connectors near the top of the rear left interior access panel. The two darker connectors plug into the second piece of harness.
There is no little separate fuse box either with the NAS spec harness. The fuse box is included with the UK 13 pin dual plug units. If there was a fuse box, it would be on this portion of the harness.
|
|
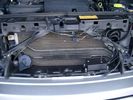
Plastic cover and Box back on in Front of Radiator 636 viewsThe wiring loom is below the cover - nothing is crushed or distorted and all fits back together OK. The black plastic box with the DPDT, (centre OFF), toggle switch is to tie the battery maintainer to each of the two batteries per the Traxide Dual battery install. I can also get power to the power door locks if all fails.
|
|

Horn Wiring Circuit LR3575 viewsThe is the wiring diagram for the dual horn circuit.
The Horn Relay, (R133), is not a big black thing hidden somewhere but instead what is called a FET, (and it is hidden)!
This is a Field Effect Transistor that is built into the circuit board that is mounted to the back of the fuse box that is located behind the lower glove box door on the passenger side of the 3. The related 15 amp fuse, 12P, is mounted in this fuse box and is often called F12P, where F is for fuse, and P is for Passenger compartment.
This is to help differentiate from another fuse and relay box, (the usual kind), that is located beside the starting battery in the Engine compartment. FxxE is often used in the naming of those fuses.
|
|
Thread upload2 viewsImage uploaded in thread 166499
|
|
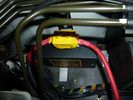
traxide796 viewsThis would be an ideal location for the traxide 80 kit, there are pre threaded holes available here.. would take a bit of fitting, and extending the cable to the primary battery would need to be extended.
|
|
rear socket install1386 viewsTraxide rear socket installation, alternative location. These holes must be precisely in this location because there is little clearance to the right of left due to the blower motor and hoses, etc.
|
|
rear socket install1021 viewsShows to white cable run, cable routing, cable ties and socket placement. Rear sockets fitted. Note the white power cable, and cable tie location. The socket in this position are neatly back out of the way, but handy.
|
|
rear socket install825 viewsThis photo shows the rear sockets installed, shows how the sockets in use are tucked up nicely and out of the way.
|
|
rear socket installation complete635 viewsThis demonstrates the rear sockets installed, shows how the sockets in use are tucked up nicely and out of the way.
|
|
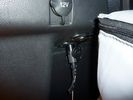
rear socket installation complete671 viewsdemonstrate a neat and roomy install
|
|
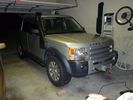
DIII LR3 1423 viewsFitted Accessories
Devon 44 hidden winch
Warn XD9000 with remote kit
Safari Snorkel
Rover Specialties Rock Sliders with side nerf bars.
Yellow Top 2nd Battery
Available from --
http://www.lucky8llc.com/Products.aspx?ProductID=7136
Traxide SC80-LR D3 Kit B -TPSE
Available from --
http://www.traxide.com.au/Traxide.html
|
|
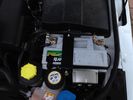
Dual battery14 views
|
|
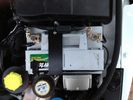
Dual battery18 views
|
|
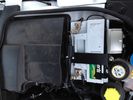
Dual battery18 views
|
|

My Packed LR Expedition Roof Rack38 viewsShovel, 60" Hi-Lift Extreme, (2) 5 Gallon Jerry Cans in a Front Runner dual can holder, TRED 4x4 Recovery boards, and my spare 275/65/18 Goodyear MTR/Kevlar on a t-bolt mount. Almost everything is locked down except the shovel, and now the TRED's until I find a good way to mount them.
|
|
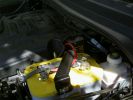
dual batery system112 views
|
|

dual reverse cams71 views
|
|
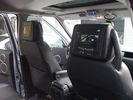
Dual Headrest DVD installed45 views
|
|

Thread upload3 viewsImage uploaded in new thread
|
|

Thread upload2 viewsImage uploaded in new thread
|
|

Ball measurement with 150mm high-rise tongue fitted to the LR tow hitch167 viewsWith a 150mm high-rise tongue fitted the centre of the ball measures approx 565mm (22¼") from the ground. Now high enough to keep our 5.4m Trailcraft dual-axle caravan level.
|
|

LR "plough" with 150mm high-rise alloy tongue.194 viewsWith a 150mm high-rise tongue fitted the centre of the ball measures approx 565mm (22¼") from the ground. Now high enough to keep our 5.4m Trailcraft dual-axle caravan level.
|
|
|
|
|