| Search results - "hidden" |
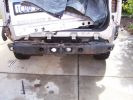
The hidden bar283 views
|
|

Hidden Winch330 views
|
|
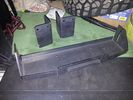
Hidden winch mounting plate discovery 3 4 RRS Mudtech4x4.com119 views
|
|
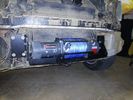
Hidden winch mounting plate discovery 3 4 RRS Mudtech4x4.com184 views
|
|
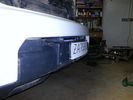
Hidden winch mounting plate discovery 3 4 RRS Mudtech4x4.com180 views
|
|
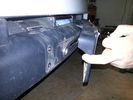
Hidden winch mounting plate discovery 3 4 RRS Mudtech4x4.com193 views
|
|
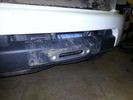
Hidden winch mounting plate discovery 3 4 RRS Mudtech4x4.com183 views
|
|
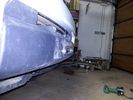
Hidden winch mounting plate discovery 3 4 RRS Mudtech4x4.com168 views
|
|
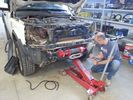
Hidden winch 12000 Disco 4 /2157 views
|
|
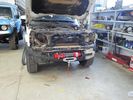
Hidden winch 12000 Disco 4151 viewsHidden winch mounting on a Discovery 4 3.0 TDV6 using Mudtech4x4 plate and 12000xc dual speed ALANWINCH
|
|

Hidden winch 12000 Disco 4 /3137 views
|
|

Hidden OBA29 views
|
|
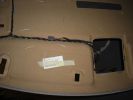
Hidden Mic Connector141 viewsMic connector on upper side of head lining just above & behind sun visor
|
|

Disco 4 Pricing with Unhidden Columns87 views
|
|
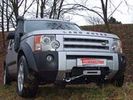
67 viewsHidden winch solution for D3 and D4.
Supplier: Taubenreuther in Germany.
Link: http://www.offroad24.de/shop/index.php?pli=1005055010&artnr=16-4950&view=detail
|
|
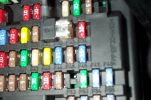
Tapa-Circuit Fuse Tap407 viewsTapa-circuit fuse tap fitted in existing fuseway provides extra fuseway which I have used to hard wire my Tomtom Sat Nav PDA. The fused output feeds into a female socket (Cigar lighter sized) into which the tomtom power adaptor is plugged. All hidden away behind the glove box.
|
|
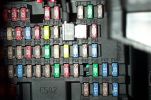
Tapa-circuit Fuse Tap431 viewsTapa-circuit fuse tap fitted in existing fuseway provides extra fuseway which I have used to hard wire my Tomtom Sat Nav PDA. The fused output feeds into a female socket (Cigar lighter sized) into which the tomtom power adaptor is plugged. All hidden away behind the glove box.
|
|
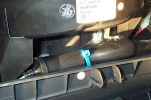
Hard wired tomtom493 viewsThe fused output from a tapa-circuit feeds into a female socket (Cigar lighter sized) into which the tomtom power adaptor is plugged. All hidden away behind the glove box.
|
|

65 viewsoriginal lettering hidden behind the bar
|
|
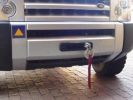
Hidden Winch111 views
|
|
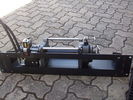
Hidden winch mount with winch in place122 viewsHydraulic hoses are now installed. Note notch for hydraulic:electric solenoid to fit in mount.
|
|
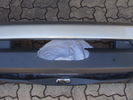
Front bumper with cutout for winch rope entry115 viewsBumper was initially cut "too small" with a low speed hand-held jig saw. It was then progressively filed to about the right size. Finally a very sharp box cutter was used to provide a smooth edge to the cut. This cutout is hidden behind the licence plate.
|
|

CALENDAR 2011509 viewsRescue01, Tunisia, 2009 (Rescue01 consent needed before VRN to be unhidden)
|
|

Thread upload0 viewsImage uploaded in new thread
|
|
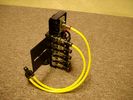
FASKIT on end view 859 viewsEnd and rear view of the FASKIT. Yellow lines are as shipped for hooking to the air supply; one line to valve/filler and other is to gauge. I will modify the arrangement to delete one of the yellow lines such that gauge line plugs into where the second yellow line is right now,(will be only one yellow tube), and then the air source line will plug into the port controlled by the valve, (hidden in this view but visible in other view). When white valve is in the ON position, gauge will read air source pressure, and be available to supply air to any of the selected four air springs. When valve is closed, the gauge will show individual air pressure in each of the air springs when a jumper is run between the gauge Schrader valve and the appropriate air spring Schrader valve.
|
|
304 views
|
|
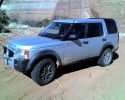
Hidden Canyon, Moab 030937 views
|
|
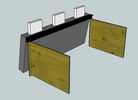
Thread upload13 viewsImage uploaded in thread 106371
|
|
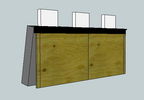
Thread upload15 viewsImage uploaded in thread 106371
|
|

Thread upload15 viewsImage uploaded in thread 106371
|
|

MY12 Hidden Menu61 viewsMY12 Hidden Menu
|
|
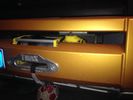
T-MAX 950014 viewsT-MAX winch 9500 lb hidden behind front bumper D3
Dyneema rope
|
|
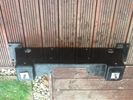
Hidden winch12 views
|
|
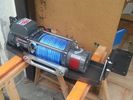
Hidden winch mudtech 4x4 with alanwinch 9500xc86 views
|
|
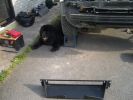
1553 viewsThis is a shot of the Hidden winch mounting, The dog is holding the car Up !!
|
|

1824 viewsHere it is all back together with the winch looking well and truly hidden !
|
|

Hidden winch45 views
|
|

AV connector for RSE60 viewsdecided to install AV connector in Cubby box between seats (no fridge in my car) so I can store an iPod hidden in there to provide media for Rear Seat Entertainment
|
|
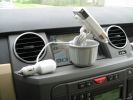
Full setup...556 viewsThis is a side view of that setup. As you can see, all the wiring can be hidden from view in the bottom of the car adapter (The part that goes into the cup holder...)
|
|

Hidden Parking in France44 viewsThe Ultimate Undercover Disco
|
|

Full frontal147 viewsWell hidden. Uncle Ray sump plate, Goodwinch 9.5T winch and tray.
|
|
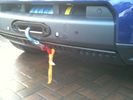
Recessed Hawse 143 viewsI had the hawse powder coated black which was not necessary in the end as it is normally hidden behind the number plate. The cutout of the hole in the bumper cover could have been a bit tidier, but again, it is usually hidden when winch not in use. Note the two clip receivers which hold redg plate mounting in situe.
|
|
Hidden Fixing Behind Wheel Arch75 views
|
|
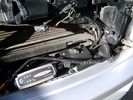
Battery Maintainer switching box plug and CTEK Multi US 3300 charger. 703 viewsThe CTEK Multi US 3300 maintainer is just sitting there for the picture. In addition to topping up both batteries, the CTEK can provide power such that if the batteries were completely dead, there would be power to the door locks and hence, one could most likely still gain access via the remote once the starting battery charged up a bit.
The Land Rover recommended method is via the hidden key hole which is mechanical, however that presumes the mechanism is not frozen from lack of use. As such, the manual lock should be exercised at least once a year to ensure that it still functions.
The blanking plug sitting on top of the plastic box is of the GM Weather Pack series. That is what I like to use for vehicle wiring that is subject to moisture, (or not).
|
|
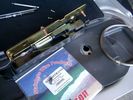
0.032" OD metal fishing leader and lead fishing weight clamped to existing wire rope 2104 viewsI used a size #0 lead fishing weight as a clamp to attach the 0.032" diameter flexible wire rope fishing leader to the release cable.
The pictured weight is the smaller #00 weight, however it did not work very well so reinstalled with the larger #0 size. I clamped to the cable as what breaks is the L retainer that is hidden in the actuator and holds the cable. When the L breaks, it lets go of the cable so you hear the clicking but there is no opening action.
Clamping on to the cable is an attempt to resolve that reality; also if the actuator electrically fails, the release mod should still do the task. Note in the picture the two Torx T15 screws that hold the gold plate to the plastic case and also the two 8mm cap screws that have to be loosened to remove the actuator from inside the door.
|
|

LR3 Denso Alternator YLE500390 rear view705 viewsThis picture shows the rear of the YLE500390, the Land Rover part number for a newer design alternator utilizing the Transpo IN6349 regulator with the "hidden" cooling fins. Note the visual difference in the rear view of the next file jpg.
If the alternator is a rebuilt, (service exchange unit), but Land Rover supplied, then the part number is LR008860 or similar. (Note that 0 in LR0 is zero.)
Two Denso part numbers exist for the alternator as well, 4280003690 and 4280003691. The rating of the petrol V8 alternator is nominal 12 VDC and 150 amps. In normal day to day operation, they seem to run about 14VDC - usually between 13.9 and 14.1 volts at the OBD port.
For the petrol V6, the LR service exchange number is LR008862, and the 2.7TDV6 is LR008861.
The bridge rectifier within the alternator is a 12 diode avalanche type, 117mm diameter, as used in Nippondenso 120 to 160 amp alternators with the Hair Pin stator. It is similar to a Transpo INR421 which is rated for 120 to 150 amp alternators. That is probably our primary problem - the rectifier is just too light. Alternate part numbers for the bridge rectifier are Cargo 237607, Mobiltron RM-29 and AS ARC6021.
Re the B+ stud, the INR421 calls it up as an M8 x 1.25 x 30 mm long course threaded stud; some say 34 mm but that may be longer than desirable.
|
|

Horn Wiring Circuit LR3575 viewsThe is the wiring diagram for the dual horn circuit.
The Horn Relay, (R133), is not a big black thing hidden somewhere but instead what is called a FET, (and it is hidden)!
This is a Field Effect Transistor that is built into the circuit board that is mounted to the back of the fuse box that is located behind the lower glove box door on the passenger side of the 3. The related 15 amp fuse, 12P, is mounted in this fuse box and is often called F12P, where F is for fuse, and P is for Passenger compartment.
This is to help differentiate from another fuse and relay box, (the usual kind), that is located beside the starting battery in the Engine compartment. FxxE is often used in the naming of those fuses.
|
|
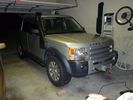
DIII LR3 1423 viewsFitted Accessories
Devon 44 hidden winch
Warn XD9000 with remote kit
Safari Snorkel
Rover Specialties Rock Sliders with side nerf bars.
Yellow Top 2nd Battery
Available from --
http://www.lucky8llc.com/Products.aspx?ProductID=7136
Traxide SC80-LR D3 Kit B -TPSE
Available from --
http://www.traxide.com.au/Traxide.html
|
|
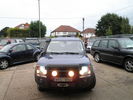
After Work at Challenger 4x416 viewsAdded Hidden Winch Soft bar, Driving Lamps and Raised Air Intake,
Made by Challenger 4x4 in Tongham.
|
|

New Hidden Menu48 views
|
|
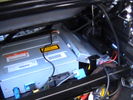
Interface unit hidden at side of the dvd player433 views
|
|

Rosen A10 Manufacturer Installation Manual759 viewsThis is a 30 page pdf from Rosen that explains how to install the A10 unit. It is Generic in nature and hence carries detail not found in the LR specific install instructions. It also uses words and pictures instead of just pictures, hence can be a bit easier to figure out, particularily if you wish to take advantages of some of the hidden features not described in the LR material.
One of these features is how to hook up to a headrest display or I suppose even to the NAV in front.
|
|

Thread upload15 viewsImage uploaded in thread 174024
|
|
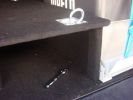
Spare wheel lowering tool98 viewsHidden below is the adapter from the 22mm bolt head to a 1/4 inch drive
|
|

Tekonsha P3 Brake Controller 90195 to Ford 3035-P wiring adapter plug306 viewsThis two page pdf is the general instruction for hooking up the Tekonsha part number 3035-P adapter cable between a Tekonsha P3 controller and the existing Land Rover/Ford plug, (called C2590 in the Land Rover wiring diagrams), that is hidden above the brake pedal.
The "Ford" plug, (C2590), is grey and is stuffed up above the brake pedal arm.
Mount the P3 controller appropriately and then connect one end of the custom cable to the P3 and the other to the "hidden" plug.
You will now have power for your trailer electric brakes in the round socket at the rear of your LR3; also no computer update from the Land Rover T4 unit is required. For once, it is plug and play.
If however, your trailer has LED tail lights, you may have trouble with the flashing of the trailer signal lights or non recognition by the 3 that a trailer is connected. As such, the little green trailer signal will not illuminate when a trailer is connected and the signal lights are used. This can affect the shifting of the transmission and much to your annoyance, the backup sensors will still be functioning rather than being auto disabled.
|
|
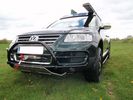
Detachable bull bar and hidden winch mount190 views
|
|
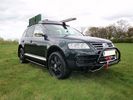
Detachable bull bar and hidden winch mount143 views
|
|
Thread upload6 viewsImage uploaded in thread 159603
|
|
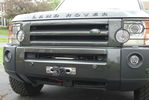
Hidden Winch Install10 viewsA front shot of my Front Runner Hidden Winch install with a Superwinch Talon 12.5 winch, D44 Hawse Fairlead, Factor 55 Flatlink Shackle, and Amsteel Blue synthetic line.
|
|
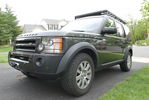
LR3 Front Shot8 viewsShot of my 2006 LR3 HSE with 18" wheels, General Grabber AT2 tires, hidden winch install, and Front Runner Slimline II Roof Rack.
|
|
|
|